Using Your Cricut and Heat Transfer Vinyl
Hello and welcome to my studio! I’m so glad you’re here because I just can’t wait to show you how fun and simple it is to create your very own garden flags! It’s Spring and I am sitting outside right now. I’m sitting in the beautiful sunshine watching the bees buzzing and the birds singing and I just saw a gorgeous butterfly! Here in central NC, it’s 70 degrees, blue skies and fabulous right now! A few days ago I realized I needed a new Spring garden flag and my first thought was where was I going to buy it from? Then, I wondered if they sell blank garden flags for we crafters? Guess what? They do! I found several different types on Amazon and I placed an order right away. I’ll share a link to the ones I chose in the supplies list below. I am always happy to find new craft materials to work with! I usually have a few seasonal or holiday garden flags around my property and now I’m delighted to know I can and will make my own designs. I love the flags that are for sale in the stores but I get a real kick out of making my own, not only for myself, but to also give as gifts to others.
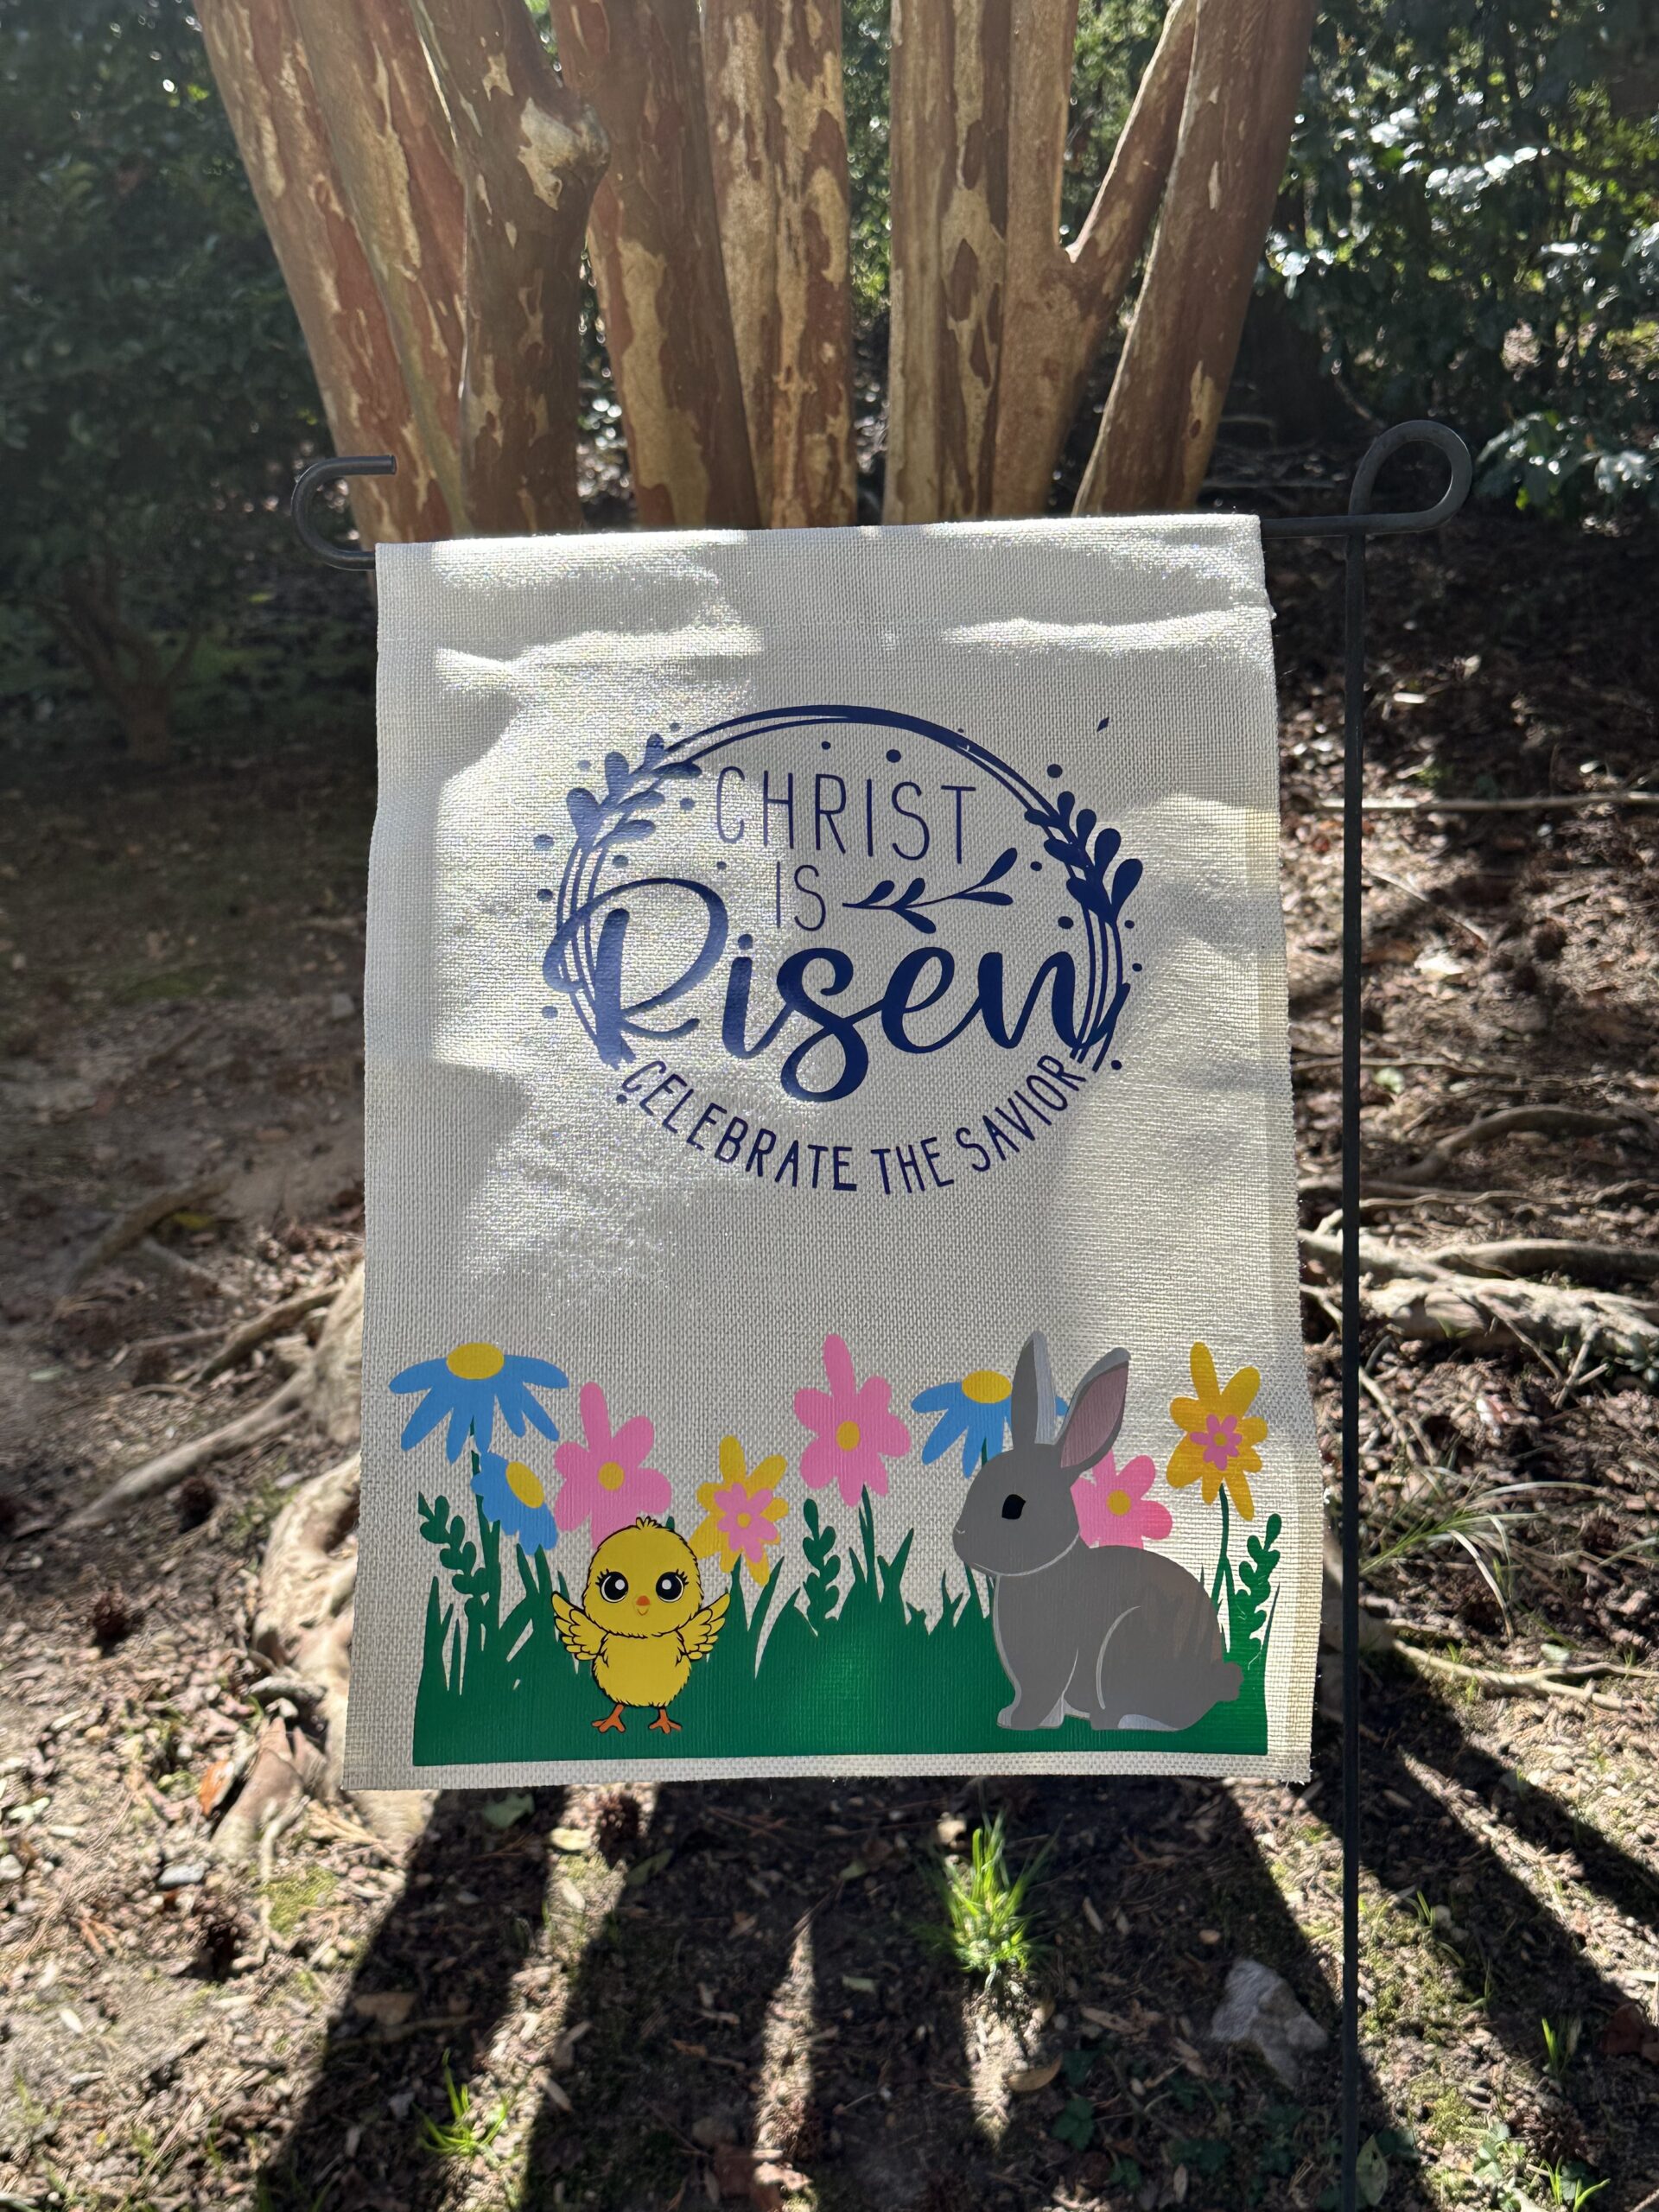
The options we have with a blank canvas such as these flags are absolutely endless. I decided to create a garden flag that celebrates Easter. I gifted some to family and friends and kept some for myself! I also made one for St. Patrick’s Day and I’ll share a photo of that one as well. I’ll share the supplies I used along with links to where to find them but of course, you are not limited to those. I’ll also share a link to my exact design in Cricut Design Space and again, don’t let that limit your own ideas! These projects I share are meant to inspire and celebrate individual creativity! Keep reading to see a list of supplies I used to make this project along with links to products. ** I am not affiliated with nor do I earn commissions from any of the products I mention or companies I reference.** Below the list of supplies, I’ll include my free step by step guide to creating this garden flag.
REMEMBER
WANT TO SEE MORE?
Supplies I Used to Make this Flag
- Blank Burlap Garden Flags( 12”x 18”) https://a.co/d/4nx12DE
- HEAT TRANSFER VINYL (HTV): HTVRONT- https://a.co/d/hJ2k18C
- HEAT PRESS: HTVRONT-https://a.co/d/2XcCg5Y (OPTIONAL: Other brands of heat press or a home iron)
- Cricut Explore Series
- Cricut Heat Press Mat- https://cricut.com/en-us/tools-accessories/accessories/easypress-mats/cricut-easypress-mat-20-x-16/2005398.html
Let’s Get Krafty!
Right, so turn on your Cricut, ready your heat press or iron. I used an iron for many years and that works but a heat press is so much easier. If you think you’ll wish to keep making iron on projects, it’s worth the investment. The vinyl sheets in the package from HTVRONT do not name the colors so you’ll just pick out your colors based on my photos OR whatever colors you’d like to use. There will be 14 vinyl layers to cut. I believe I used 11 different colors of HTV. Go ahead and choose your colors and lay them out.
Take a look at the image as it is on Cricut Design Space and if you want to go ahead and trim some of the vinyl down to a smaller size I find that makes it a bit easier in the end. For example, the rose gold piece for the rabbit’s ear is quite small. I see no need to place an entire 12” piece of vinyl on the mat to be cut. But do whatever best works for you. They can and should all be trimmed down before you start weeding out the cut design or you’ll waste a lot of vinyl. So now we begin:
Step 1: Use this link to take you to my design in Cricut Design Space: https://design.cricut.com/landing/project-detail/67d4ab971609aa4f45b0e49c
Step 2: Click the “Make it” button and the mats will pop up on your screen.


Here’s a sizing hack I thought I’d share with you- in order to create the proper size of images that we are to be using- we can create a temporary template. So in this case, I know my flag measures 12 x 18 inches. So I placed a rectangular shape on my canvas on Cricut Design Space and sized it to 12 x 18”. Then I placed the images I wanted to use on the rectangle, sizing them accordingly. Once we have sized everything and got a general idea of what the finished product will look like- we can either “hide” that layer or just move the rectangle over and delete it.

Step 3: at the top of the screen: Mat 1 of 14- in the green part it says Mirror Off- Now click that to turn MIRROR ON! This will lead to all of the mats and you’ll toggle each one to declare Mirror On. For any iron on project using heat transfer vinyl, the images need to be mirrored. This is very important or your cuts will be backwards and will not work.
Step 4: Place your Heat Transfer Vinyl SHINY SIDE DOWN on your cutting mat and place it into your Cricut machine. This is Very Very Important. This vinyl must be placed with the shiny “pretty” side down. You will know which color to place on the mat by the picture it shows you. In this case, the black for layer one of the chick is on screen. So place a piece of black HTV that’s big enough to cut the chick and the little eye for the bunny, shiny side down on your cutting mat and feed it into the machine- check that you have mirrored the image and set your Cricut to the setting your brand of HTV says is best for a Cricut ( I used the vinyl plus ) and press the C button for the cut to be made.
Step 5: Once the cut has been made, remove the piece of vinyl and weed out the parts that will not be ironed on. Make sure you got a clean cut that is easy to weed and that your image mirrored and that you had the vinyl placed correctly. For HTV, you’ll remove the extra vinyl from the sticky clear backing. That sticky backing is what will be placed on the flag, sticky side down.The reason I say to do this now is to make certain your settings are working for you and that everything is smooth and easy to weed out. If your little chick layer one cut and weeded beautifully go on to the next color.
For each new cut, I suggest you look at your screen and make sure it’s mirror on and make sure you have placed your vinyl with the shiny side down and then just press C on the Cricut. Why am I repeating this to you? Because I once cut 10 layers for a project with the vinyl placed the wrong way on the mat. I was so bummed because I know better but was just in a hurry. And that wasted not only my time but a lot of product also. The best way to go about this project is to go ahead and weed each cut as it comes out of the Cricut. Just place the cut and weeded images to the side and ready the mat for the next cut.
Step 6: Once you have cut and weeded all of your beautiful and colorful layers, place all of the like pieces together in little piles. Like place the grass to the side, then gather all of the pieces that make the little chick, then all the pieces for the bunny, then the blue flowers and so on.
Step 7: Now for the really fun part! Heat up your Heat Press to the specifications on the vinyl you are using. The vinyl I used, the one in the Supplies List. HTVRONT- says to heat the press to 305 degrees and press for 20 seconds. With this press, once you’ve set your temperature and the time, it will keep that setting and we don’t have to set it again for each layer.

Step 8: Place your flag onto a heat press mat and heat up the bottom for 5 seconds. Place your green grass HTV at the bottom of the flag, centering it and then place the teflon cover that comes with the vinyl on top of the vinyl and lay the press on top of that. Press the R button and the timer will count down and beep when ready. Remove the press from the flag and place back onto its tray.
Step 9: Allow the pressed image to cool completely – give it about 4 minutes – and then remove the clear carrier sheet and make sure your vinyl has adhered to the flag well. This is the way the HTVRONT vinyl works- just follow the instructions for whatever brand you use. If all is okay with your adhesion then yay! You’re ready to finish your flag.
Step 10: Place your flowers next. I chose to cut them out with some small scissors to separate them so that they’d be easier to place in place on the stems. I used the full image on the computer to see where I wanted to place each item. This HTV layers beautifully! Not all HTV layers well but I found this one cuts, weeds and layers very well indeed! Continue on with all the flowers and their centers.


Step 11: Place the main bunny layer where you want it on the flag and heat press it on following steps 8 and 9 again. Then adhere the shadowed part of the bunny, then the eye, then the pink inner ear piece.
Step 12: Place the chick where you want it following the same steps as above.
Step 13: Place your circular wording at the top of the flag making sure to center it. You should start from about 2 inches down from the opening top bit that fits onto the flag stand. This will cut and iron on in just 2 pieces. Lovely.
Step 14: Step back and take a look at your creation! You did it!
Now turn off your Heat Press, iron, Cricut Machine because you’re gonna want to just stare at your new garden flag!
This has been such fun! I’ve enjoyed sharing this idea with you and I hope you give it a try. You can make your first garden flag using my design here or you can go ahead and make your own design and just follow these steps to help with the process. Placing this picture together, piece by piece, takes me back to my childhood where I played with coloring crayons and books and blocks, pegs and all kinds of wonderful things! This is just as much fun if not more. Now, when we make something like this for our home, we hang it on the flag stand and watch it gently wave in the breeze and we get to think to ourselves, “hey, wait a minute, I made that!” I personally consider crafting and DIY projects to be part of my self care routine. It’s good to be creative and explore new things. It’s a good thing to take an idea and make it our own! So go ahead and give this a try. Or go ahead and take this idea and make it your own and just remember to always keep it krafty! Until next time, bye bye!
Here’s a picture of the St. Patrick’s Day Flag I made:

This one was so last minute- I think I made it two or three days before St. Patrick’s Day. So I thought that was a bit too late to share the how-to on this blog. But now you’ve read the how-to for the Easter flag- you can see how easy this one is to make!