Make it with Card Stock
Hello and welcome to my studio. I’m happy to see you here today! I believe I have mentioned my love for little boxes a few times. I love to give little gifts to family and friends and enjoy presenting these gifts in boxes. Boxes, that are right for the gift, are very difficult to find in a store or online. This tall lidded box is easy to make and will save time.
A few years ago, I was absolutely delighted to learn we can make our own boxes with card stock. It’s probably my favorite type of craft project now. Keep reading to see how to make this tall lidded box.
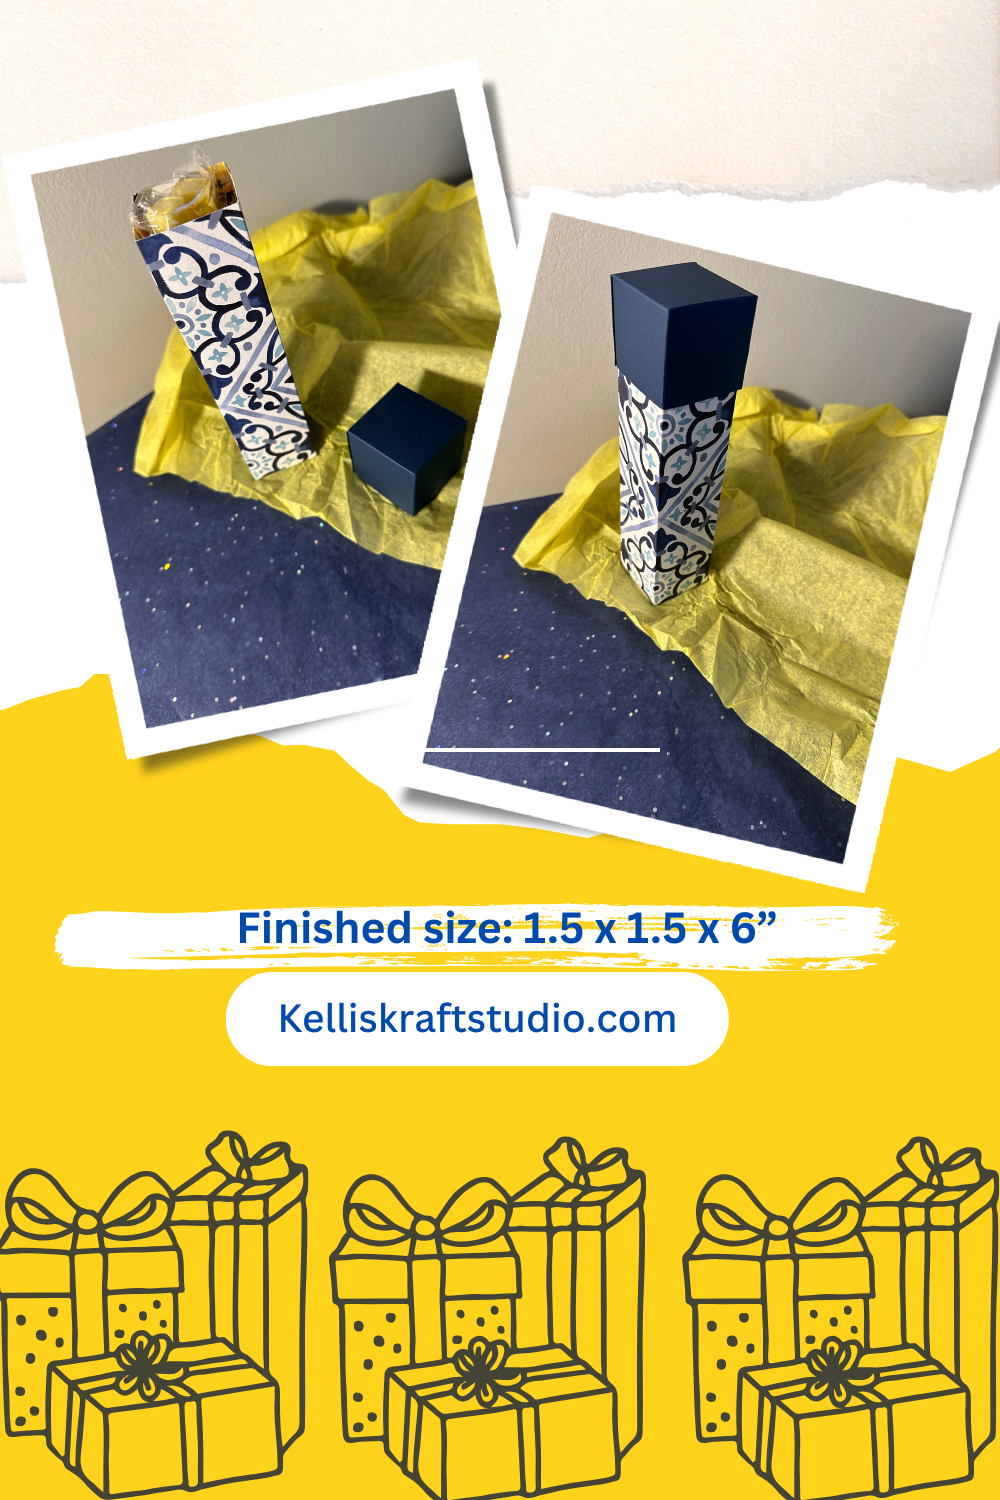
The finished measurements are 1.5 x 1.5 x 6”. Four alcohol markers fit perfectly inside. I used designer paper for the box itself and a piece of coordinating card stock to make the lid. Keep reading below. I’ve shared my list of supplies, a step by step how-to and a diagram to help you make your own tall lidded box.

Supplies I Used For This Box
Links are for Your Convenience Only
- CARD STOCK: “Night of Navy” by: Stampin’Up! https://www.stampinup.com/products/cardstock-8-1-2-x-11-night-of-navy
- DESIGNER SERIES PAPER: “Mediterranean Blooms”: Stampin’Up! https://www.stampinup.com/products/mediterranean-blooms-12-x-12-30-5-x-30-5-cm-designer-series-paper
- PAPER TRIMMER
- GLUE
Let’s Get Krafty
The next step is to gather your supplies. In just a few minutes, you will have made this cute box! The finished dimensions of this tall lidded box are 1.5” x 1.5” x 6” tall. It’s a nice size for ink pens, markers or anything you need a bit of height for.
Trim a piece of cardstock or designer paper for the BASE to 6.5 x 7.5”
Score the LONG side at 1.5 inches.
Score the SHORT side at 1.5, 3, 4.5 and 6 inches.
Trim the cardstock or designer paper for the LID to just a tiny bit larger than 4.5 x 4.5”.
Score ALL SIDES at 1.5 inches.
Below, I’ve included a diagram for trimming, scoring and cutting your cardstock or designer paper for both the base and the lid of this adorable tall lidded box.

Handy Dandy Diagram

Building The Box
To build this tall lidded box, fold and burnish all of your score lines. For the base, I used a piece of designer paper. Any good cardstock or designer paper will work for this box.
Remove the small rectangular bit shown in the diagram above. Use your scissors to cut straight up the score lines at the 1.5, 3, 4.5 and 6” scores only to the score line that intersects. (See diagram) This creates the bottom of the box that will close up. Place adhesive on the small 1/2” section and fold the cardstock to create the box. Fold up the bottom of the box and add adhesive to secure the bottom closed. The top of the box will be open where the lid will be. Next, you will make the lid.
Fold and burnish the score lines on the square that is just 1/16” bigger than 4.5” x 4.5”. For this box, I used a piece of solid navy cardstock that matches the blue in the designer paper. Use your scissors to cut straight lines up the score lines of just 2 of the sides. See the diagram above.
Finally, fold each of the corners in and glue them closed. You will see how it comes together to create the lid of this tall lidded box.

In conclusion, this box comes together quickly and easily. It’s a very useful size and is one I make often. We can change the look of this box at any time by changing the cardstock color or the designer paper. Add a cute little tag and some ribbon or twine and this tall lidded box will be a delight to your recipient.
I hope you have enjoyed this project today because it’s so much fun to make your very own gift boxes. There are so many types and designs of boxes you can make. In fact, my next few posts will be various gift boxes so follow me on Pinterest to see what other crafty things I do. Take these ideas and make them your own and remember to always Keep it Krafty!