
Featuring the “Long Time No See” Stamp Set by Stampin’Up!
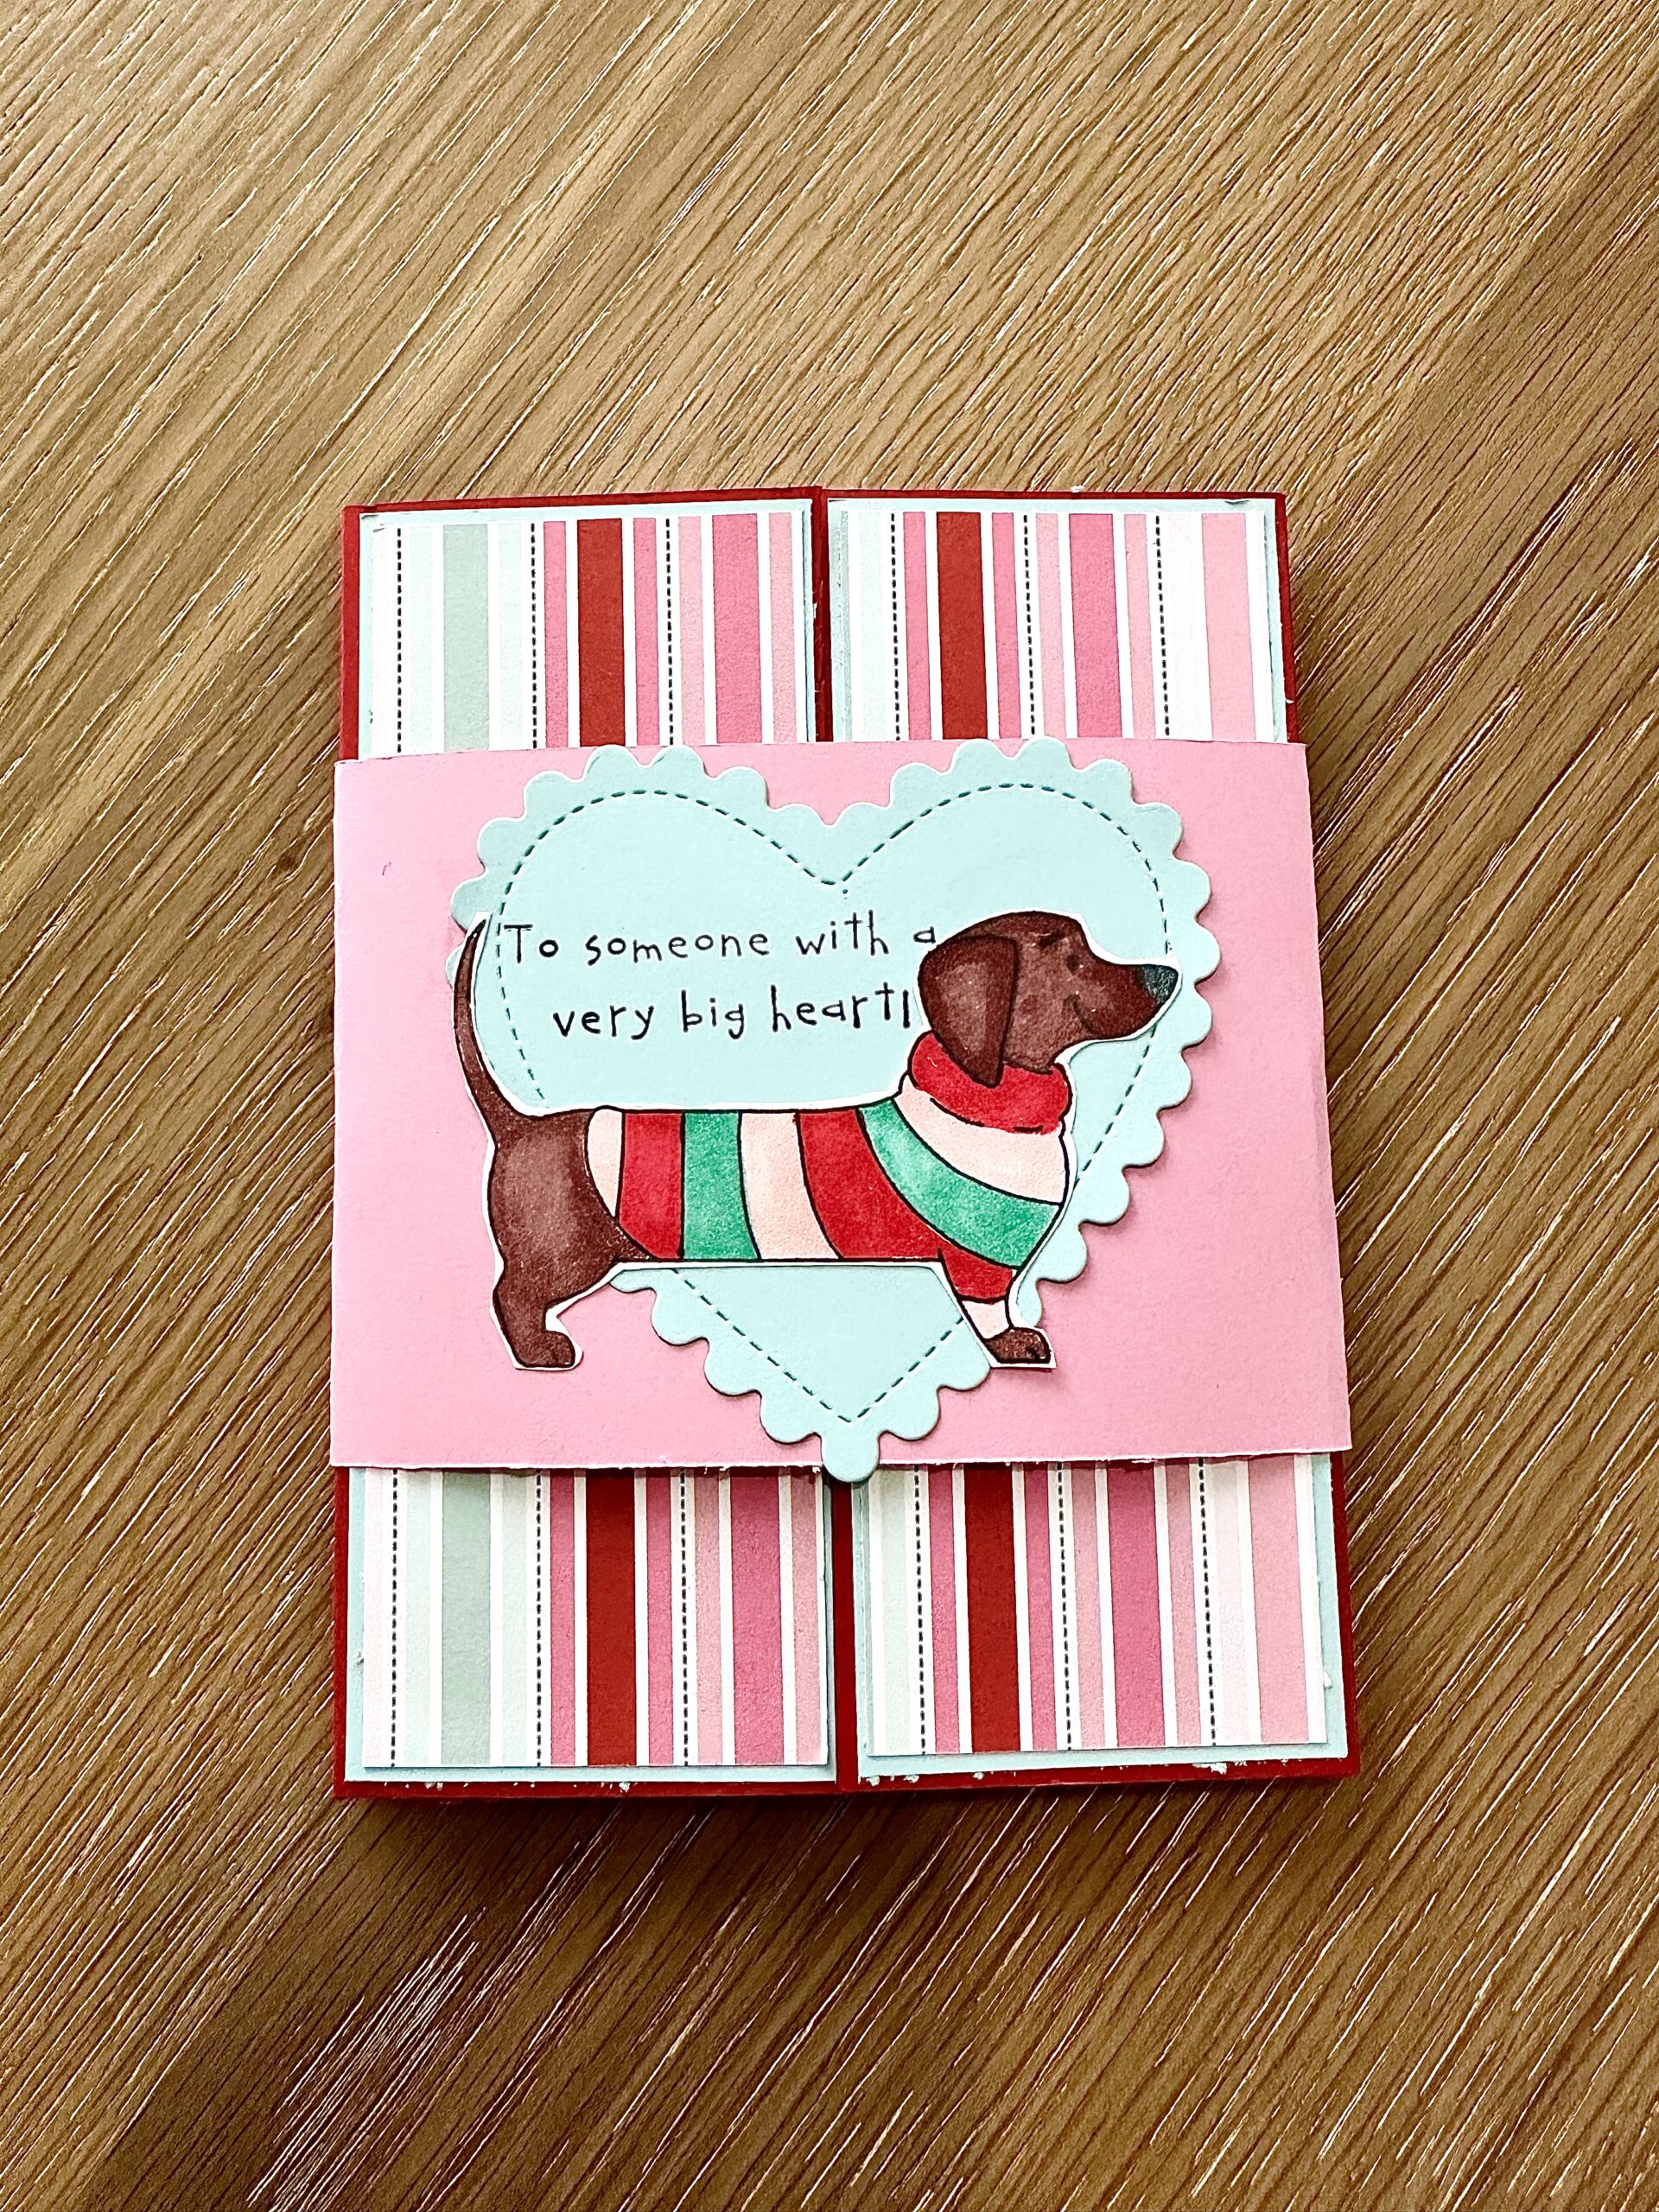
Hello and welcome to my studio! Firstly, I’d like to say how happy I am that you are here today. Because I’m so excited to share this ever so sweet Valentine’s Day fun fold card with you. This style of card is generally referred to as a gate fold card. And this one has a sweet belly band showcasing a big heart with the cutest little sweater-wearing dog. The stamp set I used for this card is called “Long Time No See” by Stampin’Up! What a fun and versatile stamp set!
For example, the set comes with a wonderful sweater-wearing wiener dog, a lovable llama, a couple of playful extensions and some pun-ful sentiments! I used the long-necked llama in my last post “How to Make This Fun Slider Birthday Card”. Check that post out HERE!
So for this Valentine’s Day fun fold card, I just had to use the cute wiener dog with the long body extension. I created a gate fold as the card base and used a krafty little technique to mirror the dog image so that 2 cuddly dogs could meet in the middle. I’ll explain more about this technique later in this post. I’ll share all of the how-to along with photos and a list of supplies I used for this project. So… without further ado – let’s get krafty!!

List of Supplies
- [3 pieces] of 12 x 12” OR 8.5 x 11” Card Stock (at least 80lb is best) Your Choice of Colors —-I used colors that coordinate with the designer card stock I chose.
- Solid Card Stock I used can be found here: “Real Red”. “Pretty in Pink”. “Pool Party”. “Lost Lagoon”.
- “Long Time No See” Stamp Set by Stampin’Up!
- Alcohol Blending Markers in coordinating colors:
“Real Red”. “Pretty in Pink”. “Pool Party”. “Lost Lagoon”. - Solid White Card Stock
- Tuxedo Black Ink Pad: HERE
- Silicone Craft Sheet: HERE
- Sticky Mat: HERE
- ”Cable Knit” 3D Embossing Folder: (optional)
- Heart shaped Cutting Die: like THIS
- “HAPPY VALENTINES’S DAY” sentiment stamp: whatever you have on hand
- ”To someone with a very big heart” sentiment stamp: any heartfelt loving stamp for the belly band sentiment
- Paper Trimmer with a Scoring tool like THIS
- Patterned Paper ( optional ) I used the last piece of paper from last year’s Valentine’s paper pad from Scrapbook.com
- Glue
- Scissors
NOTE: If you wish to buy products from the company Stampin’Up!, you’ll need to list a demonstrator. It’s easy, they’ll just ship you the products you choose. If you do not know a SU demonstrator, click the link below and Stampin’Up will find one for you.
Want more card making & crafting inspiration?
Follow me on social media
Let’s Get Krafty
Making Choices
- First, choose your papers. If you’re using patterned card stock, match your solid card stock to the colors in the designer paper. Use whatever you have on hand or buy some new paper, you know you want to. Scrapbook.com and Stampin’Up are good places to shop for paper. For this card, I used real red, pretty in pink and pool party solid card stock from Stampin’Up.
- Second, choose your markers. I used Stampin’ Blends markers from Stampin’Up called: real red, pretty in pink and lost lagoon. Their markers come in pairs of a light and dark shade of each color that coordinate with their papers.
Stamping-Coloring & Cutting
- Next is the fun part, the stamping! Take the little dog stamp and stamp it 2 times on white card stock. Take the long extension stamp and stamp it twice on the same piece of white card. NOW, to make the mirrored image of the dog, stamp the dog in black ink on a silicone craft sheet OR a sticky mat. Then place the white card stock on top and press down well without sliding the card. Carefully lift the card stock and quickly clean the ink off of the silicone sheet or sticky mat. I use baby wipes for this. Make sure NOT to use Stazon ink for this. Now you have the doggie stamped two times facing to the right and one time facing left! That’s a neat trick, huh? I love it!
- Now, use the markers to color in the sweaters however you wish. As you see in the photos below, I used 3 different colors for the dog on the front of the belly band. And I used one color on each of the dogs for the inside. Here’s where the light and dark color combos come in handy.
- Once you have colored your puppies and the long extensions, take some small snips and fussy cut them out.
- Next, you have to cut the dog images so that you can add in the extensions. I cut them just behind the front legs. Use some glue to add in your long body extensions to the puppies. This creates the adorable looooong body, creating an even more whimsical image.
- !!! Before you glue the puppies back together, decide if you’d like to add texture to the sweaters. IF you are, do this:
- stamp the dog again both regular and mirrored. Color in the sweater, then fussy cut just the sweater. Take those pieces along with the 2 matching extensions and place in an embossing folder and emboss them. Remove from the folder and adhere them on top of the corresponding doggies.
Creating The Card Base, Layers & Belly Band
- First, take a piece of real red card stock and trim it to 5.5 x 8.5”. Score the long side @ 2 1/8” turn and score the other long side @ 2 1/8”. Fold and burnish your score lines. This creates the GATE FOLD. Simple, right?
- Second, take the light blue “Pool Party” paper and trim 2 pieces to 2 x 5 3/8”
- Next, trim the designer papers. 2 for the front flaps and 2 for the inside flaps. Trim these to 1.75 x 5.25”
- Trim a piece of white card stock to 4 x 5.25” for the middle of the inside.
- Now, for the belly band. Take a piece of card stock- I used the Pretty in Pink and trim it to 3” by 8”. Just fold it around your card base and burnish the fold lines. Add some adhesive to hold it closed. That’s it! It’s ready to decorate. The belly band simply holds the flaps of the gate fold firmly closed. And, in this case, it hides the amusing doggie tails until removed.
Building Your Fun Fold Valentine’s Day Card
- First, use glue to adhere the 2 designer pieces and the white message piece to the inside of your gate fold card.
- Next, use glue to adhere the 2 Pool Party pieces to the outside of your gate fold card and then add the 2 designer panels on top of those.
- Now it’s time to add your sweet wiener dogs. I found it easiest to start with their noses meeting right in the middle of the white card stock center. And wrap each one around the front. Make sure it all fits properly before you add the adhesive.
- Next, stamp the “Happy Valentine’s Day” sentiment to the center of the white card stock above the dogs. I chose to add a paw print at the bottom using the same “Lost Lagoon” ink.
- Use the Heart die and cut the heart from the “Pool Party” blue paper. Stamp a sentiment like the one I used in the top left corner. This is optional, of course. Now adhere the heart to the center of your belly band. And adhere the cute dog with the multi-colored sweater onto the heart.
- That’s it! WELL DONE – YOU!!
HELPFUL PHOTOS


KEEPING IT KRAFTY
Thank you, again, for joining me here today. This was such a fun FUN FOLD CARD to make. The adorable little dog with the LOOONG body is so stinking cute! Valentine’s Day is the perfect excuse to use this set. And it’s a reminder that we can use all of our stamp and die collections in various ways. That makes our money go further and offers endless creativity. For this card, changing papers, inks and card bases allows infinite possibilities. So no matter what you make just make it your own. And remember to always keep it krafty! Until next time , bye-bye!
WANT TO SEE MORE?
VISIT MY BLOG ARCHIVES
