
It’s a Fun Fold Featuring “Fairytale Christmas” by Paper Rose Studios
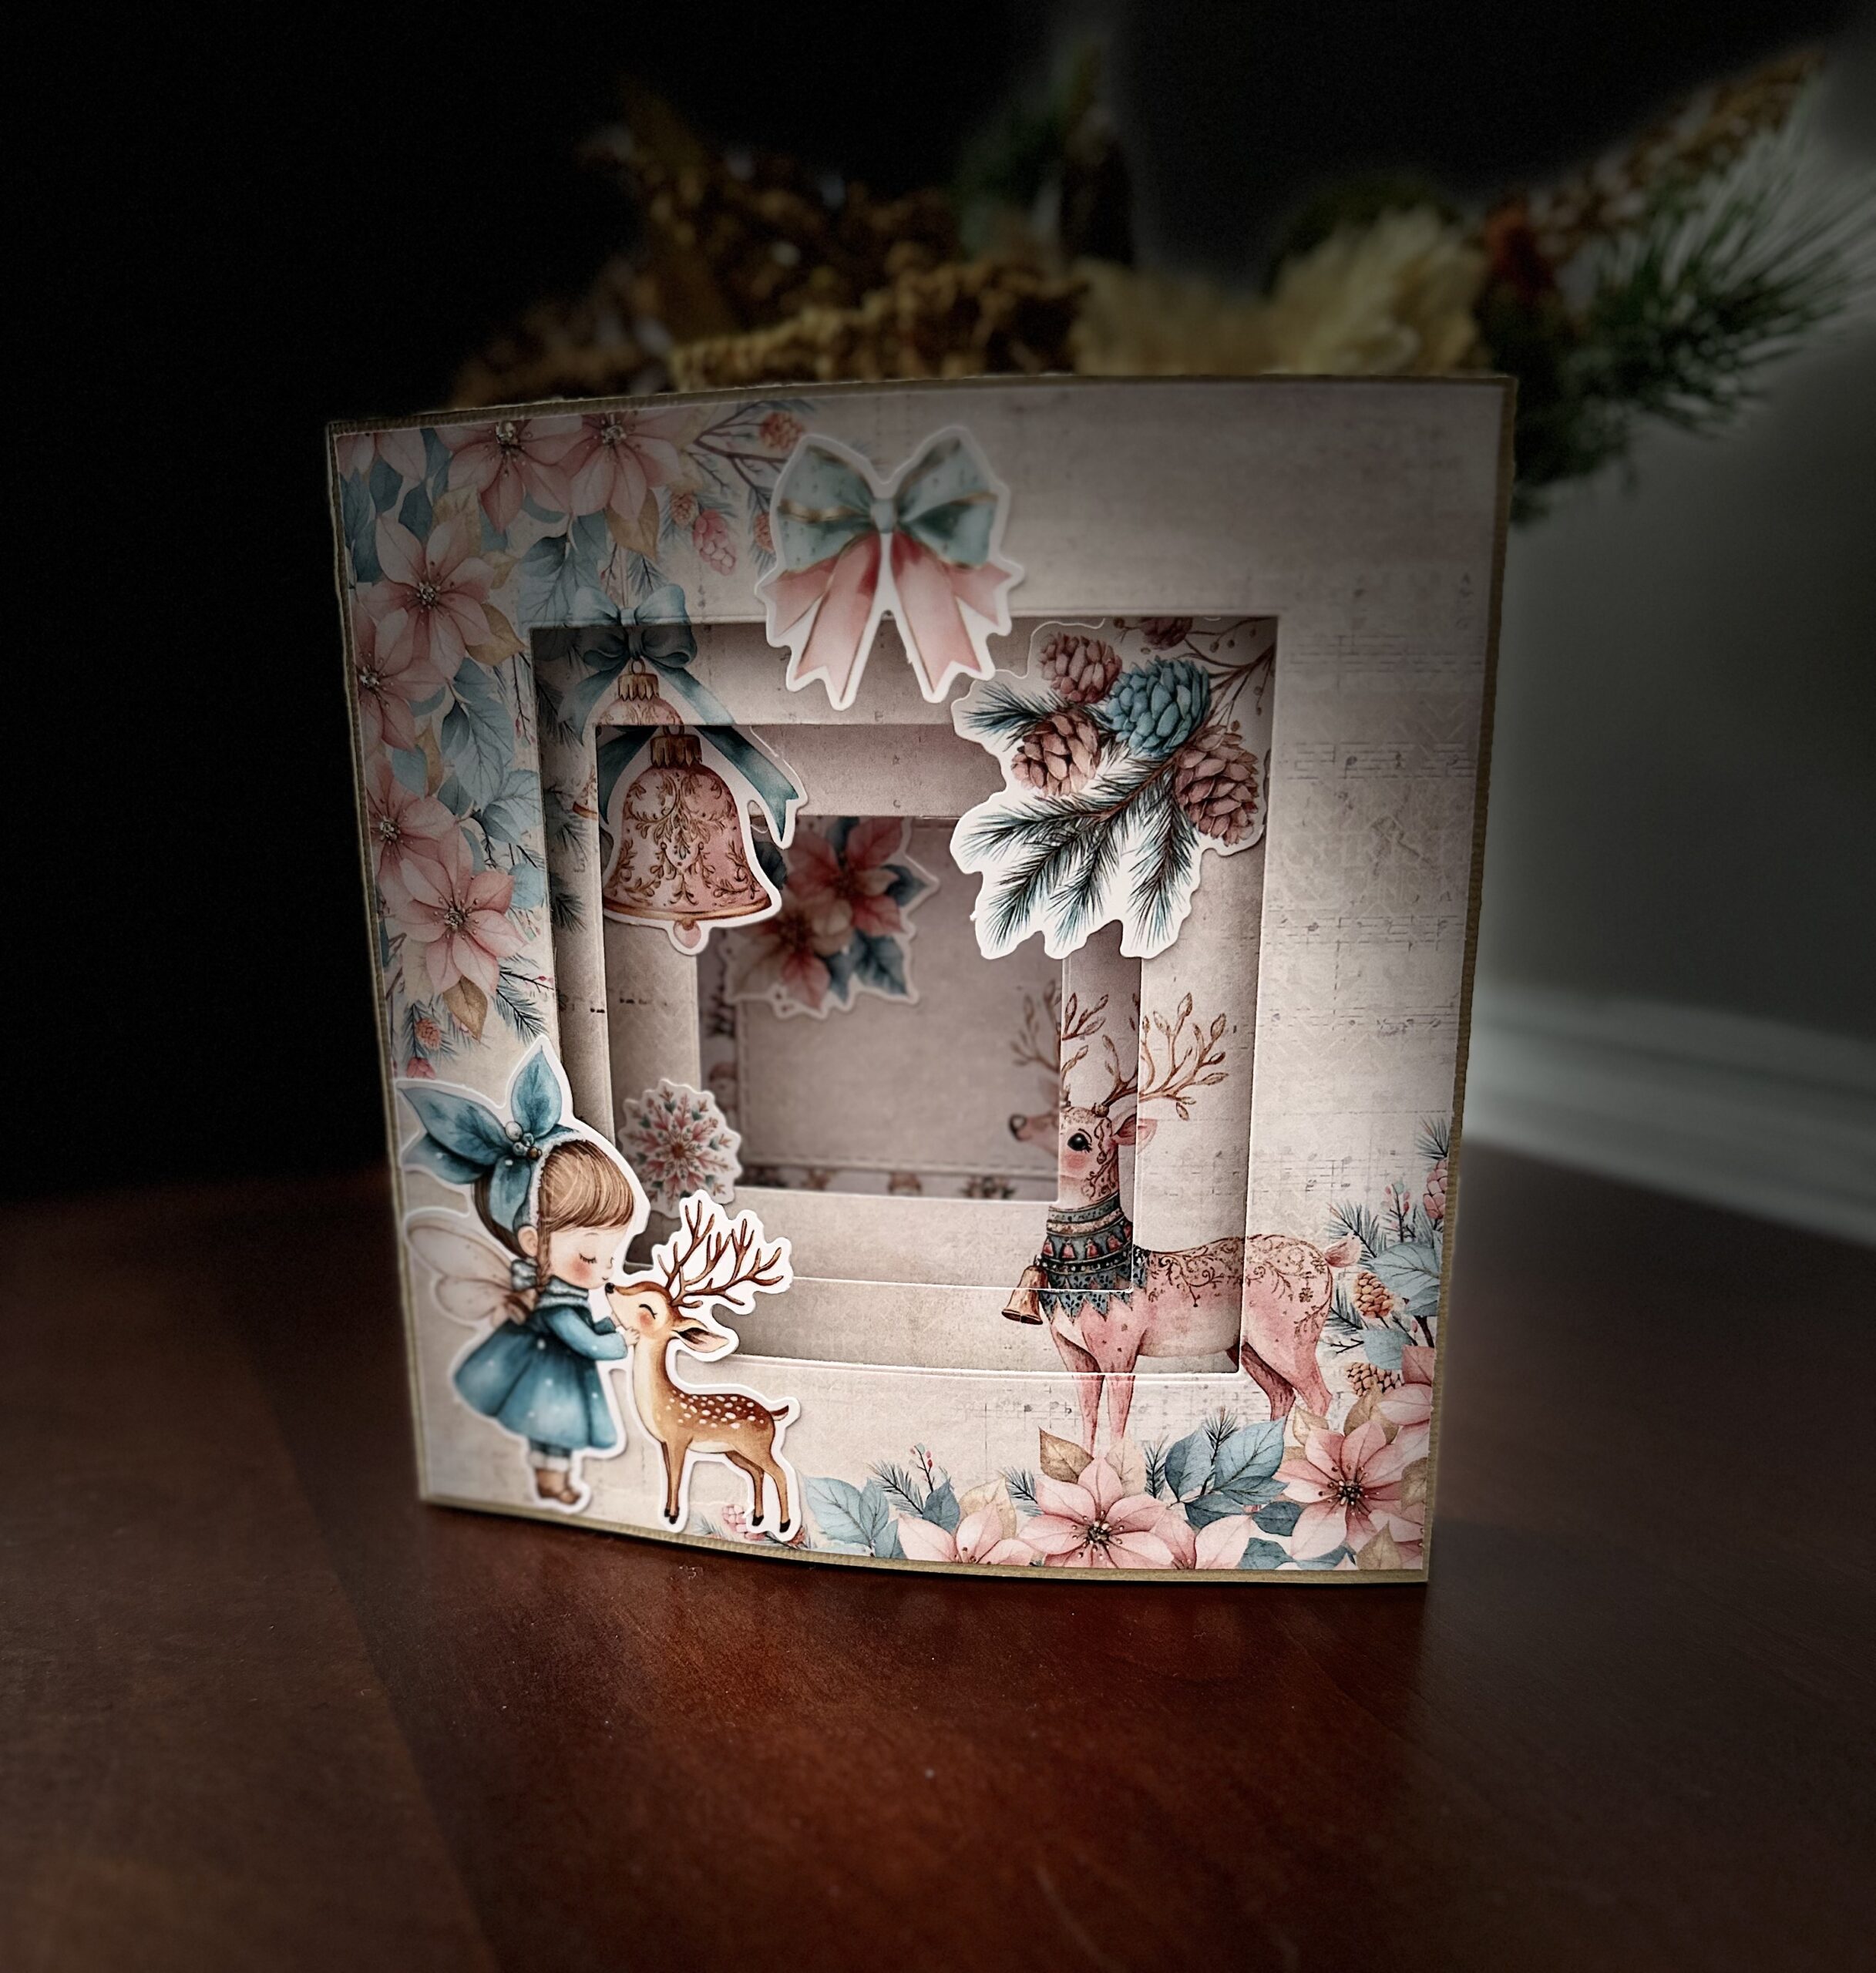
Hello and welcome to my studio! I just want to say how excited I am to have you here with me today! Because I have a special Christmas card to share with you that I think is just so whimsically adorable I can’t keep it to myself. It’s a fun fold that is appropriately called a Tunnel Card. This Christmas card features the beautiful “Fairytale Christmas” collection from Paper Rose Studio and it’s filled with layers of delightfully embossed die cuts that are also a part of the collection.
So, keep reading below where I share all of the supplies I used to make this card. I’ll include links to supplies-where possible-for your convenience. Below the list of supplies, in the “Let’s Get Krafty” section, I’ll share my steps( along with a small slideshow to help you visualize the process ) to making this delightful Christmas card. This card is a large 6 x 6” because I wanted to showcase as much of that fabulous paper as possible. And by the way, it looks more difficult to make than it is so don’t worry. You’ve got this! So let’s get started!

List of Supplies
- Designer Paper: “Fairytale Christmas” 6×6” paper collection from Paper Rose Studio . HERE
- Embossed Die Cuts. “Fairytale Christmas” same collection- separate purchase. HERE
- 12 x 12” Card Stock in white or a matching color like light tan, pastel pink or blue. I used a light tan card stock.
- Paper Trimmer/Scoring tool. HERE
- Glue
- Nested Shape Dies: I used nested squares but other shapes work well also like ovals, circles, stars… HERE
- Die cutting/embossing machine. HERE
- 6.25” Square Envelopes: craft stores or Amazon
Want more card making & crafting inspiration?
Follow me on social media
Let’s Get Krafty

Fairytale Christmas Tunnel Card 
Grab a few Supplies 
Score your CS for the Base 
Fold and Burnish your Card Base 
Use Nested Dies to Die Cut your shapes 
use 3 Matching Designer Papers 

Use a piece of mint tape or washi tape to hold in place 

Layer your die cut panels from largest to smallest onto the card base 
embellish your 3D tunnel card with embossed die cuts 

Fairytale Christmas Embossed Die Cuts 
Such a cute design! 
Follow the steps below. 
Step back and Enjoy your Special Card!
Step by Step
- Trim 12×12” card stock to 6 x 12”
- Score the 12” side @ [.5” – 1” – 1.5” – 2” – 2.5” – 3”] AND [9” – 9.5” – 10” – 10.5” – 11” – 11.5”]. Basically there should be 6 score lines 1/2” apart on each side on your card base. For a total of 12 score lines.
- Choose 3 identical designer papers ( like the ones I’ve used ) from your paper pack. This is yet another reason I like this “Fairytale Christmas” collection from Paper Rose. They have 3 of each design in their 6×6” pack. Trim the designer papers to about 5 7/8” in width and length.
- Take one of the papers and adhere it to the 6 x 6” section of your card base. This is the section that’s in the middle of the score lines. This is the main focal point of your card.
- Now, take your largest square die and center it on that section and run it through your die cutting machine. HINT: You can keep that square for a future project.
- Next, go ahead and fold and burnish all of your score lines ( some call this an accordion fold, or fan fold or a concertina fold).
- Follow that step with choosing your next square die and center it on the middle of your next designer paper. Run it through your die cutting machine. Tip: use the first die cut panel as your guide to placing this die. Hold it with a piece of mint tape or washi tape.
- Repeat step using your smallest square with your 3rd matching card panel.
- At this point, I chose to select another piece of designer paper-chose the backside design- and trimmed it to 5 7/8” square for my very back panel. I also chose to use the little square that was removed from the smallest die cut and adhere it to the back panel. This is because it finished the face of the cute deer. I didn’t want his face to be incomplete 🙂
- Now, use glue or tear and tape or a good permanent tape runner to adhere the other panels onto your card base. You’ll easily see exactly where they should go. And go ahead and adhere your back panel onto your card base. My back panel was made using the same piece of CS as the base trimmed to 6×6”. Stand your card up and see the amazing tunnel effect and lovely design!
- Lastly, choose some of the embossed die cuts from the Fairytale Christmas Embossed Die Cuts pack. These are just beautiful! And they’re so much fun to use! Stand your card up with plenty of lighting and admire your creation! Because you’ve done it! You have made an enchanting Christmas card that will delight anyone!
Want more card making & crafting inspiration?
Follow me on social media
Now that you see just how simple it really is to make a special 3D tunnel card like this one, you’ll be ready to make many more! It’s kind of addictive. And you’ll see the next ones you make like this just go more quickly. I may be a bit obsessed now. I keep looking for more papers to use and shape dies to try. Again, I’m so happy you joined me today because I love what I do and I love to share these ideas with you. So don’t forget to follow me on Social Media to see what’s next. There is so much possibility with this style of greeting cards so no matter what it is that you decide to make just remember to make it your own. And always remember to keep it krafty! Bye-Bye!
WANT TO SEE MORE?
VISIT MY BLOG ARCHIVES
