
A Large & Lovely Box
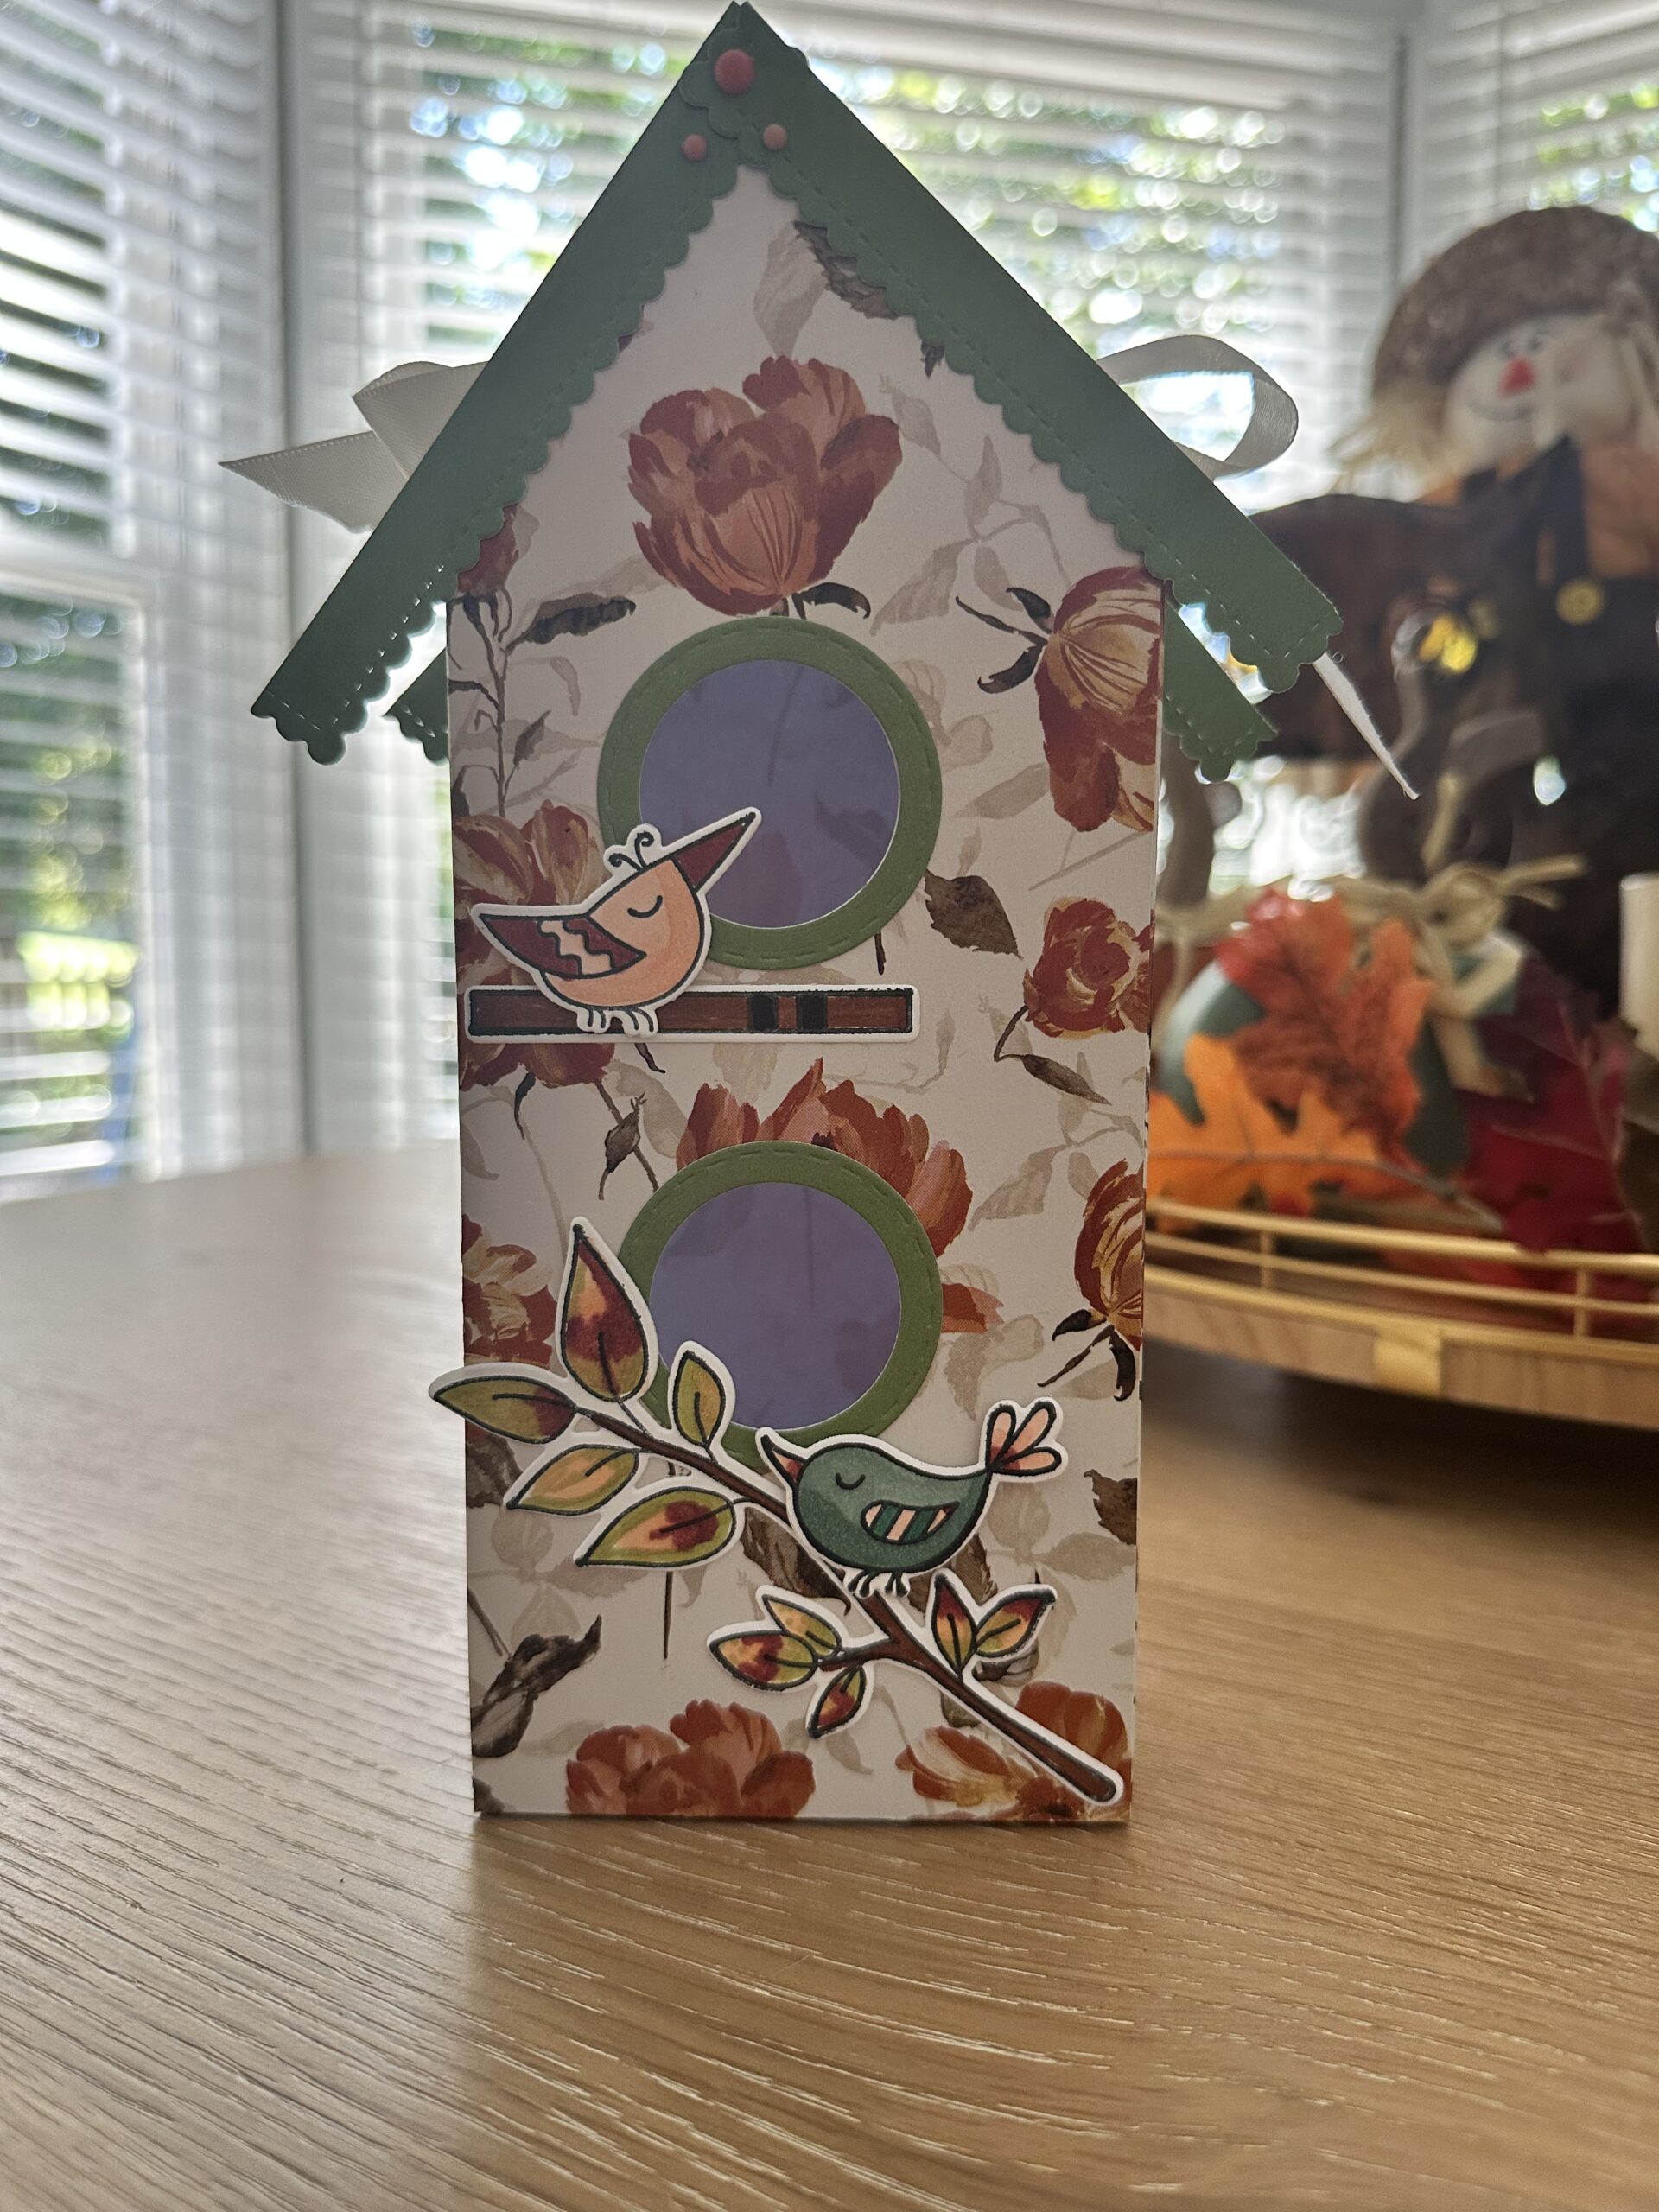
Hello and welcome to my studio! I’m so happy to have you here with me today because I love what I do and I adore sharing my ideas with you! And this week I’m sharing another birdhouse design. Last week, I shared an autumn-inspired gift box. And the week before that I shared a Birdhouse Gift Bag. So, I decided I wanted to see if I could make a Birdhouse Gift Box that closes at the top. And I suppose you already know- it worked! This is a nice large and lovely box that finishes at 3.5” wide x 9” tall x 2” deep from tip to base. And the closed area, the area for your gifts, is 3.5” x 7” x 2”. As an example, you could fit a t-shirt, a tea towel etc. inside this darling birdhouse gift box. 🙂
So this week, I’m sharing another birdhouse but it’s a Birdhouse Gift Box and it has two portals, doors, windows- whatever they’re called. And I’m still giving a nod to Autumn by using some gorgeous Autumn-inspired cardstock. I guess I’m trying to usher in that cooler, colorful, cozy season with my crafting and home décor. You may be asking why the rush? Well, because I live in the southeastern part of the US. And it has been a hot and humid and mosquito-filled August and I’m just over it. The only thing I can do is create adorable cards, bags and boxes in my craft room while I wait for the season to change over.
Also, keep in mind that you can create this darling birdhouse gift box with any 12×12” cardstock you like. It can be designer cardstock or a solid choice. And this box uses only one sheet of 12×12” cardstock. Don’t you just love that? Below, I’ve added a list of the supplies I used to create this box, followed by some photos, a template and a step by step tutorial. This sweet gift box comes together quickly and easily and is so much fun to decorate! So, without further ado, let’s get krafty!

List of Supplies
Any Links I offer are for your convenience.
- 12 x 12” Cardstock: I used a piece from “The Paper Studio-Amanda” you can find it HERE
- 8.5 x 11” Cardstock: “Olive Green”
- 8.5 x 11” Cardstock: “White”
- Alcohol Markers
- Paper Trimmer with Scoring Tool
- Scissors
- Glue
- Ombré Matte Decorative Dots “Timid Tiger” by Stampin’Up — find it HERE
- Nested Stitched Circle Dies: Like THESE
- Nested Scalloped & Stitched Rectangle Dies: Like THESE
- ”Doodle Birds” Stamps And Dies by Taylored Expressions: find it HERE
- Tape
- Ribbon
- Ruler
- Pencil
- Adhesive Foam Dots
- Frosted Vellum: Optional: For the Portals
- Embossing Folder: Optional: For the Vellum
Want more card making & crafting inspiration?
Follow me on social media
Let’s Get Krafty
Kelli’s Kraft Studio: Slideshow

Completed and Decorated Gift Box 


The front side once you’ve finished the box and you’re ready to decorate! 

Use a circle die to die cut your windows. 
Use 2 circle dies together to create decorative window frames. 

Use the scalloped rectangle die and cut a rectangle. 
Trim half an inch of the scalloped side to create the roof décor. 
Use glue to attach your decorations! 
Stamp and die cut or fussy cut any decorations you wish for your gift box. 


Use a piece of coordinating ribbon to close your completed box! 


If you want vellum in your portals. 
Embossing Folder 
Embossed Vellum 
Birdhouse with ADDED VELLUM IN PORTALS 

The back side, once you have scored and trimmed your box.
WANT TO SEE MORE?
VISIT MY BLOG ARCHIVES
BIRDHOUSE GIFT BOX TEMPLATE

KEEP IT KRAFTY: STEP BY STEP TUTORIAL
REFER TO THE PHOTOS AND THE TEMPLATE ABOVE
To Create Your Darling Birdhouse Gift Box…
- Trim your cardstock (CS) to 11 x 11.5”. Be sure to turn your CS over to the back side. This will be the inside of your box when you close it up.
- Score the 11.5” side at ( 3.5, 5.5, 9 and 11” ).
- Measure 2” up from the bottom of the 11” side and make a score line.
- Measure 2” down from the top and make a small mark with your pencil AND draw a faint line with your pencil all the way across the cardstock. This will not be seen in the finished box.
- Go to the first (left hand side) 3.5” rectangle area and measure 1.75” and make a mark with your pencil. This will be the halfway mark in the rectangle area. This will be your pointed roof later.
- NOW, Do the same as above in the second (right hand side) rectangle area.
- Fold and burnish all your score lines.
- Use scissors to cut up each of the bottom score lines as in the template above. And make a small wedge as shown. This just helps the bottom of the box close up smoothly.
- Use scissors to cut a straight line with no wedges on the score lines at the top of your box.
- REMOVE the 2 small rectangles on the right hand side. The ones with the red X.
- Use your scissors OR paper trimmer to cut diagonally from the pencil marks at the top to each of the corners as in the photos and template above. This creates your pointed roof – front and back -.
- BUT WAIT! DO NOT GLUE YOUR BOX CLOSED YET!
- Your next steps are to create your holes ( portals ) in your box and then you’ll create your decorations (birds, branches…) if you so choose.
- NOTE: It’s way easier to do all these steps BEFORE you close up your box.
To Decorate Your Darling Birdhouse Box…
- Use one of the smaller, ~1-1.25” circle dies to die cut your two portals/windows from the front panel of your box.
- Now, use that circle die along with the next size up together to create a decorative frame for your windows.
- Next, use a ~ 4” scalloped rectangle die and simply trim about a half inch strip. OR you could just trim plain CS to .5 x 4”. It doesn’t have to be scalloped. This is for your roof decoration.
- At this point you can use stamps and dies to create branches, birds or whatever you like to adorn your box.
- If you want your box to be a bit of a peek-a-boo box, leave the windows as is or add a piece of acetate for a see-through window. OR you could add a piece of vellum. IF you DON’T want a peek-a-boo box, you could add a piece of frosted vellum that you emboss. The vellum and the acetate can just be taped on because you will not see it in the finished box.
- Now, use glue to adhere the window frames, the roof decorations, the branches, birds and any other add ons you wish.
- Lastly, use glue on the small side rectangle piece to close up the sides. And then add glue to the bottom flap to close up the bottom of your box and that’s it! To close the box, choose a piece of coordinating ribbon. Great! You have now created your own birdhouse gift box!
Keeping It Krafty
In closing, I’d like to thank you again for visiting me here at Kelli’s Kraft Studio! This has been such a fun project to make! In fact, I’m making a few of these boxes, with different cardstock, to use as decorations around my house. THEN maybe I’ll use them as actual gift boxes. 🙂
Once you’ve made one of these darling birdhouse gift boxes you’ll see just how easy it is and how much fun it is to decorate. You’ll be looking for reasons to give gifts in these very unique boxes! Changing the paper will make these gift boxes perfect for any one of your family and friends. This gift box can also be tailored to perfection for Christmas, Halloween, Valentine’s Day etc. Wow, I just thought of that! So, no matter what it is that you decide to make just make it your own. And always remember to keep it krafty!
Until next time,
