
Featuring “Lovely & Beautiful” DSP
Hello and welcome to my studio. I’m so happy to have you here today. Because today, I just have to share this bright and beautiful fun fold card with you! It’s a Triple Z Fun Fold card like the one I shared in my last post. You can see that post as well as all of my other recent posts by visiting my Blog Archives-the link is close to the bottom of this page. Also, if you enjoy fresh and new inspiration for your crafting, follow me through my social media-links below.
So, this week, I chose to create another fun fold that is made in the Z Fold style but using different papers than in my last post. This style of card, no matter what papers or themes you use, makes a real statement. And when it’s made with this paper, full of gold foil accents, this fun fold card seems to become a beautiful piece of décor that anyone would just love to receive. Below, I’ve shared my list of supplies, followed by a simple tutorial with all of the dimensions. So, without further ado, let’s get krafty!

List of Supplies
- 12 x 12” Designer Series Paper: “Lovely & Beautiful” by Stampin’Up! HERE
- 12 x 12” Card Stock: “Fresh Freesia” by Stampin’Up! HERE
- 8.5 x 11” Gold Foil Card Stock ( I purchase mine on Amazon )
- Glue
- Paper Trimmer with Scoring Tool HERE
- Butterfly Dies or Punches: —Scrapbook.com has THESE + Lots more
Want more card making & crafting inspiration?
Follow me on social media
Let’s Get Krafty


- First, choose your papers. I chose this gorgeous flowery paper from the “Lovely & Beautiful” 12 x 12” Double Sided paper pack. I used this for the back of the card as well as for the smallest panel on the front of the card.
- I used a piece of one of the double sided papers from the pack for the “old olive” green DSP for the middle panel.
- I used a piece of 12 x 12” solid “Fresh Freesia” for the base, or largest panel of this beautiful fun fold card.
Trimming and Scoring
- Use your paper trimmer with scoring tool and trim and score as follows:
- Base Layer: Layer 1: Trim to 6 x 12” and Score @ 4 and 8” ( I used a piece of solid “Fresh Freesia”)
- Layer 2: Trim to 5 x 11.5” and Score @ 4 and 8” ( I used a piece of the double sided DSP from the “Lovely & Beautiful” pack.
- Layer 3: Trim to 4 x 10.5” and Score @ 4 and 8” ( I used a piece of the “Fresh Freesia. )
- For the Inside Message panel, I trimmed a piece of white CS to 2 x 3”. I used a bit of “Peach Pie” and “Petal Pink” ink and blending tool to add a bit of color to this rectangle. However, white would work just fine. You know I’m a bit extra sometimes!
Decorating Your Fun Fold Card
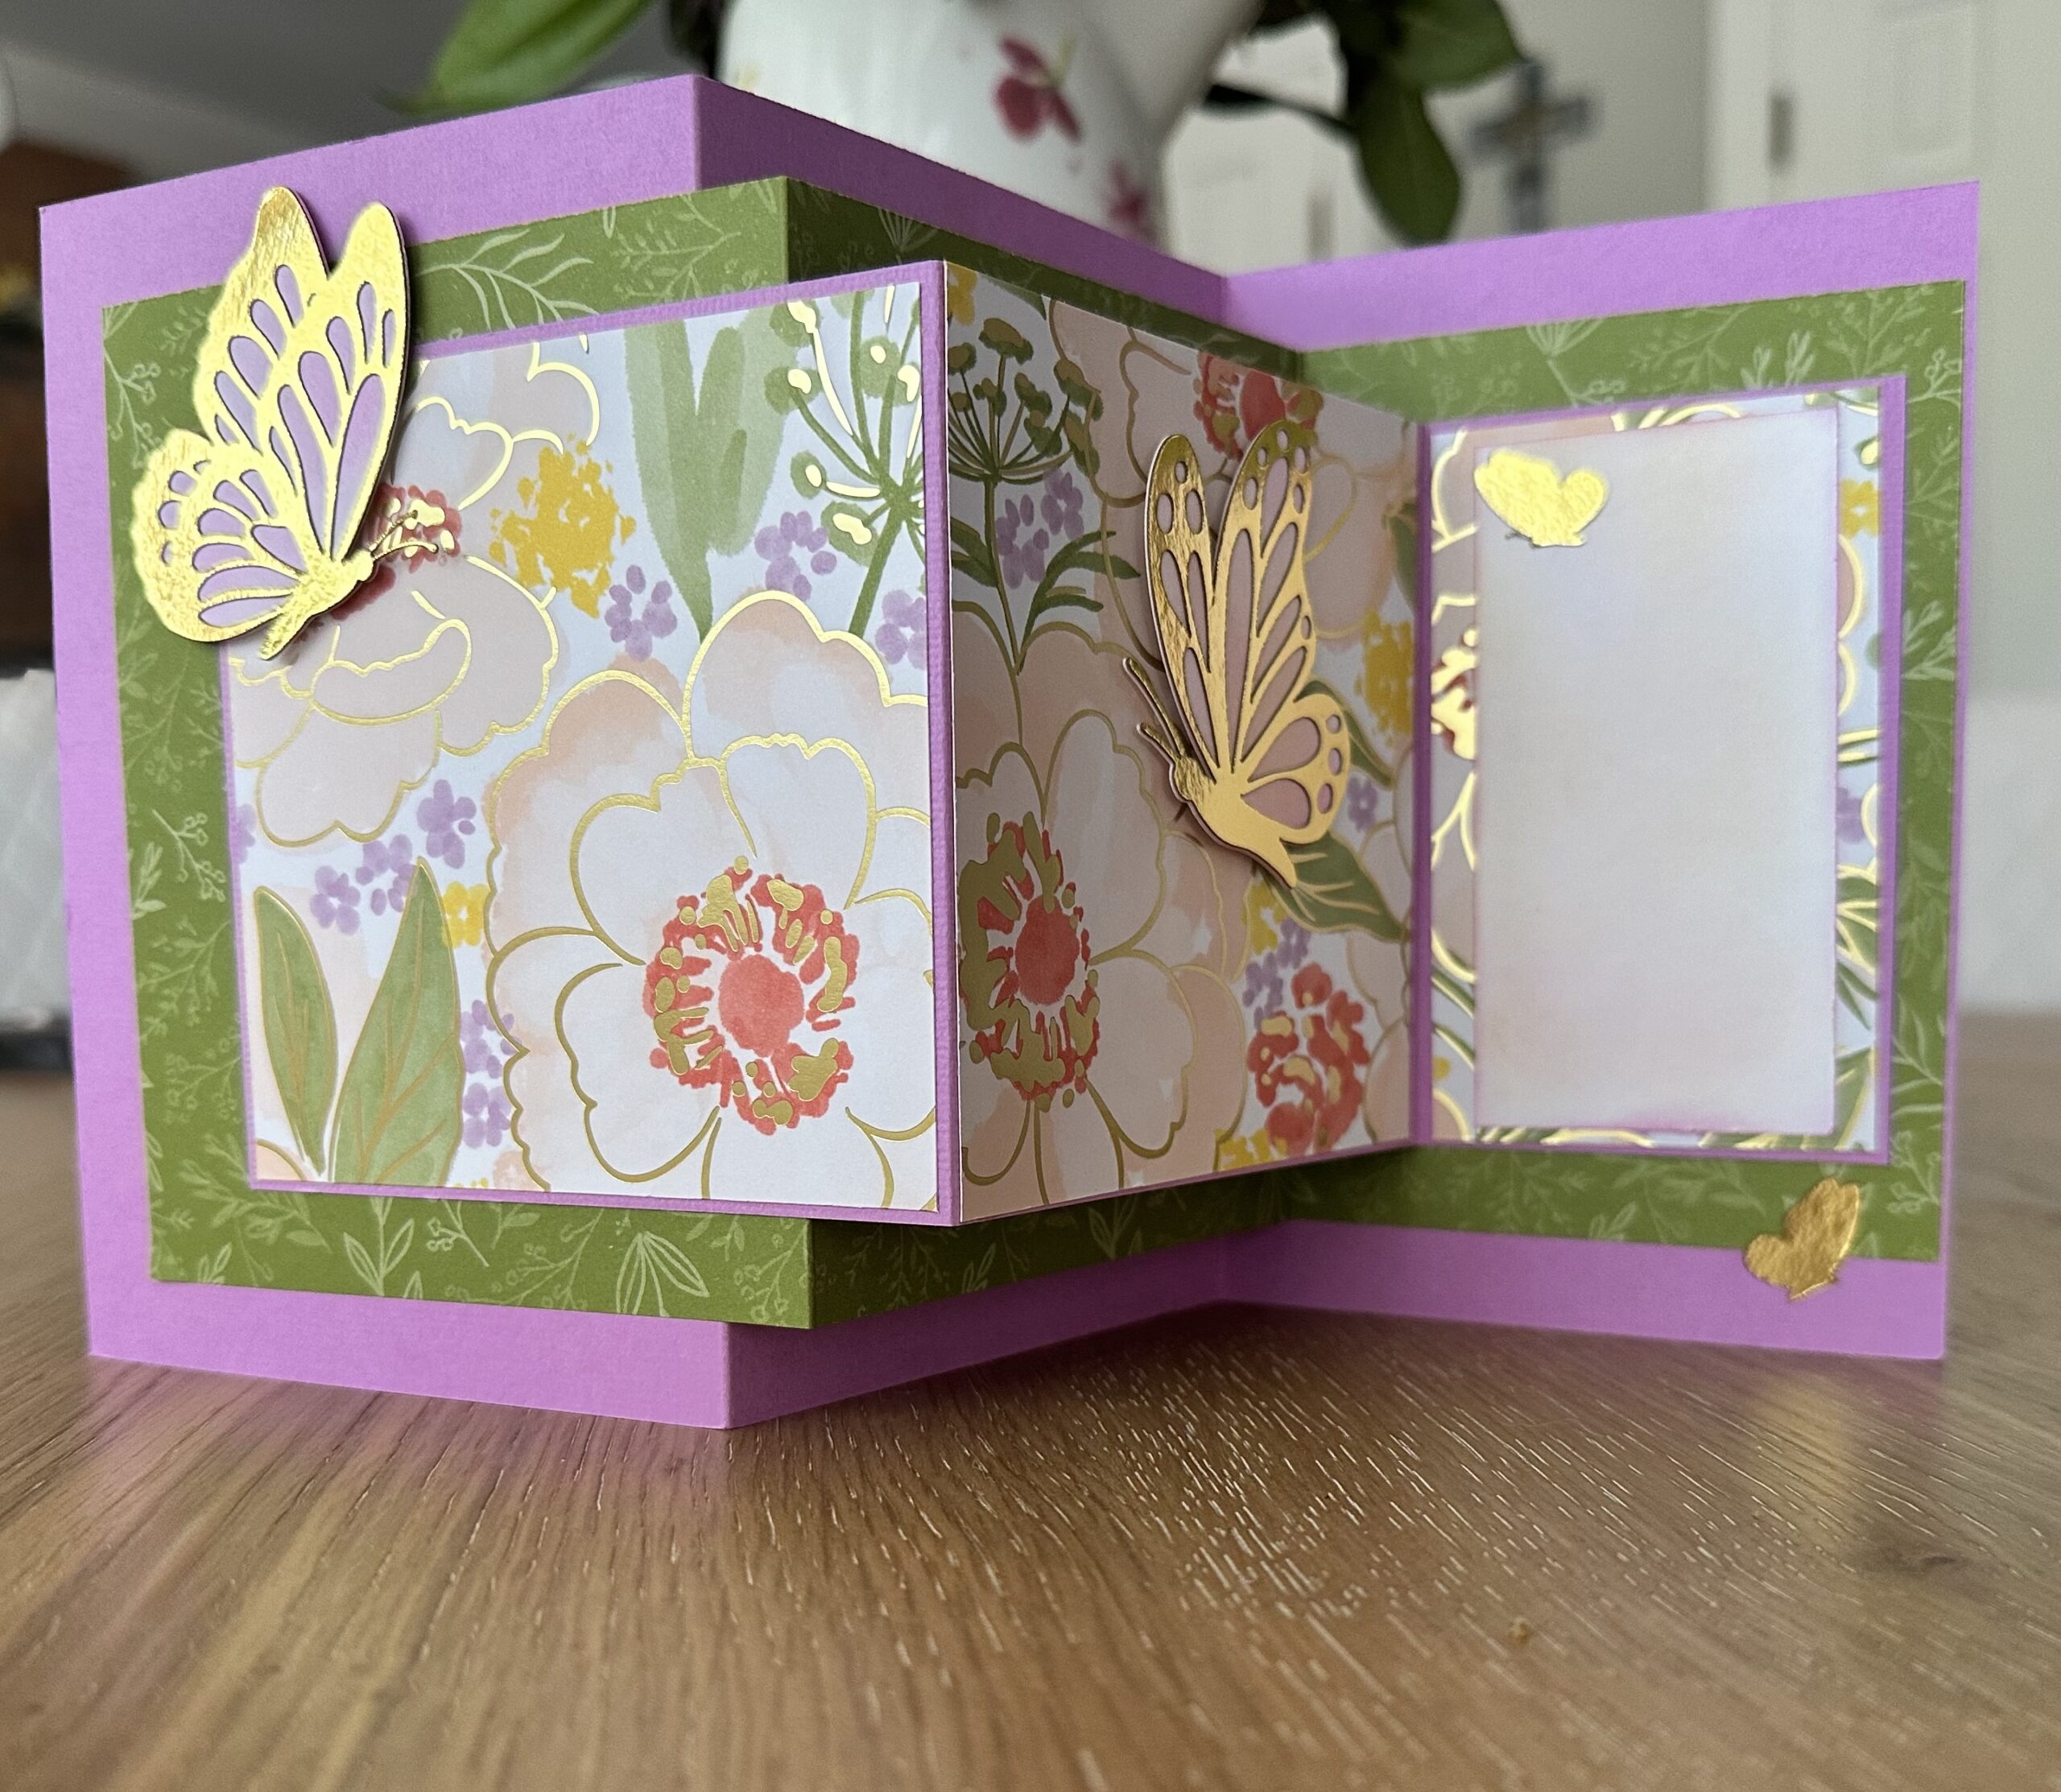
- Select a piece of the “Lovely & Beautiful” DSP ( I chose one with large flowers ). Trim 3 pieces to just shy of 4 x 6”. These will be for the backside of your beautiful fun fold card! I just wanted this card to make a real statement no matter which way it’s facing or where it’s sitting.
- Trim 2 pieces of that same design to just shy of 4 x 4” for the main focal point-smallest panel inside of the card. And trim another piece of this paper to about 2.25 x 3.75” for the smallest panel.
- Now, for the gold butterflies! Use a piece of gold foil card stock and a decorative 2 piece butterfly die to die cut the decorative butterfly piece.
- And use a scrap piece of solid CS to die cut the solid part of the butterflies. I used a piece of white CS to die cut the base piece of the butterflies and did a bit of ink blending on them. Then just use glue to adhere the top decorative gold die cut pieces to the solid pieces to create the beautiful butterflies to adorn this lovely fun fold card!
Building Your Triple Z Fun Fold Card
Now it’s time to build this beautiful fun fold card. Use glue to adhere your decorative CS to the backside of the base of your card. Next, use glue to adhere the “Old Olive” (5 x 11.5”) panel to the base by first adhering the right side-close the card-and then adhere the left side. At this point, adhere the 3 DSP panels to the smallest purple layer and then adhere that layer the same way you did the second, middle layer. And add your “Message Panel” to the inside right of your beautiful fun fold card. Lastly, add your gorgeous gold foil butterflies wherever you think they should go. I used 2 large and 2 small on the front of the card and I used 2 for the back of the card. They absolutely complete this gorgeous card! Hey! Set this card up on a table by a window, stand back and take a look at your incredibly lovely and beautiful fun fold card! You did it! WOOHOO!
WANT TO SEE MORE?
VISIT MY BLOG ARCHIVES
Keeping It Krafty
I’ll end by saying-again-that this beautiful fun fold card truly does make a statement! Remember to add a sentiment, ie. happy birthday, hello, just for you, thank you to the front of your card. I left mine blank for now so that I can use it for whichever purpose. That is if I can ever give it away. Do you ever make a card that you love so much that you’re not really certain you want to give it to someone? I do have those thoughts sometimes. And you know what? It’s perfectly acceptable to keep your card creations! This is your artwork. If you wanna keep it, then keep it. If you wanna give it away, then go ahead. People do so love to receive cards, especially hand made cards. As you’ve now seen in this post as well as my last post, this card can be made with any papers and any themes you like and it will still WOW. So no matter what it is that you decide to make, just make it your own. And always remember to keep it krafty!
Until next time ,
