Featuring Spellbinders Hot Foil Plates
Hello and welcome to my studio! Spring is finally here and Easter is just around the corner so I’ve already hopped onto some fun Spring and Easter makes! I live in North Carolina so our winters are not all that bad but I still look forward to Spring. It’s just so much easier not having to layer clothing. I mean I love to layer things in crafting like papers and vinyl but I do not really enjoy having to wear layers of clothing. I love the colors of Spring and all the wonderful life that is being lived to the fullest outdoors.
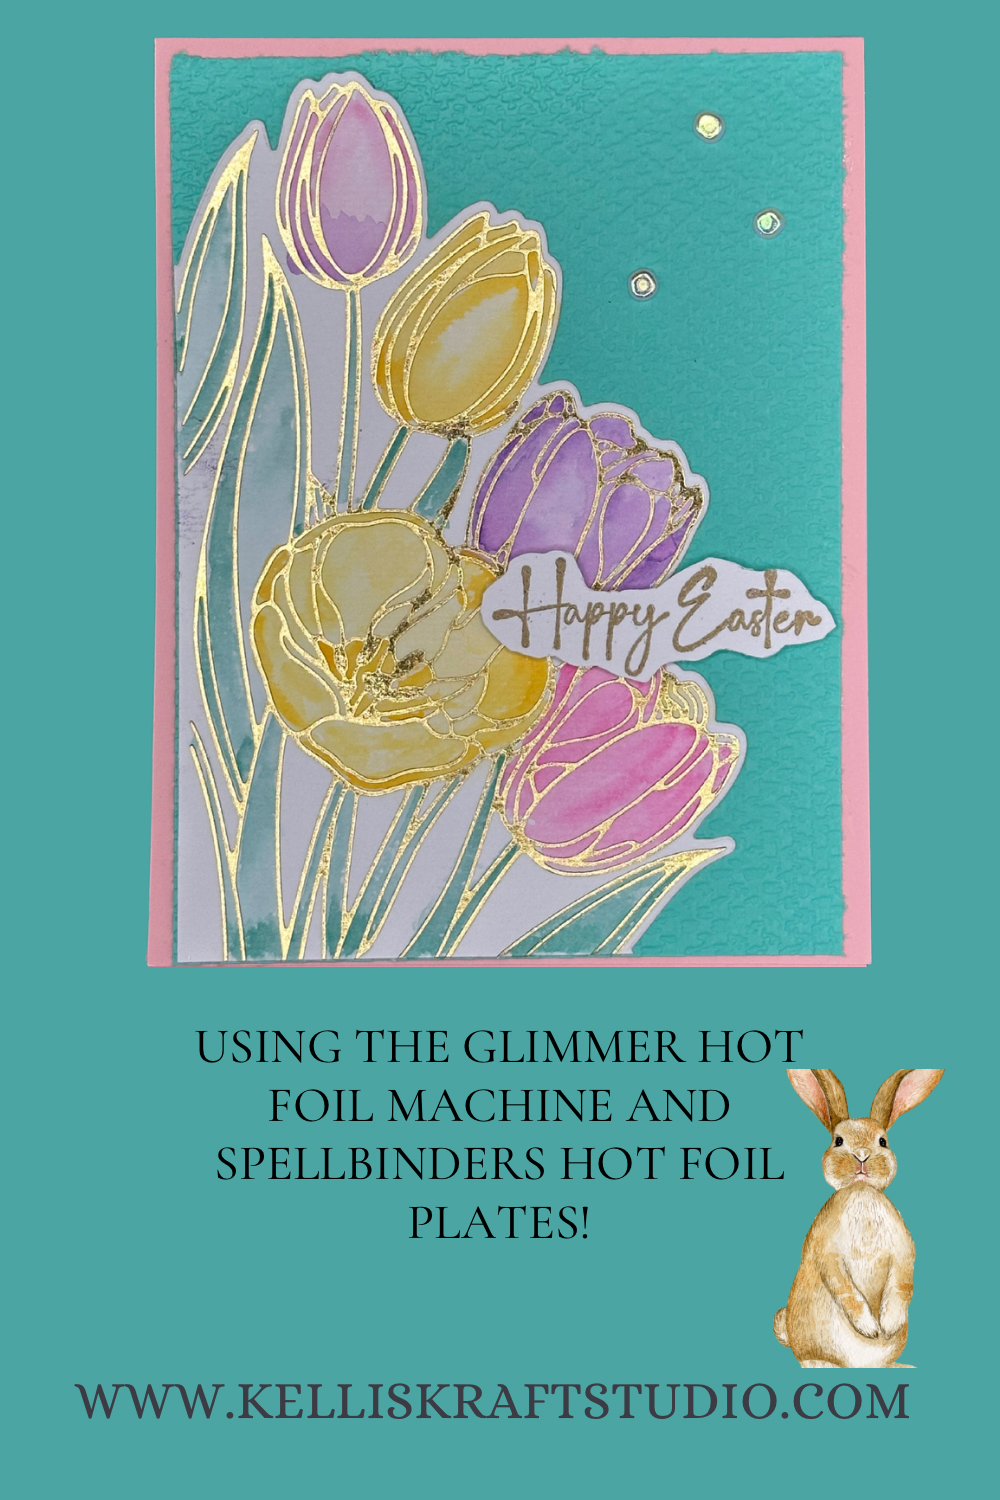
I decided it’s a good time to start making some Easter cards so I took out my tulips hot foil plate and gathered some card stock in pastel hues and got busy! The greeting card turned out beautifully and it’s even prettier in person when you can really see the shine of the gold foil! Using a hot foil machine, the hot foil plates and the foils take card making up a notch. It’s just so pretty! And I have already made some more things using hot foil that I’ll be sharing soon so don’t forget to follow me on Pinterest so you don’t miss a thing. I’ll share links to items I use in the Supplies List below but there are plenty to choose from.
SUPPLIES I USED
- GLIMMER HOT FOIL MACHINE: https://www.scrapbook.com/store/spe-gls-005.html
- SPELLBINDERS HOT FOIL PLATE: TULIPS: https://www.scrapbook.com/store/spe-glp-377.html
- GOLD HOT FOIL: https://www.scrapbook.com/store/spe-glf-040.html
- CARD STOCK: PASTELS
- RUBBER STAMP- “HAPPY EASTER”
- GOLD EMBOSSING POWDERS
- ALCOHOL MARKERS IN PASTEL HUES
- TASTEFUL TEXTURE 3D EMBOSSING FOLDER
- STAMPIN’ CUT AND EMBOSS MACHINE FROM STAMPIN’UP!
LET’S GET KRAFTY
This is a pretty quick card to make. If you’ve never used a hot foil machine let me say it’s truly simple and it’s so much fun. The results are always stunning! Personally, I believe this is the easiest way to add foil to cards.
Trim a piece of pastel colored card stock to 4.25 x 11” and score @ 5.5” then fold and burnish to make the base of the card. This is an A2 Vertical Scored Card (finished size: 4.25 x 5.5”)
Trim a piece of coordinating card stock to 4 x 5.25” This is the background layer. I decided to add some texture to this layer by using an embossing folder( Tasteful Textiles ) and running it through an embossing machine. This, by the way, must be used in conjunction with the Glimmer Hot Foil Machine. Spellbinders also has die cutting and embossing machines and there are also many others. Just make sure they have at least a 6 inch opening.
Trim a piece of white card stock to about 6 by 6” and this will be the piece to foil.
Trim a piece of gold foil big enough to cover the entire tulip hot foil plate and place it shiny side up onto the white card stock , then place the tulip hot foil plate pretty side down on top of the gold foil. Secure it with a piece of heat resistant tape like mint tape and place this plate side down onto the Glimmer Hot Foil Machine. For more information on using the machine, you can go to Spellbinders website and watch a video. There are also numerous how to videos on YouTube. The hot foil machine heats the hot foil plate and the foil, then we run it through a die cutting/embossing machine to add the pressure and this adds depth like a letter press system as well as the imbedded foil. Sounds more complicated that it is, I promise. Once you’ve used the tools once, you’ll realize it’s very simple and very quick.
This tulip hot foil plate come with a die that will cut the foiled image out of the paper. So once you remove the foil to reveal the foiled tulips, place the cutting die around the edge of the flowers and run it through your die cutting machine again to create that lovely edge.
At this time we have to make a choice. To color the flowers or not to color the flowers. Because of the foil, I believe it looks terrific either way but as this card is for Easter, I chose to add some subtle pastel color to the foiled image. Adding ink will not disturb the foil so never fear.
Now, simply adhere the embossed 4 x 5.25 panel to your card base, then adhere the foiled and die cut tulips to the bottom left of that embossed panel lining up the corner.
I wanted to put a “Happy Easter” greeting on the front of the card and I do not have a hot foil plate that says that. I’m not sure there is one but maybe we can find it if there is. To have my sentiment match a little better, I decided to use gold embossing powder. Use some Versa Mark to stamp the “Happy Easter” and cover it with gold embossing powder and then heat with a heat tool to set it. I fussy cut that sentiment out and used foam dots to raise it over the top of the flowers and that’s it! Done and Done!
Thanks to the hot foil machine, hot foil stamps and foil, this card turned out to be absolutely beautiful! The pastel colors of the paper and the inks give the card that Easter vibe and the foil adds a professional classy touch that I just know any recipient will love! Thank you for joining me today here at www.kelliskraftstudio.com where I get krafty in many ways from greeting cards to wreaths to mugs and more. So go to my “Latest Project Tutorials” tab in the menu at the top of this page to see some of those ideas. And don’t forget to follow me to see future projects, makes and ideas! Until next time, bye bye!
REMEMBER
WANT TO SEE MORE?