
Featuring “Autumn Rain” BetterPress & Stencil Bundle by Spellbinders
Hello and welcome to my studio. I’m so happy you’re here so we can get crafty! Do you know someone who has an Autumn birthday? It’s time to make some birthday cards as I have lots of friends and family with autumn birthdays. Undoubtedly, this sweet birthday card has a lot going for it and it’s easier than you think. In this post, I’ll share the supplies, with links, I used to make this adorable birthday card.
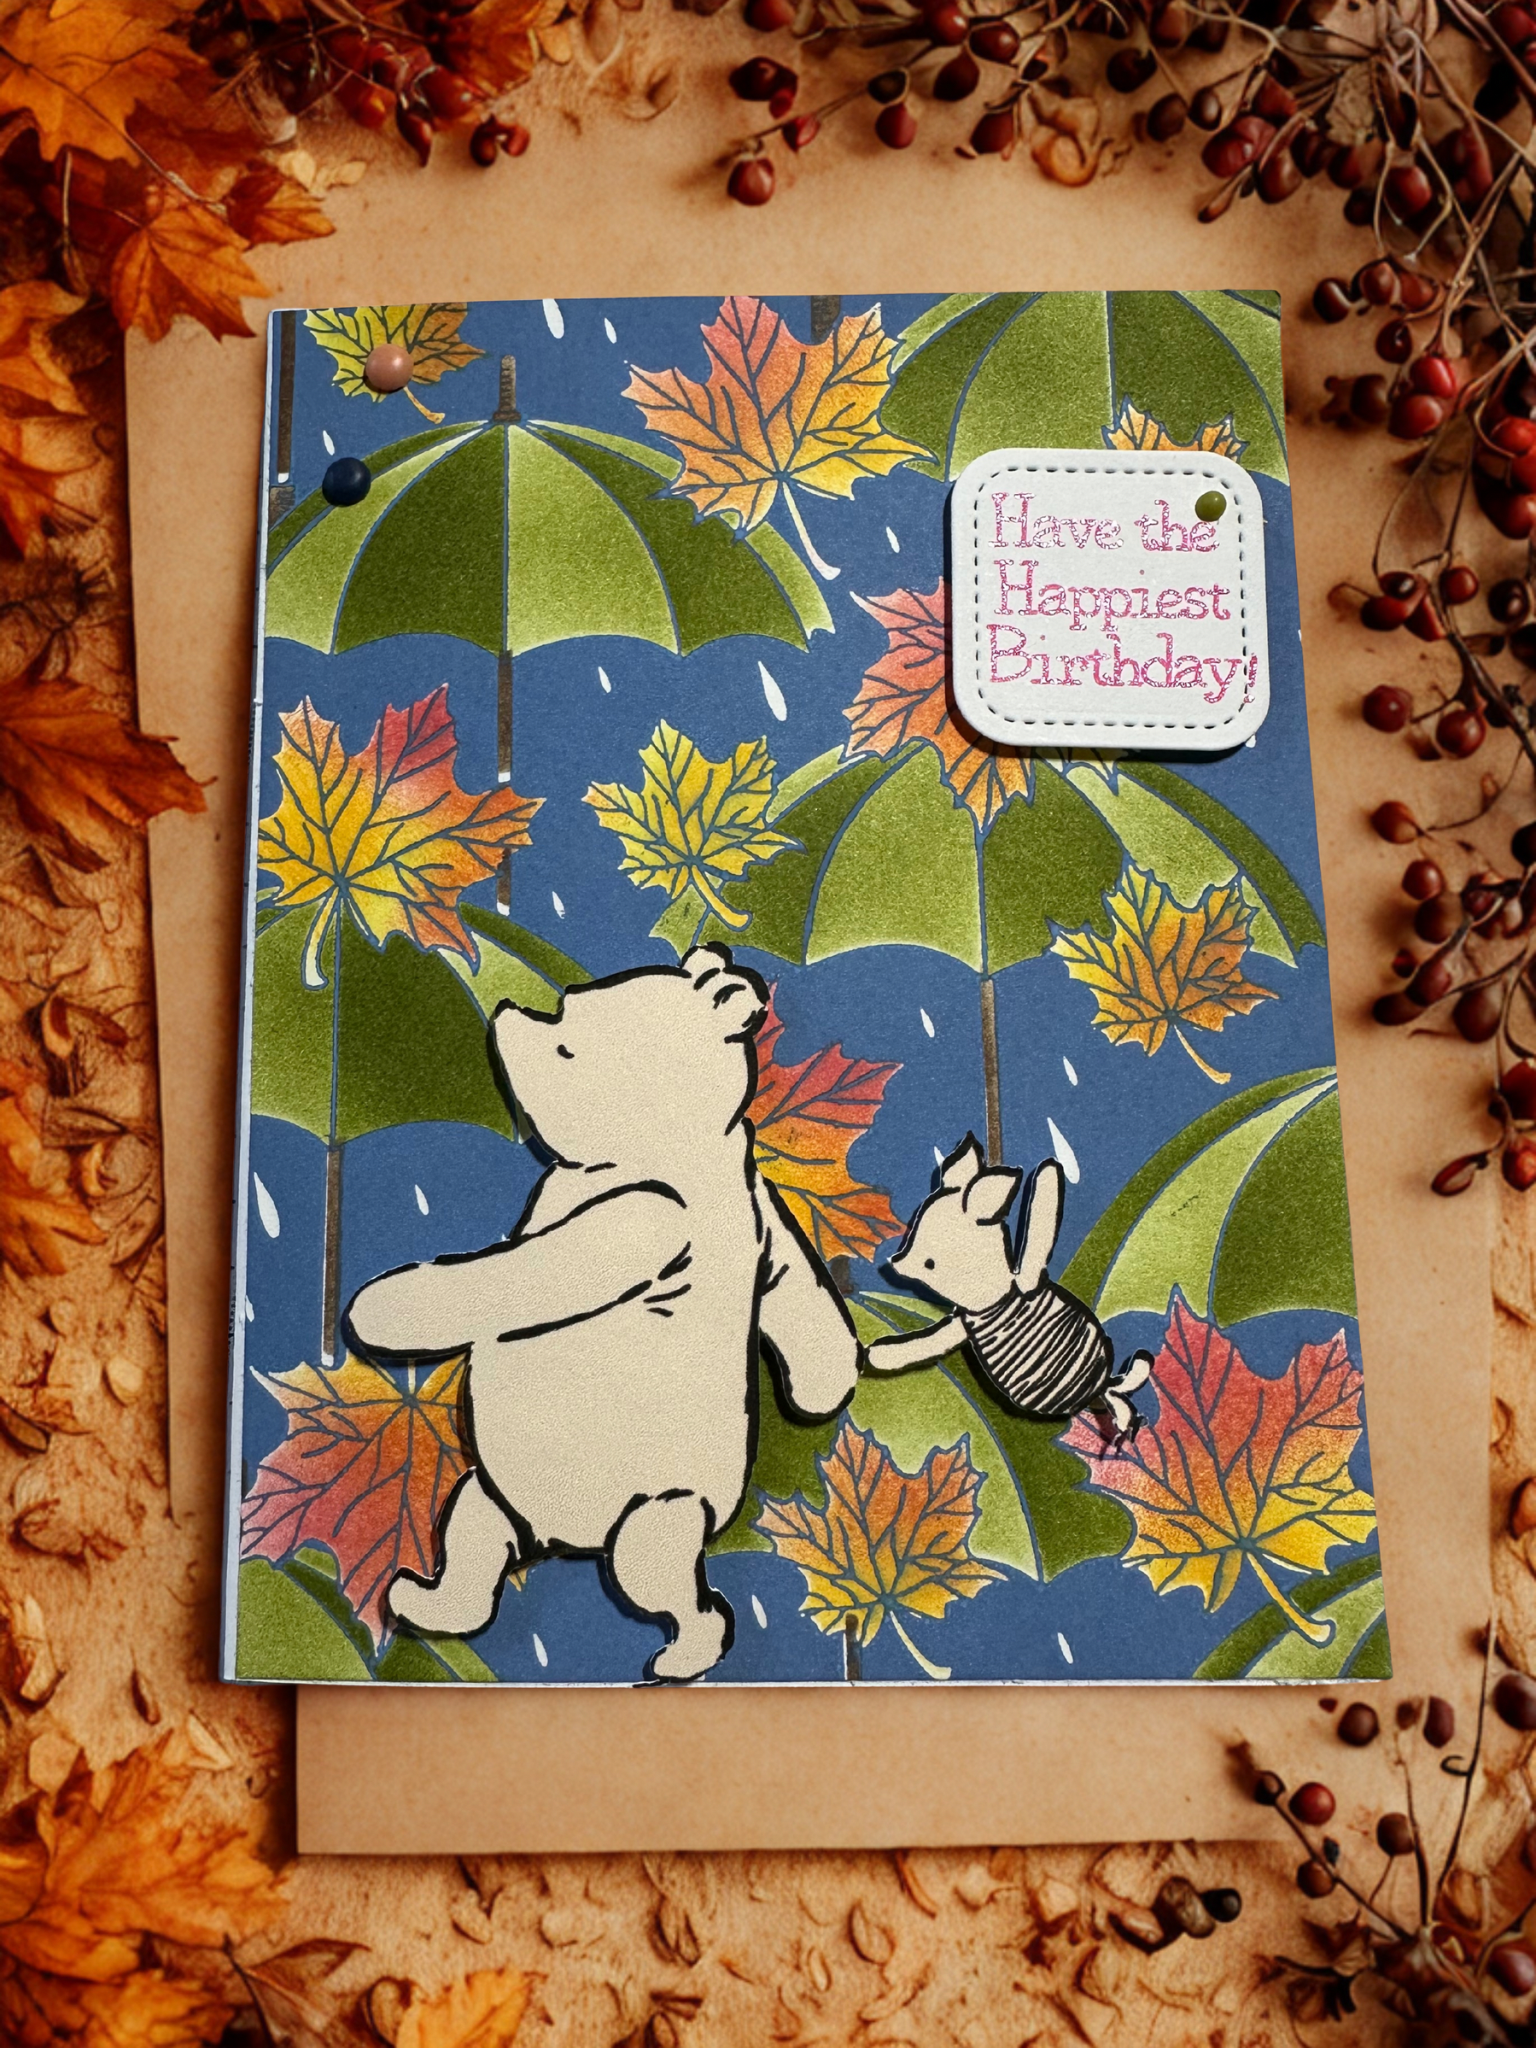
Not only that but I’ll share the “how-to” along with a helpful little hack for creating this birthday card. A BetterPress plate and layering stencils are used to create the entire background of this adorable birthday card. And the ever-so-handy Cricut Joy Xtra is used to create Pooh and Piglet elements as well as the penned sentiment and inside greeting.
Keep reading below to see how this birthday card comes together! Also, I’ll share my free design in Cricut Design Space to save you some time. First, let’s take a look at my list of supplies.

SUPPLIES I USED TO MAKE THIS CARD
- BetterPress-PLATES & STENCIL BUNDLE “AUTUMN RAIN” by Spellbinders https://www.scrapbook.com/store/spe-bd-0897.html
- WHITE CARDSTOCK: 80 lb is best but 65 lb also works
- INK PAD: DISTRESS OXIDE “FADED JEANS” by Tim Holtz (Ranger Inks) https://www.scrapbook.com/store/pp-tim21452.html
- INK PADS: “SLIPPERY WHEN WET”, “GUPPY”, “WEEPING WILLOW”, “BEE STING” by Simon Hurley (Ranger Inks) https://www.scrapbook.com/store/ri-hup67078.html
- INK PAD: “OLD OLIVE” by Stampin’Up! https://www.stampinup.com/products/classic-stampin-pad-old-olive
- DIE CUTTING/EMBOSSING MACHINE by Spellbinders http://Spellbinders Platinum Die Cutting and Embossing Machine (6 Inch Platform + Universal Plate System) https://a.co/d/86D693J
- FOAM INK BLENDING TOOLS: https://www.scrapbook.com/store/sbc-dome-1×2.html
- MINI DETAIL BLENDING BRUSHES: http://Yoseng Mini Detailed Ink Blending Brushes for Card Making(5 Count), Small Blender Art Blending Tool for Ink Blending,Use with Intricate Stencils,Deal with Small Details https://a.co/d/cUGXCM6
- CRICUT MACHINE http://Cricut Joy Xtra Cutting Machine https://a.co/d/7jIjied
- CRICUT JOY GLITTER GEL PEN (RED) http://Cricut Joy Glitter Gel Pens 0.8 mm Rainbow Colors (10 ct) for DIY Creative Projects Custom Cards Home Decor https://a.co/d/8D1owjN
- CRICUT JOY BLACK INK PEN
- STITCHED SQUARE DIE for the sentiment (optional)
Want more card making & crafting inspiration?
Follow me on social media
LET’S GET KRAFTY!
First, don’t let the supply list scare you. It’s basically just 1 press plate + stencil set, 5 ink pads, ink blending tools, card stock, ink pens and two machines. Also, you don’t have to have the Cricut machine. You could always find a Winnie the Pooh image, or any image you want, on your computer and print it out on card stock. Then you just use scissors to cut out your images.
Okay, I said earlier that I had a little hack to share with you. Normally, we would use the BetterPress letterpress system by Spellbinders with this press plate. I’m considering getting one, but I don’t have it yet. What I didn’t realize until recently was that the press plates are also hot foil plates that can be used with the hot foil machine. And that machine I do have.
So when I saw the “Autumn Rain” press plate and layering stencils bundle, I bought it to use with my Glimmer Hot Foil machine. I fell in love with that bundle as soon as I saw it. However, here’s the hack, we can create the letterpress effect even without the BetterPress system.
All we have to do is use shims, including some paper towels, to create a cushion. Just place some paper towel, then the plate with the umbrellas and leaves onto the platform of the die cutting machine. Ink the plate by rubbing the “Faded Jeans” ink pad all across the top. Place a piece of white card stock carefully on top. Place another piece of paper towel and then platform D or E on top and run through your die cutting machine. Just use a piece of plain paper and no ink to trial your “sandwich” until you get the result you want. Your image should be pressed into the paper clearly without punching all the way through.

Step by Step
BUILDING THIS ADORABLE GREETING CARD
Finally, you have your background of umbrellas and leaves and rain all colored in with your numbered layering stencils. And you have your Pooh, Piglet, Sentiment and Inside Greetings completed with your Cricut-if using. Trim the background panel to 4.25 x 5.5”.
Here is the link to my FREE DESIGN In Cricut Design Space. https://design.cricut.com/landing/project-detail/68acab759d2dcd2a32775f20
*There is a small fee for the Disney images in CDS. Once you’ve bought it, you can use it as many times as you please. My design and measurements are free for you to use. I’ve sized the images to fit on this A2 card.
To complete this card, simply adhere your pressed and colored “Autumn Rain” panel to the front of your A2(4.25 x 5.5). I used foam dot to raise and adhere Pooh and Piglet to the front. I used a small square stitched die to die cut the sentiment and some foam dot to adhere it to the front of the card. Use glue or tape to adhere the message to the inside of the card and that’s it!
In closing, this card may seem a bit daunting at first glance. But I promise it’s pretty quickly done. Just have your supplies all ready, follow the steps and it’ll come together nicely. It’s the most fun I’ve had in card making for a while and I hope you enjoy it too. You can use this design not only for a birthday card, but almost any sentiment you wish to convey. Also remember that you don’t have to add Pooh and Piglet. The background design is special in and of itself. Whatever it is that you decide to do, make it your own and just keep it Krafty my friend!
