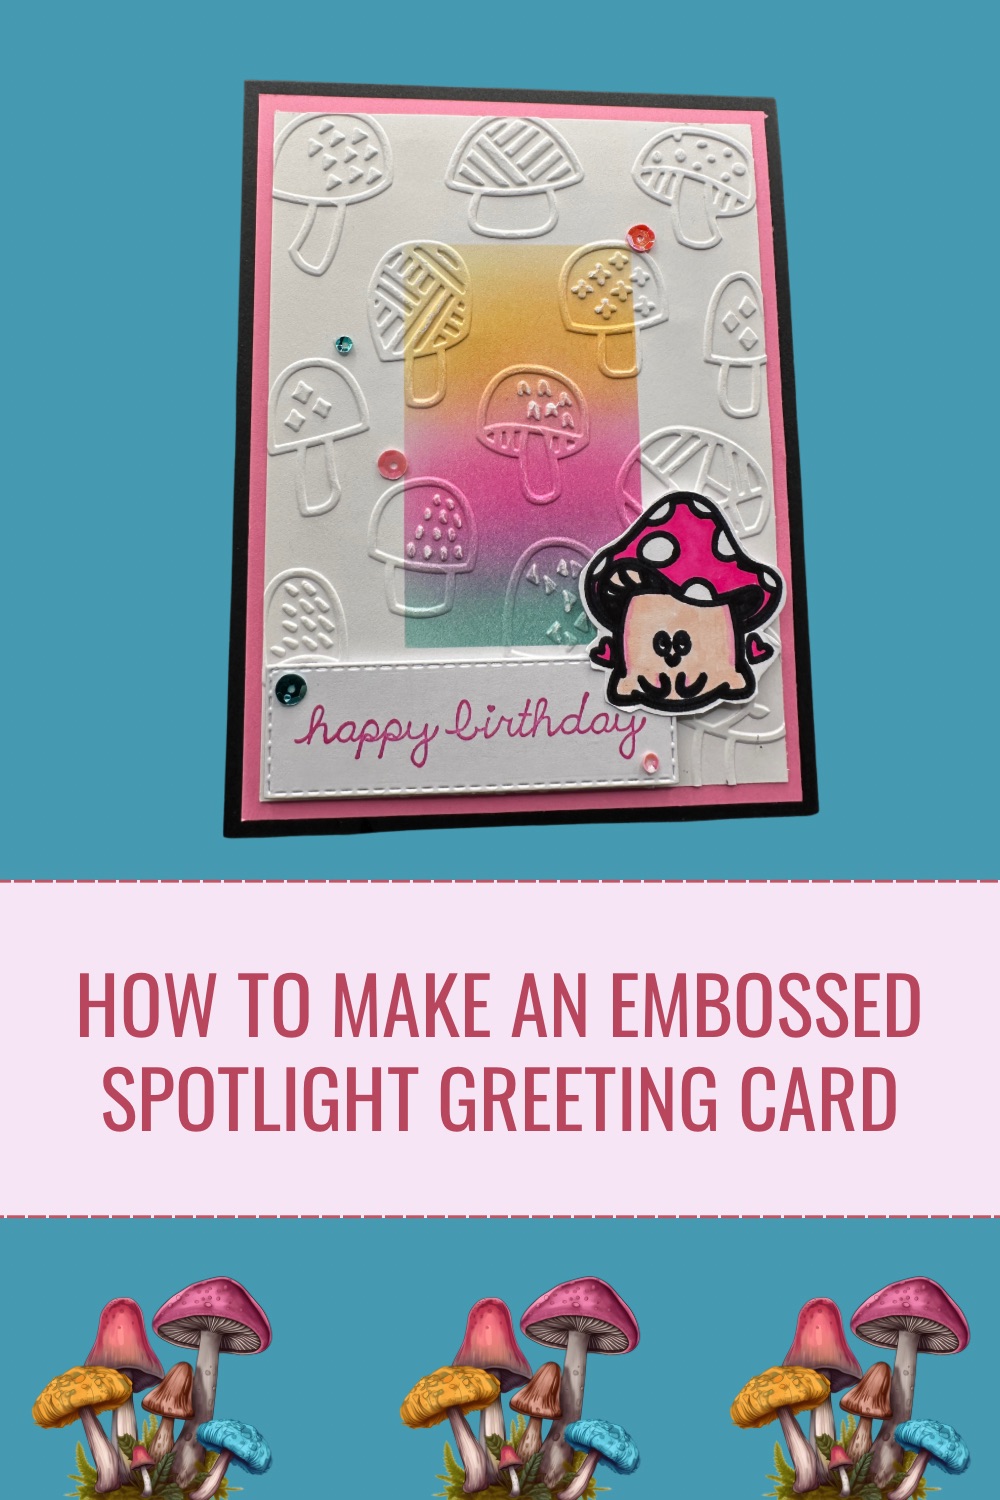
Easily Create a Focal Point
Hello and welcome to my studio. Today I am sharing a technique for creating a focal point on your greeting cards. This card uses a variation of that technique coupled with embossing. Spotlighting is a technique used with card making, scrapbooking and many other craft projects. It’s a fun and surprisingly simple way to create a greeting card!
There are other variations to this technique that I adore and will share some of them soon. Today’s project uses that spotlighting technique as well as embossing with an embossing folder, ink blending and rubber stamping. It’s so much fun! When I have an idea for a new project I actually get butterflies in my tummy I am so excited. Does that happen to you or is that just me? This card takes just minutes to make so you could easily make several at once. I like to make several at one time IF they are quick and simple and IF they would be enjoyed by various people and for various occasions. The sentiment on the front and the message inside are the only things that would have to change if we want this card to say “Hello”, “Hello Friend”, “Thank You”, “Miss You”…
Supplies I Used to Make This Card
** I do not earn commissions from any of the products I reference.
- 65 Lb Card Stock: black, pink, white
- Mushroom Embossing Folder – Darice- Can find this or similar on Etsy
- Ranger/Simon Hurley Ink Pads in colors: “triple berry”, “prom queen”, “guppy”and “slippery when wet”-https://www.scrapbook.com/store/ri-hup73284.html
- Distress Ink Oxide by Ranger/Tim Holtz in the color “evergreen bough”
- Mint Tape https://www.scrapbook.com/store/sbc-ptadh-4303-3.html
- Mushroom rubber stamp or Cricut Machine**
- Dome Foam Blending Tools – https://www.scrapbook.com/store/sbc-dome-1-2.html
- ”Happy Birthday” rubber stamp
- Stitched Rectangle Die
- Colorful Sequins
- Foam Dots
Let’s Do This
Right, so gather all of your supplies and remember, this is really about the technique so you can use whatever you have or whatever new things you find. Could be a good time to shop for something new. I mean, it’s always a good time to shop for new crafting supplies, right? This card is an A2 Vertical Score. Take your black cardstock and trim it to 4.25 x 11”. Score the long side at 5.5” which is the halfway mark. Fold and burnish to make the 4.25 x 5.5 vertical card base. Now trim a piece of pink cardstock to 4 x 5.25” and a piece of white cardstock to 3.75 x 5”. Take a scrap piece of white cardstock and stamp your mushroom or whatever image you choose and use markers, colored pencils, glitter gel pens… to color it in and then use scissors to cut around the stamped image. Set this aside for now. Take a piece of white cardstock and stamp your sentiment ie “Happy Birthday”. Use a stitched rectangle die to die cut the sentiment for the front of the card. Set this aside.

** I didn’t have a mushroom rubber stamp that I liked for this project- so, I used my Cricut machine and went into Cricut Design Space, chose a mushroom image I liked and had the machine to draw and cut the image from a piece of cardstock. Then I colored the image with alcohol markers. This is a very useful hack. Cricut Design Space has hundreds of thousands of images to choose from. We don’t always have to have rubber stamp sets- if you have a Cricut Machine, try and remember how awesome it is for all of your craft projects.

Lay your 3.75 x 5” piece of white cardstock onto a protected surface and use the mint tape to block off a rectangular area in the center of your white rectangle. Next, use your foam blending tools to ink the taped off section starting at the bottom and working your way to the top. Start with the “evergreen bough” then the “triple berry” then blending as you go up, next “prom queen” then “guppy”and finish with “slippery when wet”.

Now remove the mint tape and you’ll have a perfectly inked rectangle right in the middle of the white cardstock. Now place this paper into your embossing folder and run it through your die cutting/embossing machine.
It’s time to assemble the card! Adhere the pink cardstock onto the black base. Adhere the white embossed cardstock onto the pink. Use some adhesive foam dots to raise the “happy birthday” sentiment and then use some to raise the mushroom. Lastly, take some matching colorful sequins and place them on the card to add a touch of bling.


For this card, I used Google Docs to create the inside message, printed it out and then trimmed to fit inside the card. This is another useful hack to use when we don’t have a stamp that has the message we’d like to share. The end result of both this hack and the Cricut draw hack is that it looks the same as if we used rubber stamps! They are very useful and frugal tools to have in our crafting repertoire.
Thank you for joining me today here at Kelli’s Kraft Studio. I hope you enjoyed this cute mushroom greeting card make and that you find this technique useful for your upcoming projects. I will be sharing more useful card making techniques as well as other types of craft projects here on my blog so keep a lookout. Save this Pin and follow me for more. I will soon be sharing a St. Patrick’s Day toddler shirt using heat transfer vinyl, a spring wreath, and a hot foiled book marker so lots of fun times ahead! Until next time, bye bye!