How to Make This Pooh Bear Tee
Hello and welcome back to my studio! I am delighted you’re here so I can share this incredibly cute t-shirt project with you! I love designing my own t-shirts, hoodies and home décor. The Cricut machine has been an essential tool for all of my creativity for years. So today I thought I’d share a tutorial for how to make a t-shirt with Cricut!
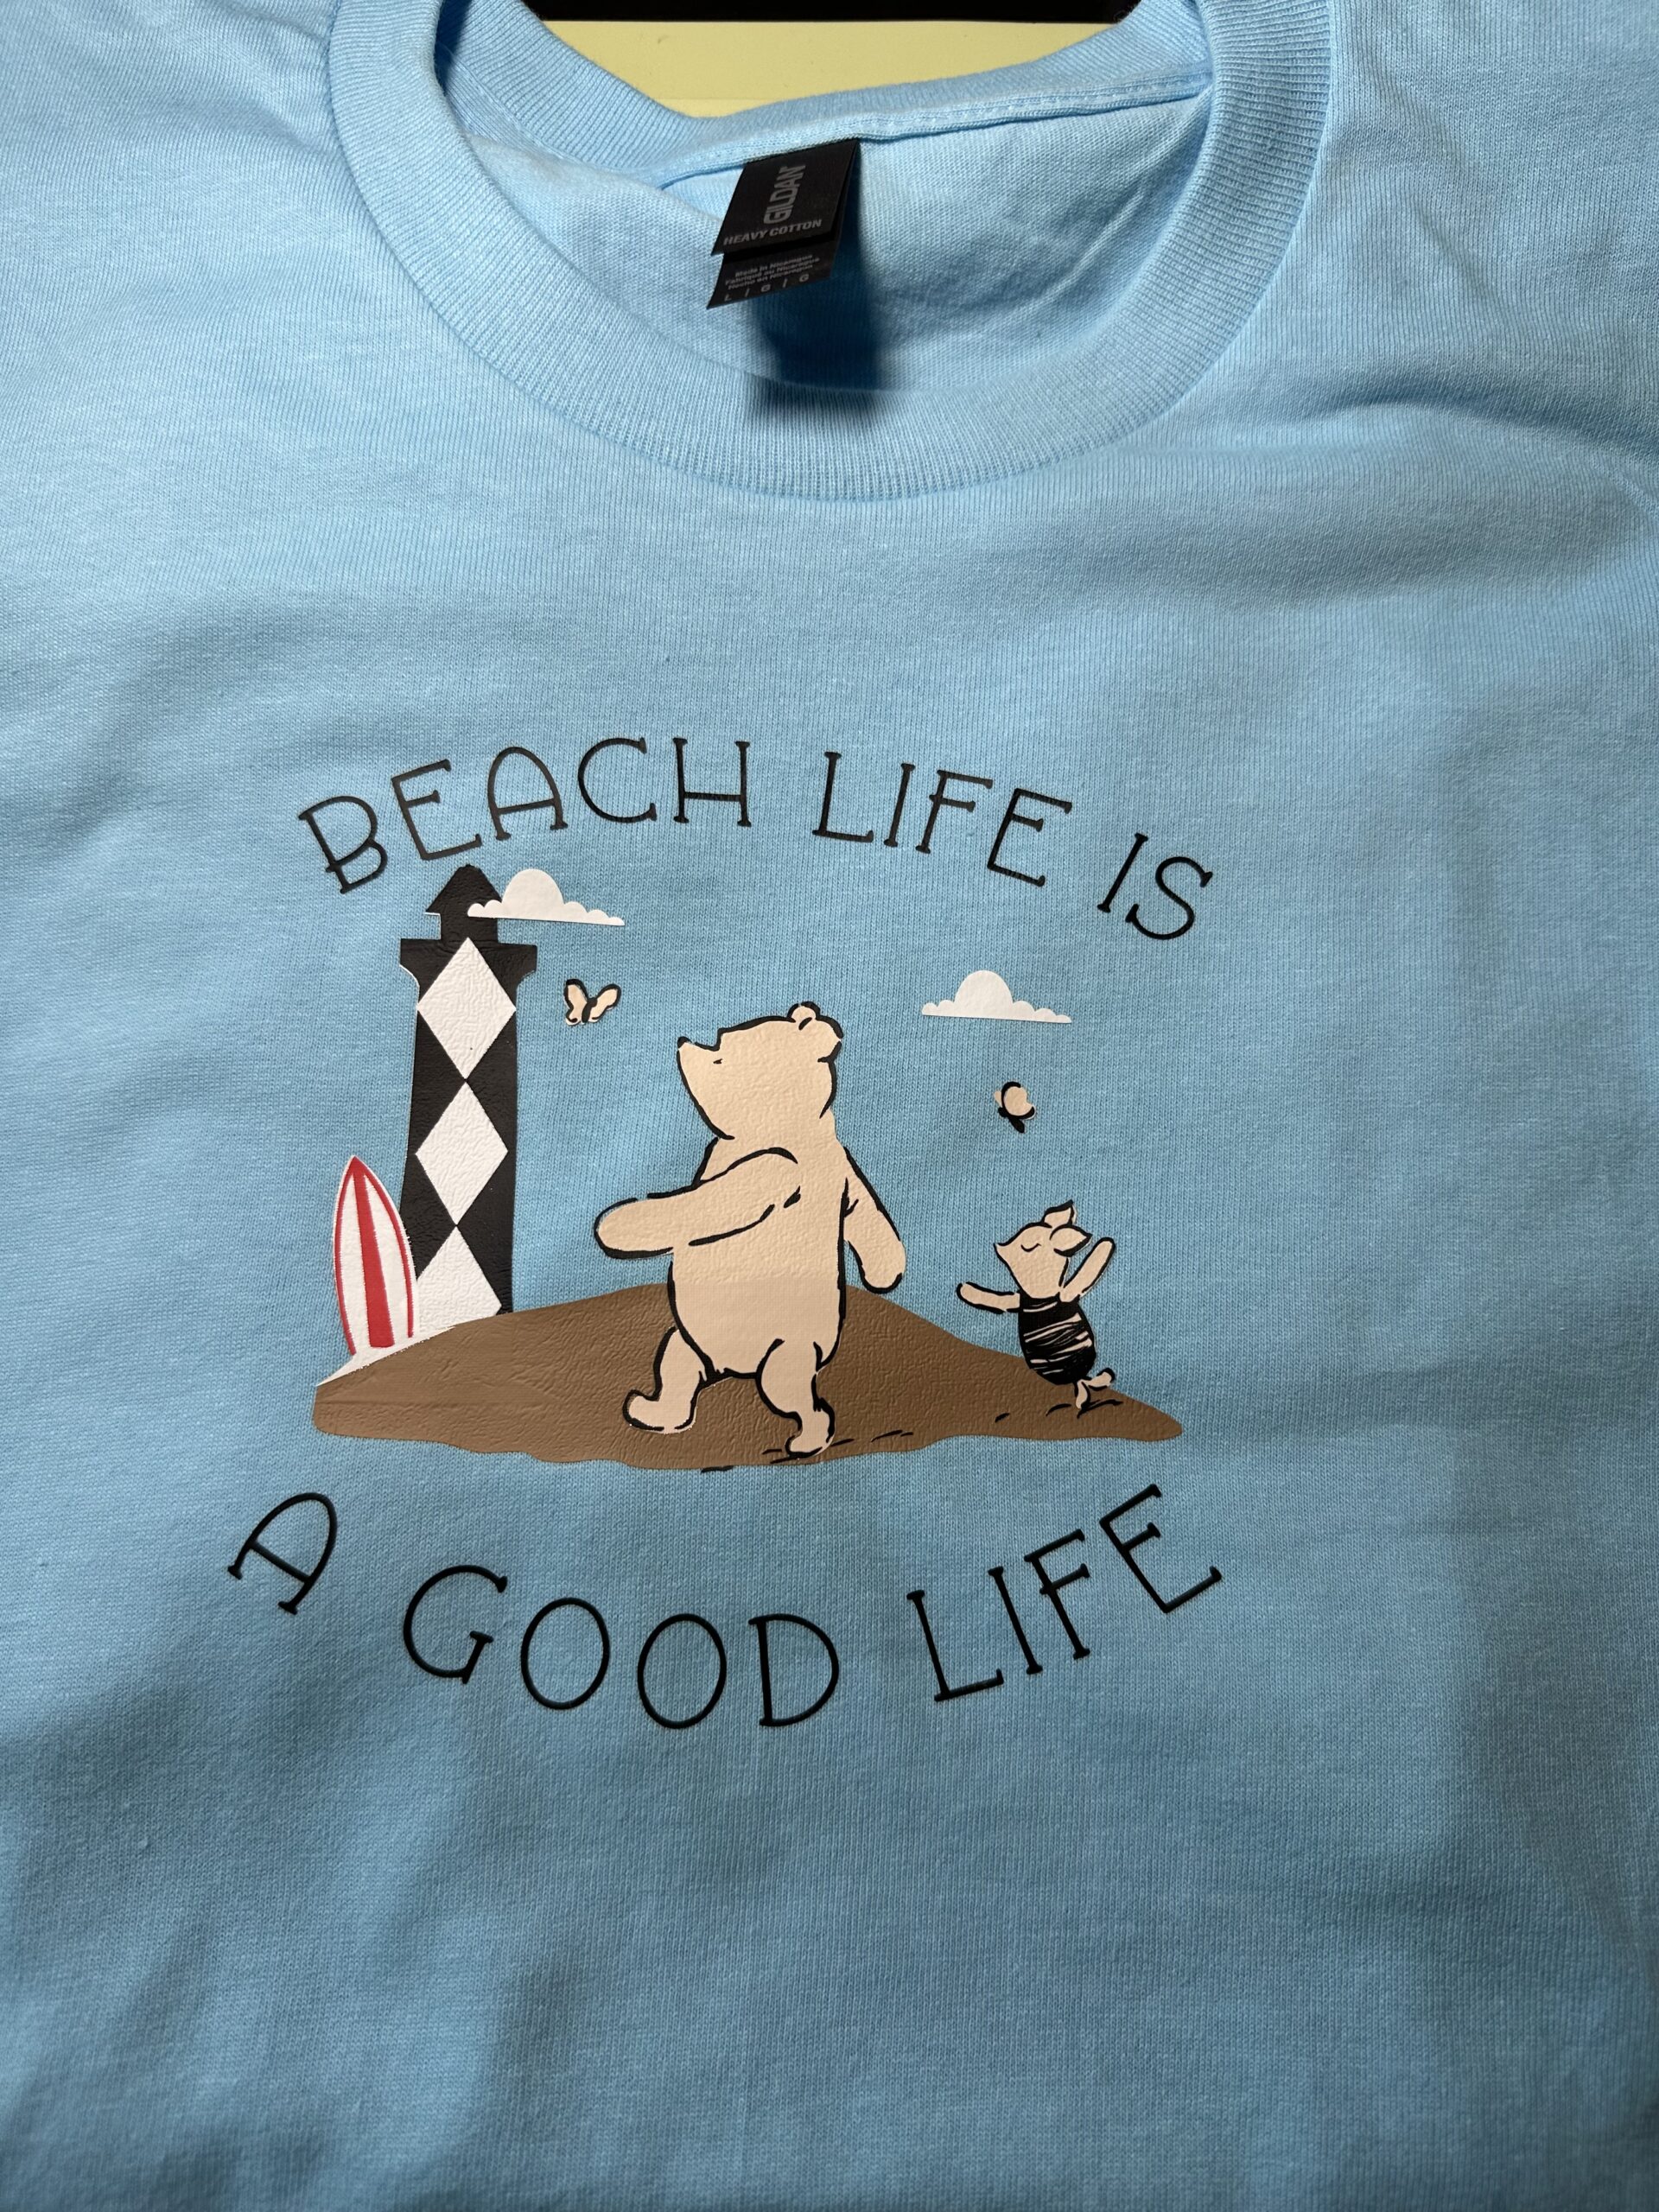
My most recent t-shirt project is this one with Winnie the Pooh at the beach. I used the Cricut machine and Cricut Design Space to design this scene and cut all of the images from Heat Transfer Vinyl. Then I simply applied the individual images, creating the scene, to the front of the shirt. I knew I wanted this shirt to have Disney’s Pooh bear, some beach elements and a lighthouse.
Yes, we have access to several Disney related images on Cricut Design Space which is the software used with the Cricut machines. We do have to purchase these images for a small fee, even if we have Cricut Access. But I think it’s amazing that we have these choices! We can also upload our own images like JPG, PNG and SVG files that we can purchase from independent creators on platforms like Pinterest and Etsy. There are loads of choices for us. Below, I’ll share a list of supplies, a link to my FREE design and the few easy steps to making a t-shirt with Cricut!
SUPPLIES
- T-shirt
- Cricut machine
- Heat Press or Home Iron
- Heat Transfer Vinyl (HTV) in colors: black, white, light tan, light brown and red
LET’S GET KRAFTY!
If you are using my FREE design as is then this is going to be a very straightforward project. I have made this Pooh bear at the beach scene and I’ll share the link below. If you are feeling creative, you can always take a look at my design and create one of your own! For instance, I made the lighthouse in this design to look like the lighthouse at Cape Lookout which is at the Outer Banks of North Carolina. That’s one of my very favorite places to go. If you have a favorite beach, you could use an image or create an image to signify that beach.
REMEMBER
WANT TO SEE MORE?
READYING TOOLS AND SUPPLIES
Now it’s time to get started by readying our tools and supplies. We’ll turn on the Cricut machine, and set up our heat press or iron where we will be using it. I finally have mine set up in a permanent place in my craft room. No more storing it in a closet and finding a place to use it, whew! Next we will choose our colors of HTV. For the scene I created, I used black for the words, “Beach Life Is A Good Life”, the lighthouse and the outlines of Pooh, Piglet and butterflies. I used a light tan for Pooh, Piglet and butterflies. There’s light brown for the beach sand, white for the lighthouse, surf board and clouds and red for the surfboard.
MAKING THE CUT
Here’s the link to my free design in Cricut Design Space. Here’s where you can choose to “MAKE IT” or “CUSTOMIZE IT”.
Link to my Design “ Beach Life is A Good Life with Pooh Bear”https://design.cricut.com/landing/project-detail/67f9b7da007f07735885b58f
To use my free design, click on the link and it will direct you to Cricut Design Space. You’ll click the “Make it” button and the design will come up in layers.

REMEMBER TO MIRROR THE IMAGES ON EACH PAGE for this because it’s HTV. My HTV, and I believe most, calls for placing the vinyl on the cutting mat with the shiny side, pretty side down. Just place the color of vinyl that is showing on your screen.
Set your material to “Heat Transfer Vinyl”. Place the mat into the Cricut and press “NEXT”. It’s quite easy to make t-shirts with Cricut! Once you’ve made one for yourself, you’ll see how simple and fun it is and you’ll likely become addicted to making your own shirts.

WEEDING THE IMAGES
Once the first cut is made, go ahead and weed it. This way you can make certain all of your settings are working for you. Remove the mat from the machine and then remove the vinyl. Warning: sometimes it can be difficult to see exactly where the cut was made. Adjust your lighting until you can make out where the design is. Trim off the part where the image cut and set the rest of the unused vinyl aside for another time. Remove the backing from the piece that has the cut design. This is the weeding process. If you’ve never done this process before, here’s a link from Cricut: https://youtu.be/UeZg7Tc0384?si=4PB8YX7FExgFzDrn
Cut and weed each color layer of your Pooh at the Beach project. Turn on your heat press adjusting the settings as per the brand of HTV you are using. Mine said to set the temperature to 305 degrees and press for 20 seconds. Mine also says to allow the image to cool completely before removing the plastic backing. This is very important.

HEAT SETTING THE DESIGN
This is the part that is most fun to me. We create the scene on the t-shirt by applying the vinyl in layers. I started with the “Beach Life Is” at the top in order to be able to center the design. Then I transferred the lighthouse so that it’s in the background a bit. Place the white lighthouse piece, then the black over the top.
Next is the sand, then the white part of the surfboard, then the red part. The next part is the light tan Pooh and Piglet and butterflies that all apply together. That’s a bit of a time saver. Now you place the black “drawn” outlines for Pooh, Piglet and the butterflies and your t-shirt is coming together nicely. Just take your time placing the images, heating them, and then cooling and removing the backing.
The next part is the words at the bottom of your scene, the “A Good Life”. And lastly, transfer the clouds, one at a time, to where you’d like them.

ADMIRING YOUR DIY T-SHIRT
You have now completed your t-shirt with Pooh bear at the beach! If this is your very first HTV project or t-shirt, congratulations! You did it! I find making my very own designs so fun and rewarding. I enjoy being able to have some items that are very personal to me and I also enjoy making things to give to others! I suppose that’s why I’m a crafter, right?
I believe we have this in common or at least you’re thinking about crafting if you’re reading this blog post. That makes us kindred spirits, right? I hope you love it as much as I do.
If you’re seeing this on Pinterest, how about giving it a LIKE and remember to save this for future reference. If you have any comments or questions, feel free to comment below and I’ll do my best to give you an answer.
I have really enjoyed sharing this tutorial on how to make t-shirts with Cricut! I hope it inspires you to give it a try or make it your own and just always remember to Keep it Krafty! Until next time, bye bye!