
Use Your Cricut & My FREE Design
Hello and welcome to my studio! Let me just say it means a lot to me that you’ve chosen to visit my blog. Because today, I am sharing three decor ideas for a Halloween Dinner Party. Yes, that’s right. Why should Halloween just be fun for the kiddos?
I don’t know about you, but I’m past the years of costume party partying . However, I do enjoy a quaint little dinner party with somewhere between 4-8 guests. And each year I host a small Halloween dinner party consisting of yummy but simple appetizers, a meal and a dessert. I also do a bit of decorating for the occasion.
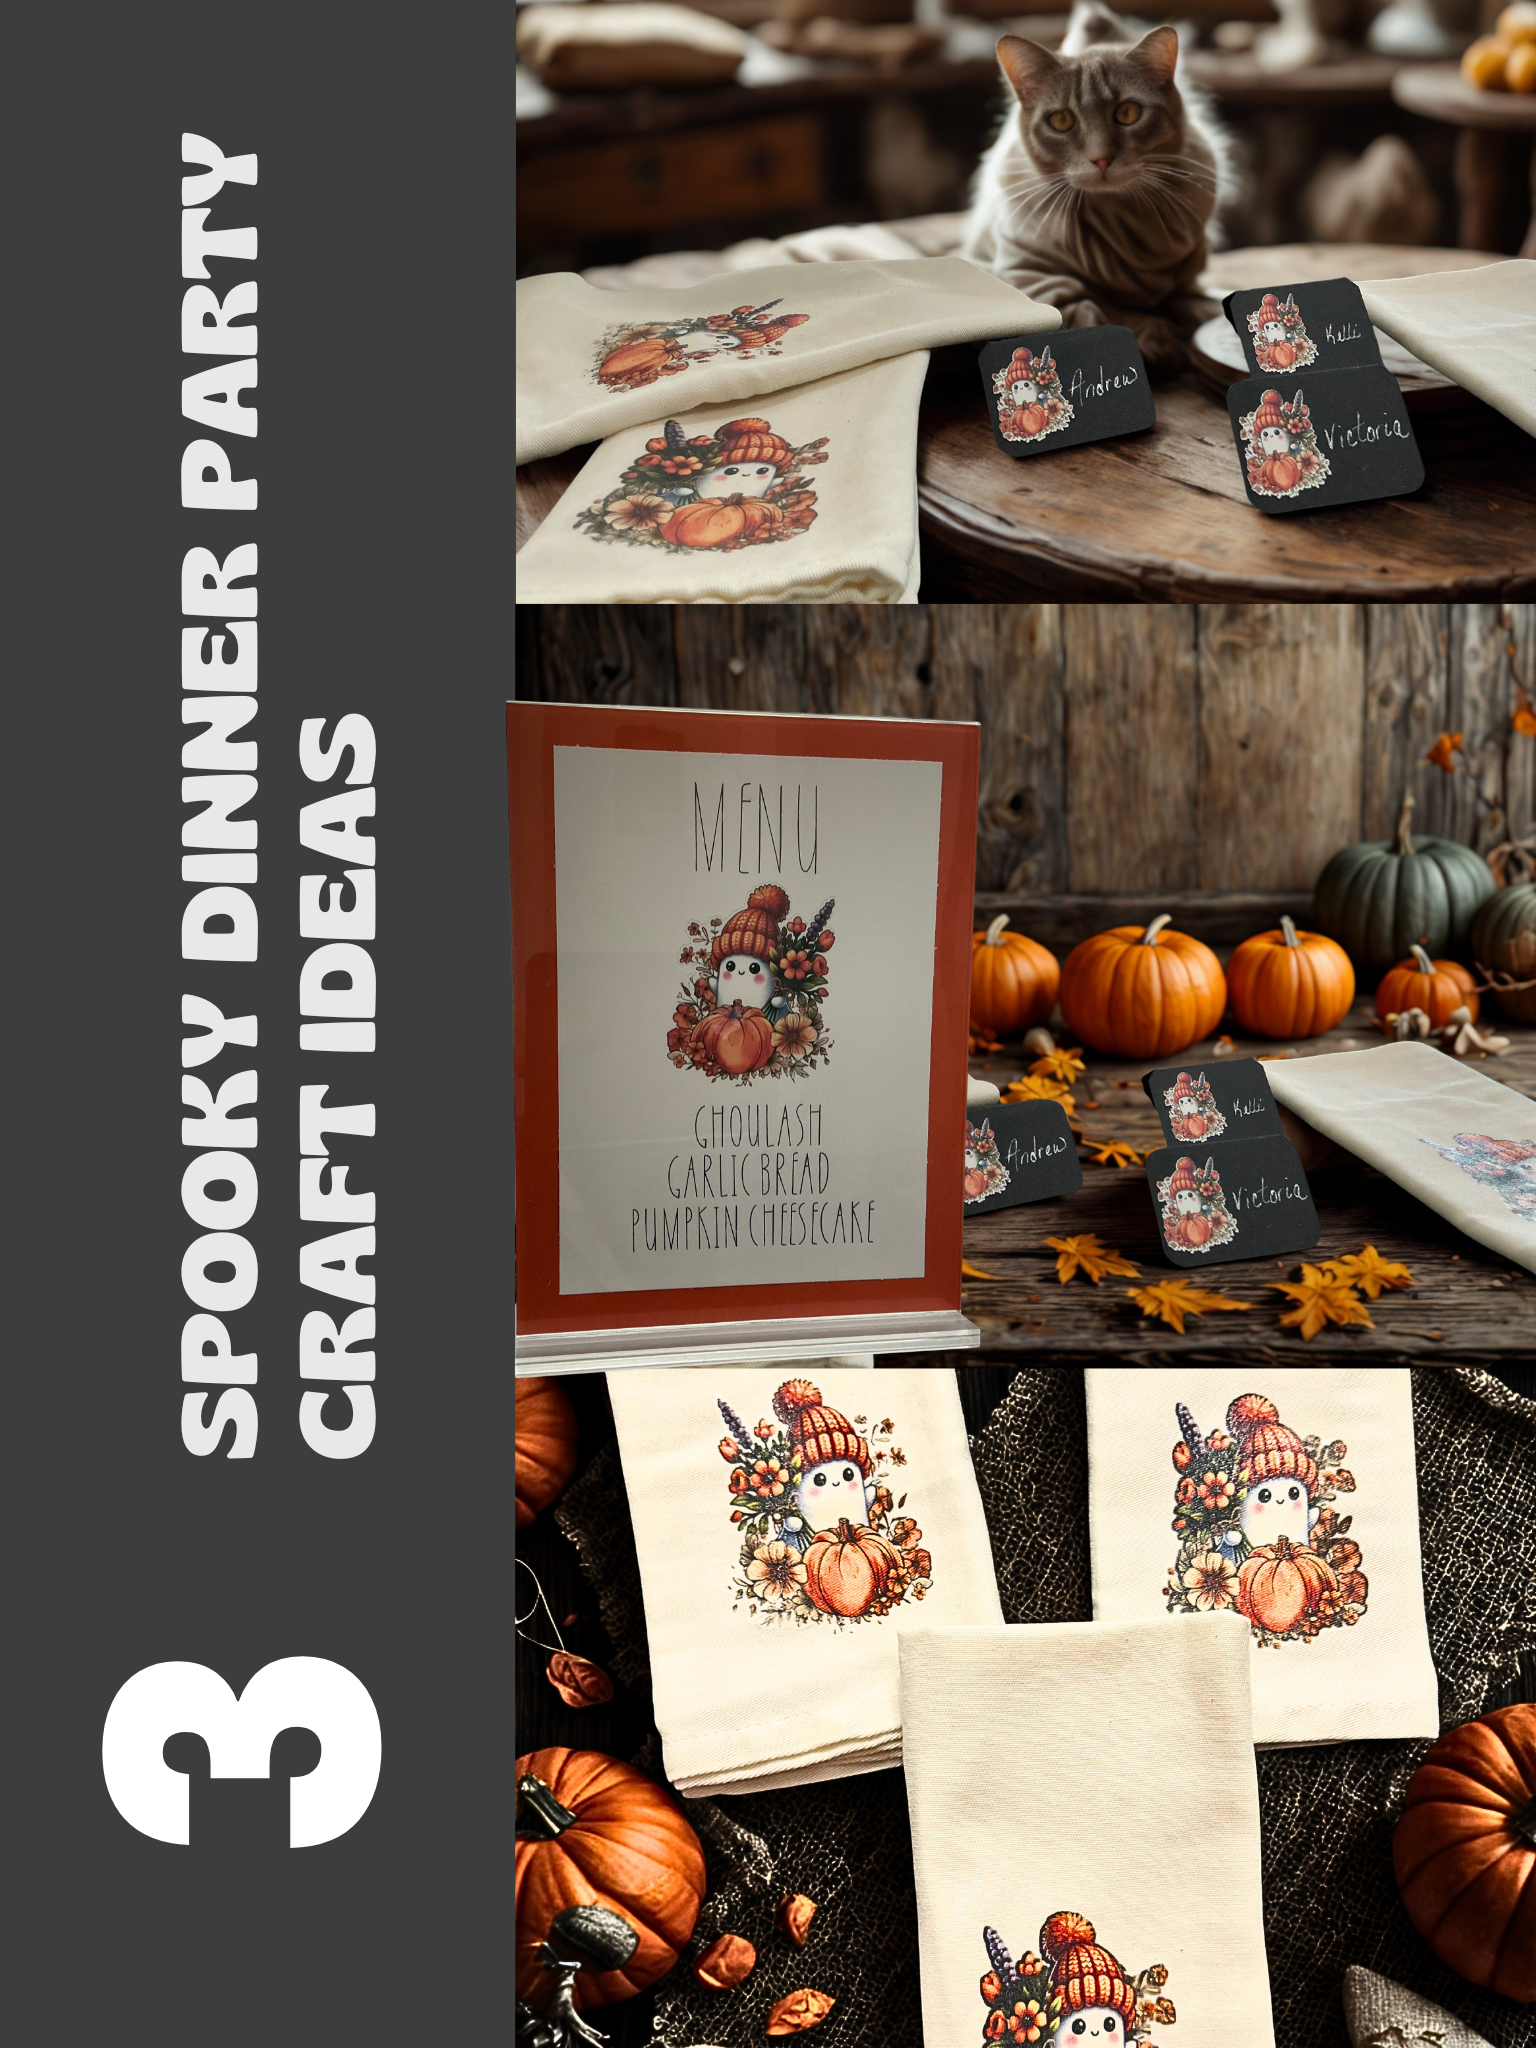
With that being said, I make most of my decorations. I love to create matching elements for parties and Halloween offers many crafty opportunities. So for this year’s party, I designed matching napkins, place cards and menu. These all have the same adorable little “ghost with pumpkins and flowers” design.
Keep reading below to see just how quick and easy these projects are to make using your Cricut along with a link to my free designs. Next, I’ve added a list of the supplies I used to make these projects. And of course feel free to make any or all of these designs for your next Halloween party.

List of Supplies
- CARD STOCK: WHITE, BLACK
- LINEN NAPKINS
- 8.5 X 11” ACRYLIC SIGN HOLDER: Find it on Amazon
- IRON ON TRANSFER PAPER [light] if using light colored napkins OR [dark] if using dark colored napkins. Find it on Amazon
- HOME IRON
- GLUE
- CRICUT smart cutting machine: I used my Cricut Joy Xtra for this
- CRICUT JOY PENS
Want more card making & crafting inspiration?
Follow me on social media
Let’s Get Krafty: CUTE BUT SPOOKY DINNER NAPKINS

First things first, let’s make the dinner napkins. These may seem a bit daunting but never fear, they’re really easy to make. Decide how many napkins you’d like to make. Hint-make a couple more than you think you’ll need. You never know who will pop in and that way you’ll have matching napkins for your newest guests also. Grab your iron and set it up somewhere with a hard surface. It’s a good idea to go ahead and prepare your napkins. Iron them and fold them. I use a piece of tape to mark the spot the image will go.
Next, click on the link. The link will take you to my design in Cricut design space. You can use my design for free. Place a piece of the transfer paper into your printer. I’ve “grouped” the different sizes of ghost images together so that you can differentiate which are for the napkins (to be printed on the iron on transfer paper) and the smaller ones which will print on white card stock to be added to the place cards. Before you print– Go into your “layers” and (HIDE) the group with the place cards and smaller ghost images. This is so that only the larger ghosts will be printed on the Iron-on transfer paper.
FOLLOW the directions on the transfer paper you purchase. Choose the “CUSTOMIZE” option when linked to my design, follow the prompts and Cricut will lead you through each step. In my design, if you do not choose to customize the design, the measurements of all the images are set to fit the napkins, the sign for the menu (more about this below) and the place cards.
TO GET THE LINK TO MY FREE DESIGN IN CDS –
Once you print the ghost images on your transfer paper, you’ll load it into your Cricut and they will all be cut out for you. Then you simply iron one on each napkin. Again, be sure to follow the directions on the product you bought. These steps are very easy and only takes a few minutes from print to cut to ironing the image onto your napkins. I think you’ll be amazed at how simple this is. Plus it’s fun!
CUTE BUT SPOOKY PLACE CARDS

Now you have your napkins all finished up, and see how easy that was? It’s time to make the place cards. If you thought the napkins were a quick and easy craft, wait till you see this part. FIRST, remember to go into your “Layers” and (un-hide) the group with the place cards and small ghosts. Then (hide) the group with the larger ghosts. Place a piece of WHITE card stock into your printer so that the small ghosts can print then cut.
Again, following the prompts on Cricut Design Space, add your chosen color of card stock on the mat and allow Cricut to cut your place cards out for you. You’ll then score and fold them in half so that they stand up. You’ll have already print and cut the small ghost images, so now all you have to do is use glue to adhere them to the left hand side of your place cards leaving enough room for the names of your guests. My place cards are black so I used a metallic pen to hand write the names. All of the ghost images work on both light and dark colors.
CUTE BUT SPOOKY MENU SIGN

Finally, it’s time to customize your menu, unless you plan to make the same things I did. All you have to do is go onto the canvas and down to the bottom of the page and click “ACTIONS” then click “DETACH”. Now, click on the menu item you wish to change and change it. Realign your menu and then select the entire menu with the rectangle and click “ACTIONS” then click “ATTACH”. If you’re familiar with CDS, this is already understood but I wanted to add this information for those who may be new to this software.

First, add a piece of white card stock to your printer and the ghost will print. Then place the card stock on the mat and you’ll be prompted to add a pen into your Cricut at the proper time. So, just use whatever color you wish. I used a black glitter gel Cricut Joy pen. Then your machine will cut out the rectangular menu sign. This is what you place inside of the acrylic sign holder, if using. I added a piece of dark orange card stock behind to add a bit more color. That’s it! You’ve now created your very own matching menu for your Halloween dinner party.
KEEPING IT KRAFTY
In closing, I do hope you’ve enjoyed these three matching projects today. Like I said earlier, feel free to use any or all of these designs. You can make all of these elements for a fun little dinner party in just one afternoon. Your guests will love it and they will definitely think you’ve worked on all of this for weeks.
In my previous posts, I made some fun party favors that I’ll be offering my dinner guests. One of the favors is a decorative Halloween dome cup holder that I fill with candies and small gifts. The other favor is a decorative Halloween coffin box that is just so sticking cute! I have those filled with candies and small gifts as well. So be sure to check out my latest blog posts to see those. Whatever it is you decide to make just make it your own and always remember to keep it krafty! Bye-Bye!
WANT TO SEE MORE?
VISIT MY BLOG ARCHIVES
