
There’s More to Cricut Cards Than Cut-Outs
Hello and welcome to my studio! I am so happy you’ve joined me today because I am sharing the how-to for this easy breezy cricut card.
Most of us, when we are new to the world of Cricut cutting machines, think of the machine as something for which to cut vinyl for decorating things like personalized tumblers or t-shirts. When we learn we can use Cricut to make greeting cards we usually see the cut-out types like these:

These are great designs. However, there’s so much more we can do with Cricut. In PREVIOUS POSTS, I’ve mentioned that we can use this machine for many types of crafts and I find it to be an invaluable tool for creating greeting cards.
I love using stamps and etched dies in my crafts and I have loads. There’s an ever growing demand for and a growing supply of stamps and dies on offer from various companies. I just love it all.
That being said, I only have but so much room to store everything. And no matter how many stamps and dies I have, I often want something I don’t have in my craft room. At that point I look to my Cricut machine. With that machine, we have literally thousands of images to use in our creativity.
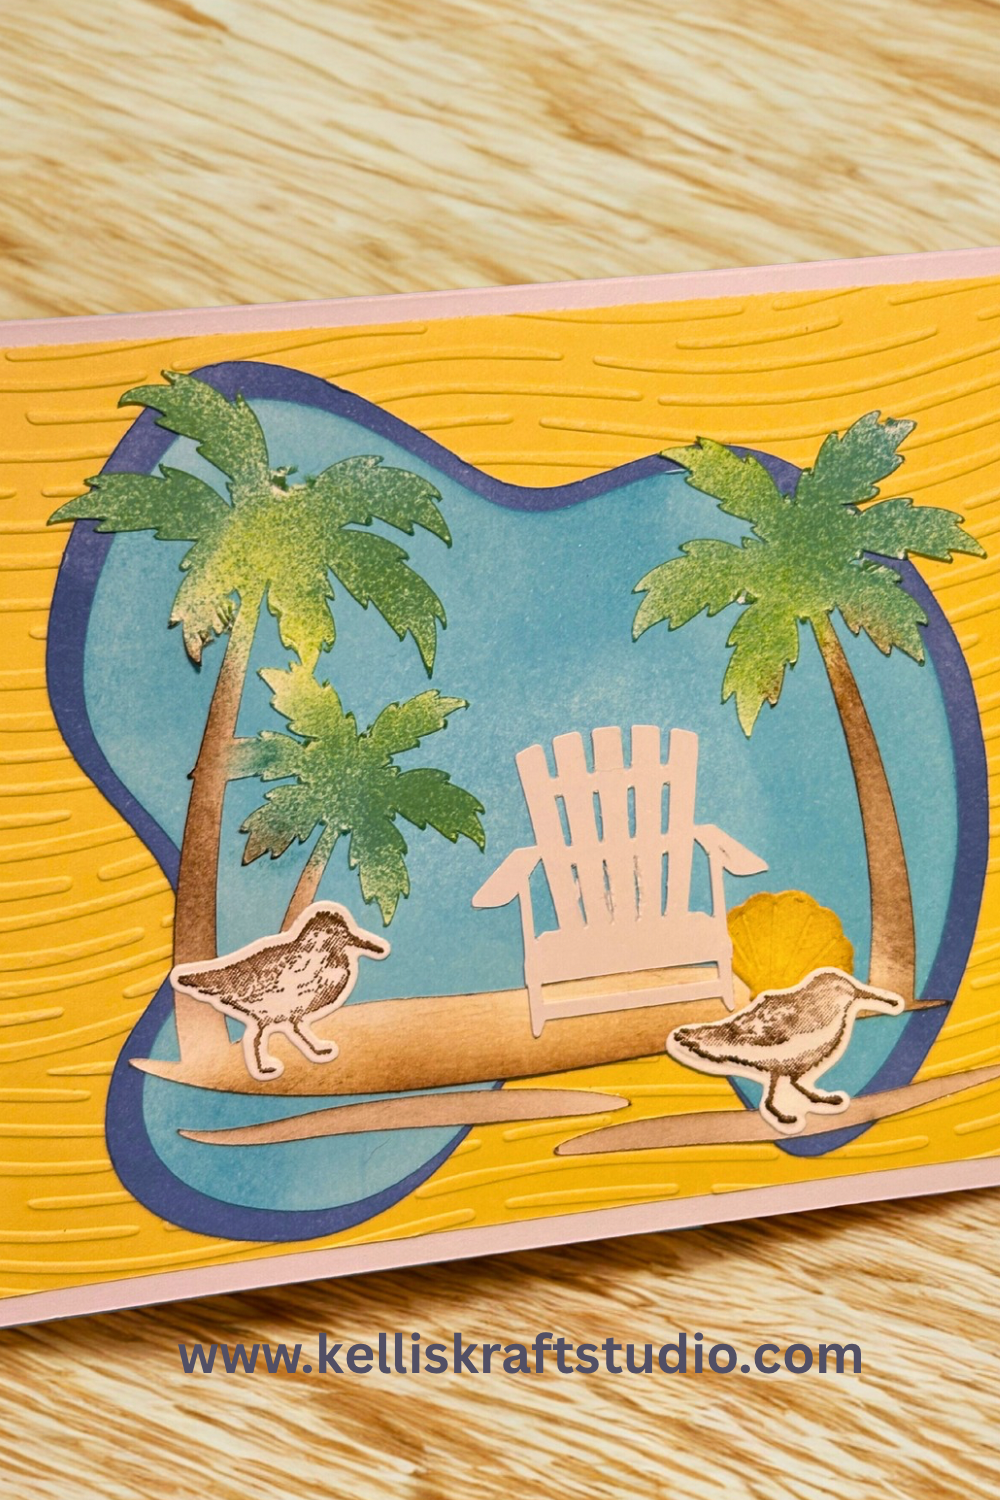
This card uses Cricut for the water, island, chair and (optional: bird) images. Then I used a stamp and die set for the little sandpiper birds running along the shore. Keep reading below where I’ve shared a list of supplies (along with helpful links-these links are for your convenience only. I do not earn commissions from the sale of any of these products.)
I’ll also share the steps for making this easy breezy Cricut card as well as a link to my free design in Cricut Design Space.

List of Supplies
- White A2 Card Base
- Light Yellow Card Stock
- Embossing Folder: wave pattern (no longer available) BUT here’s one even better from Stampin’Up! https://www.stampinup.com/products/soft-waves-3d-embossing-folder
- Card Stock: White
- Card Stock: White( Classic Glossy Cardstock ) by Scrapbook.com https://www.scrapbook.com/store/sbc-paperpad-147.html for the chair
- Ink Pad: “Weeping Willow” by Simon Hurley/Ranger https://www.scrapbook.com/store/ri-hup82262.html
- Distress Ink Pad: “Evergreen Bough” by Tim Holtz/Ranger Ink https://www.scrapbook.com/store/pp-th-tim32854.html
- Foam Ink Blending Tools
- Distress Ink Pads: “Broken China” and “Faded Jeans” by Tim Holtz/Ranger Ink https://www.scrapbook.com/store/gb-tim21414.html
- Stamp & Die Set: Seaside Bay by Stampin’Up! Retired: can be found on eBay here https://www.ebay.com/itm/388728372567


Let’s Get Krafty
- First, trim a piece of yellow cardstock to 4 x 5.25” and emboss it with the wave embossing folder.
- Go to my design in Cricut Design Space with this link: https://design.cricut.com/landing/project-detail/689bbfaa231f317be762429e
- Have your Cricut cut the 2 bodies of water and the island from a piece of white cardstock.
- Have your Cricut cut the chair from a piece of Glossy White Cardstock
- Use a blending tool to blend the smaller body of water with the “Broken China” Distressed Ink- and use the “Faded Jeans” ink for the larger body of water
- Blend the tree trunks and the island sand pieces with the “weeping willow” and the tree tops with the “evergreen bough”
- Use the little trio of sandpiper birds from the Seaside Bay stamp set and STAMP & DIE CUT the birds using the “weeping willow” and the matching dies from the set-if you don’t have this set, never fear { I’ve added some cute birds that will draw and cut in the Cricut design}
- Assemble your card by adhering the embossed yellow background to the white card base. Next, use glue to layer the rest of the adorable pieces to the card front.
- Lastly, adhere your little die cut birds onto the front panel wherever you think they should go.
Want more card making & crafting inspiration?
Follow me on social media
Admire Your Easy Breezy Cricut Card
Finally, attach the card front to your A2 (4.25×5.5”) card base and set it up on your work surface. Now sit back and admire your ever so sweet, easy breezy Cricut card. We must remember that if we have a Cricut smart cutting machine, we have thousands of images we can use every day. If you use your Cricut even once a week, I highly recommend you subscribe to Cricut Access because it pays for itself quickly. This little machine gives us the equivalent of literally thousands of images we can use for our greeting cards, tags, bags and boxes.
If you are new to Cricut, don’t worry, the software, Cricut Design Space, is easy to learn and you’ll be able to make a project on your very first day. I was super worried about that before I bought my first machine and that worry held me back. So, anyway…
I hope you’ve enjoyed this project today! This cute summery design comes together quickly and is a lot of fun to make. You can add whatever sentiment suits your needs and don’t forget to place a message inside! Whatever it is you decide to make, just make it your own and always remember to keep it krafty my friend!
