
Transform Plain Card Stock Into A Work of Art
Hello and welcome to my studio. I am so happy to have you join me today. This is such a fun project to make. We can create our own designer paper with just a bit of card stock, embossing folders and some ink. Our designed paper can then be transformed into a beautiful greeting card. It could also be transformed into framed artwork for your home.
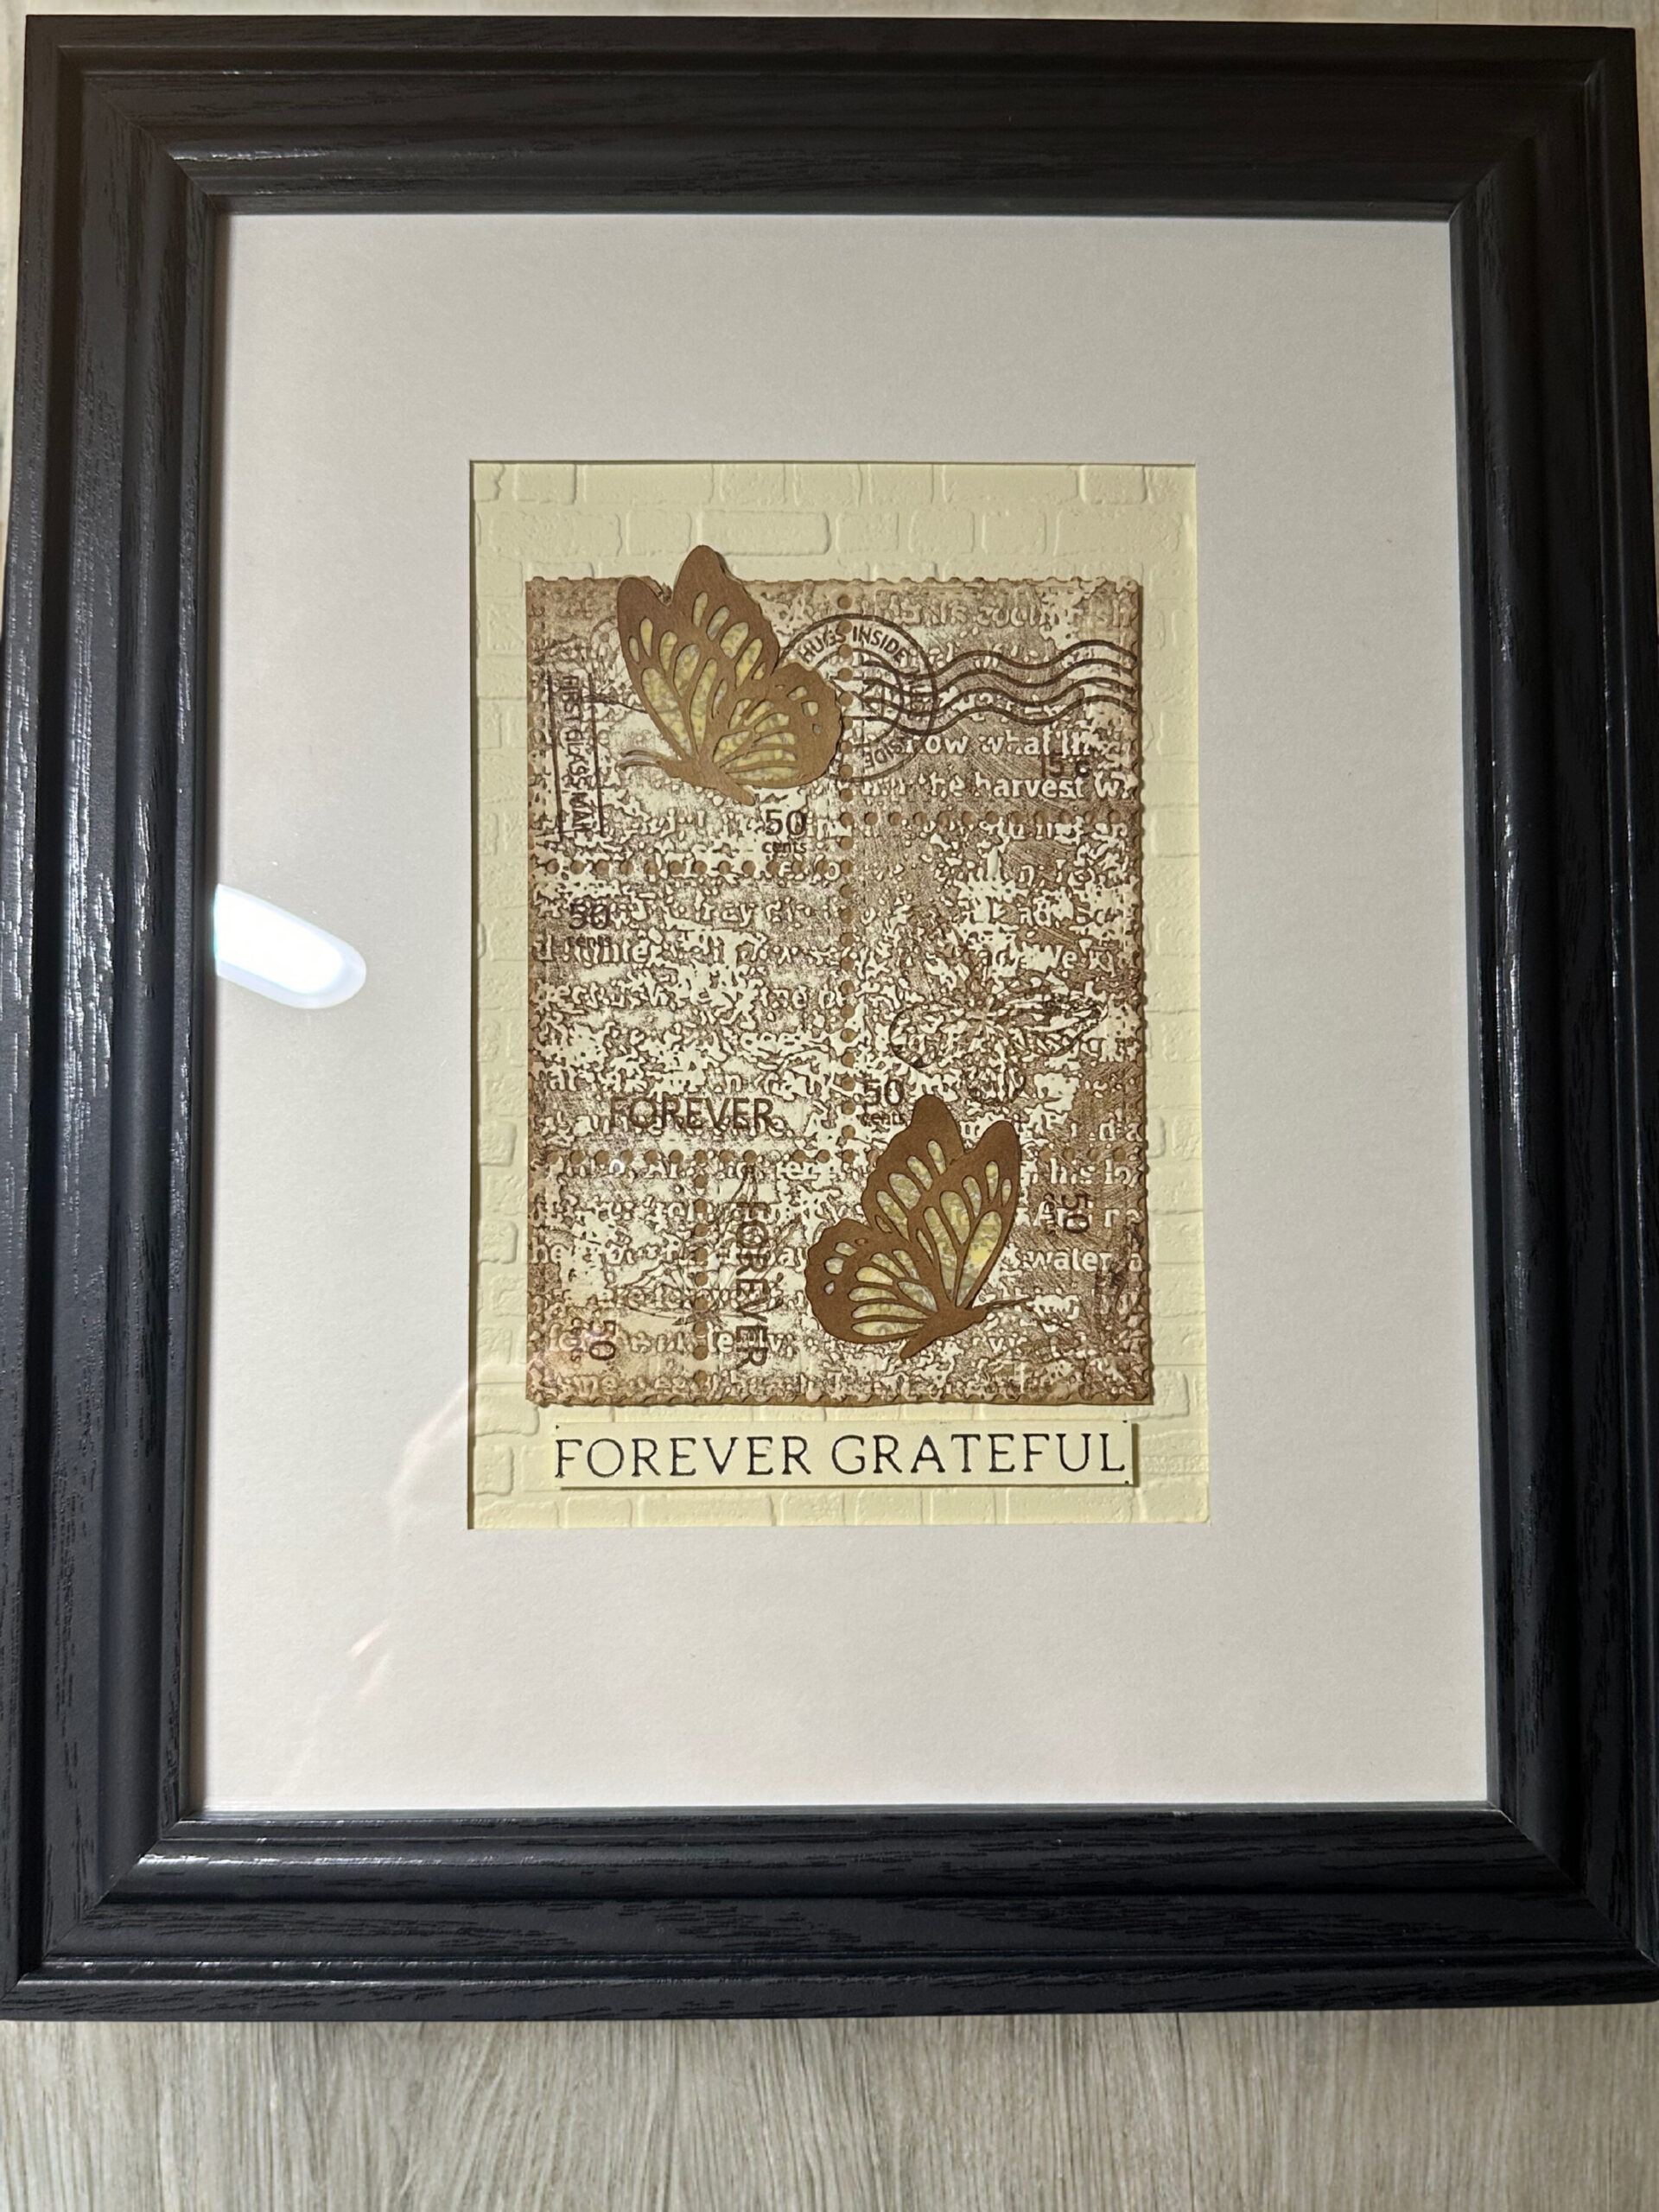
The design I’m sharing here today is for a “Forever Grateful” greeting card. However, keep in mind that this design can be used for a plethora of greeting cards from “thank you’s” to “hello’s” to “thinking of you’s” and even “happy birthday’s”.
I wanted to make a card that had a vintage postage stamp vibe. I didn’t have any designer paper that would fit that vibe so I began searching online for some paper. I was too impatient to wait for the paper to be delivered so I thought, “Maybe I can make my own vintage-ish paper.”
Recently, I have been inspired by mixed media designs in greeting cards and artwork. So, an idea was born. I’d use some various papers, tools, inks and techniques to make my own designer paper. This paper has visual depth and dimension and well as plenty of texture to appeal to the senses. Below, I’ll share a list of supplies I used for this project. I’ll also share a few easy steps to creating this look.

List of Supplies
- CARDSTOCK: “ VANILLA MALT” by Lawn Fawn https://www.scrapbook.com/store/lf-lf1576.html
- CARDSTOCK: “ PAPER BAG” by Lawn Fawn https://www.scrapbook.com/store/lf-lf1574.html
- SMOOTH VELLUM SHEETS by Scrapbook.com https://www.scrapbook.com/store/sbc-ptadh-7717.html
- INK PAD: “WEEPING WILLOW” by Simon Hurley https://www.scrapbook.com/store/ri-hup82262.html
- EMBOSSING FOLDERS: BRICKS 3D and TYPESET 3D by Stampin’Up!
- POSTAGE COLLAGE DIE: by Waffle Flower https://www.scrapbook.com/store/wfc-421382.html
- POSTAGE COLLAGE “POSTAGE” STAMP SET by Waffle Flower
- https://www.scrapbook.com/store/wfc-421381.html
- BUTTERFLY STAMPS
- GLIMMER HOT FOIL MACHINE by Spellbinders(for the sentiment “forever grateful”) https://www.scrapbook.com/store/spe-gls-005.html
- GLIMMER FOIL FOR HOT FOILING ( pewter color- for the sentiment) https://www.scrapbook.com/store/spe-glf-023.html
- CRICUT MACHINE ( for the 2 double-layered cardstock & vellum butterflies) https://cricut.com/en-us/cutting-machines/cricut-joy/cricut-joy-xtra/cricut-joy-xtra/2010313.html
- HOT FOIL PLATE ( FOREVER GRATEFUL )
LET’S GET KRAFTY


Emboss Your Vanilla Card Stock
This is the base of your card.
Use the 3D brick embossing folder to emboss a piece of vanilla card stock. Then trim it to 4.75 x 6.75”.

Ink & Emboss Another piece
This is the front of your card.
Swipe the “weeping willow” ink pad across the ”typeset 3D “ embossing folder. Then emboss the card stock. Then emboss again with the brick folder (no ink). This gives the paper depth, dimension and a beautiful texture.

Die cut the inked & embossed card stock
Use the “Postage Collage” die to die cut the stamp shape from the inked & embossed card stock.

Decorate Your Die Cut Panel
Use the “weeping willow” ink pad and the postage stamp set and some butterfly stamps to further decorate the front panel of your card. Using the same dark brown ink for stamping as we did for the embossing gives the paper that vintage look.

Create 3D Butterflies
Further Decorate your card front with some butterflies.
Create some 3D butterflies by using a butterfly etched die- if you have one-(I sadly do not). I used my very handy Cricut machine to create the 2 layer butterflies from vellum and card stock. I lightly colored the vellum butterfly bases using a yellow ink pad and a foam ink blending tool.
Adhere the brown decorative butterfly piece to the vellum butterfly layer.

Create Your Sentiment
I used the Glimmer Hot Foil machine, pewter colored glimmer hot foil and a “forever grateful” hot foil plate to make this sentiment. However, you can simply stamp a sentiment and cut it out to adhere to the front of your card.
Want more card making & crafting inspiration?
Follow me on social media
Building the Card
To build this card, follow the steps above. Also, you’ll want to trim a piece of “paper bag” card stock to the same size as the die cut postage collage, roughly 3.75x 5”. This will be placed behind the inked and embossed “stamp collage” so that you can see the different sections easily.
Finish up this card by adhering the layered, designed panel to the 5 x 7” bricked vanilla panel. Then adhere the butterflies to the front panel and the sentiment centered underneath.
Admiring your “Artwork”
Embossing the card stock and then stamping it using the dark brown ink creates this visually appealing and beautifully textured “designer paper”. Lots of different embossing folders will work for this technique. Linens, small words, tiny flowers… Inking the inside of the embossing folder then embossing the paper creates a stunning aesthetic quality. The raised aspects of the 3D embossing folders also lends tactile qualities to your card stock. The stamped images from the adorable postage stamp set and the small stamped butterflies add further interest to this mixed media greeting card.
Keeping it Krafty
In conclusion, there are many opportunities for using these techniques. There are many ways you can make a card or a piece of artwork similar to this one but using a variety of embossing folders, inks and stamps. You could also use pastes, metallic sprays, stencils, gems and more to add more mixed media to your work.
Thank you for joining me here at Kelli’s Kraft Studio! I hope you’ve enjoyed this project today. Go ahead and give it a go. Whatever you decide to make just make it your own and always remember to stay Krafty my friend!
