Use Your Cricut to Make this Fantastic Edge Card
Hello and welcome to my studio! Have you ever wanted to give someone special a special kind of card? We can’t always find exactly the type of greeting card we want in a store. Making our own cards at home is a great way to really personalize a card for someone. If you have a Cricut machine or are thinking about getting one, this style of card is a great example of its usefulness. And, if you’re a crafter or a wanna-be crafter, I say “YASSS! Get the Cricut!”
***Disclaimer: I am not affiliated with Cricut or any of the companies I mention nor do I earn any commissions from the sale of any of the products I reference in this post.
With your Cricut machine and just a few simple supplies, you can make this one-of-a-kind greeting card at home. Keep reading below to see the list of supplies I used to make this card. I’ll also share a link to my free project file in Cricut Design Space. Making this card is easy. Just click on my link, allow Cricut to cut out the unique card base and images. Then fold the card and glue the cut images to the front of the card and you’re all set!
REMEMBER
WANT TO SEE MORE?
SUPPLIES I USED FOR THIS CARD
- 65 LB CARDSTOCK IN COLORS: NAVY BLUE, LIGHT BLUE, MEDIUM BLUE, WHITE, BLACK
- OPTIONAL: EMBOSSING FOLDERS: STARS, WAVY LINES PATTERNS
- CRICUT MACHINE
- OPTIONAL: EMBOSSING MACHINE
- INKJET PRINTER
- GLUE
- CRICUT PEN: BLACK
- PAPER TRIMMER: I use this one: https://www.stampinup.com/products/paper-trimmer
LET’S GET KRAFTY!
Right, the first thing we want to do is decide what colors we want our card to be. It doesn’t have to be the same colors I have used or what shows in Cricut Design Space. However, keep in mind that the moon image is a (print then cut). You cannot choose a different color for the moon. You will allow your printer to print that image onto a white piece of card stock. Then place it on your cutting mat and allow Cricut to cut It out for you. I LOVE this feature and use it often.
MAKING THE CUT
Here is the link to my free design in Cricut Design Space: https://design.cricut.com/landing/project-detail/68502e189e0188797f9e07b6
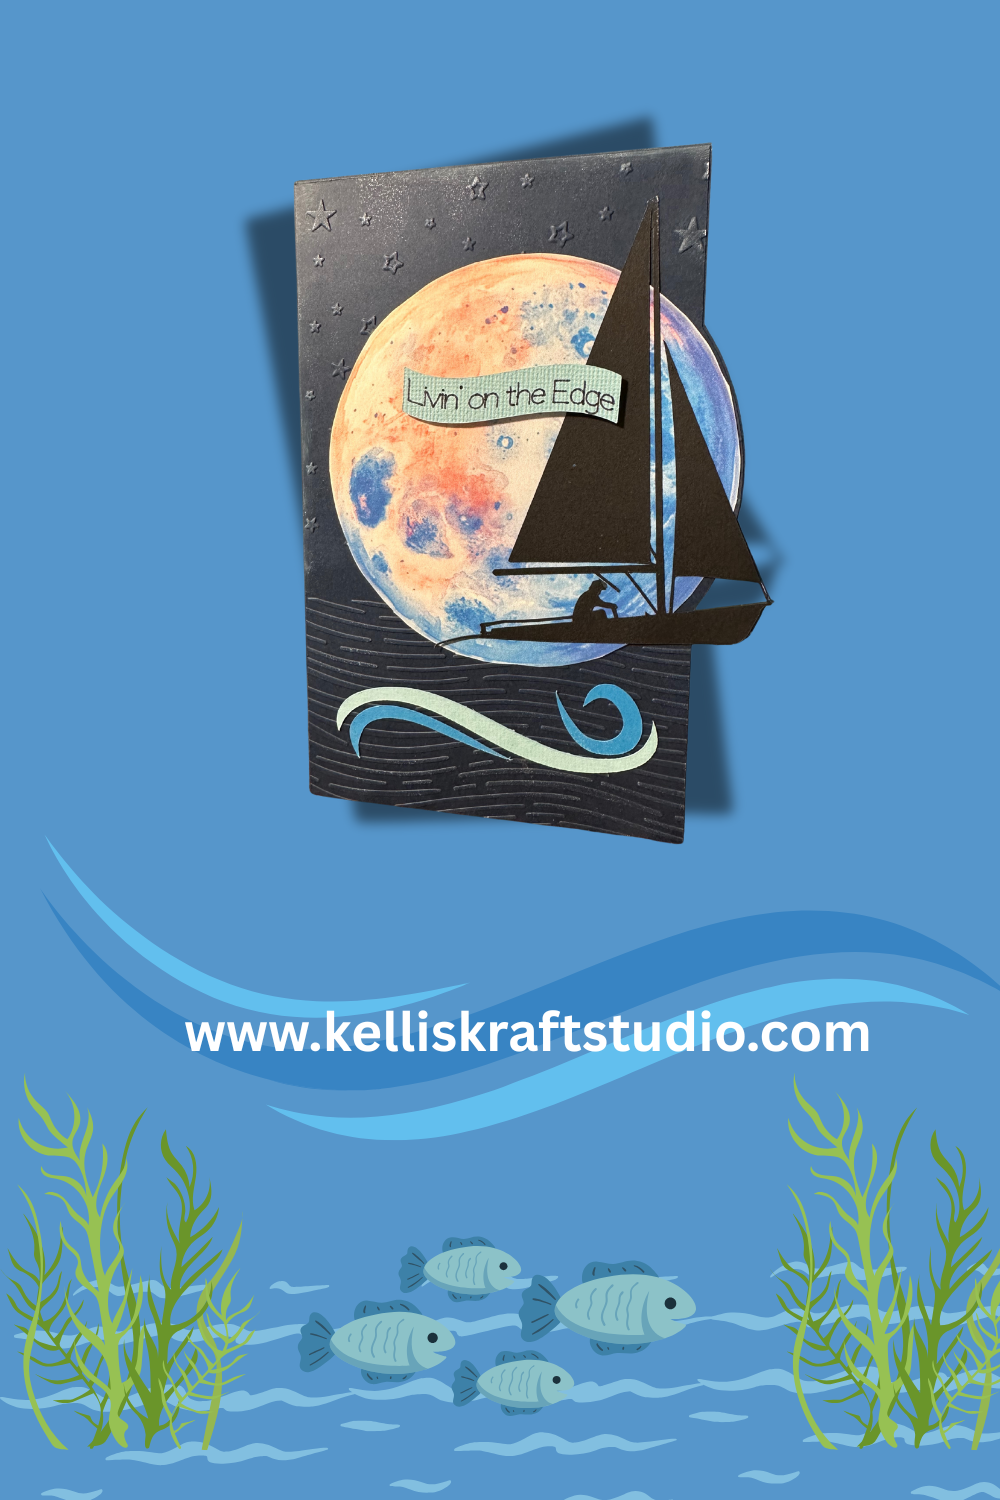
Your Cricut will “pen and cut” the small “Livin’ on the edge” sentiment banner. It will cut the black silhouette sailboat. Your machine will cut the blue wavy designs for the bottom of the card and it will cut the 7 x 10 inch card base. Once the base is cut, you can use your paper trimmer to score at the 5” mark. If you do not have a paper trimmer, get one! You’ll need it for all of your paper crafting! If you do not yet have a paper trimmer, just use 2 rulers. One to hold the place at 5” and the other’s edge to create a score mark. Fold and burnish the score line to create a 5 x 7” greeting card.
If you choose to make a top panel for the card the way I did, simply use your Cricut to cut the base twice. You don’t have to re-cut the entire project here, just the base. Again, use your trimmer to measure 5” from the edge of the second base and cut in half. You can then emboss that panel any way you like. I chose to use a wavy design at the bottom to mimic the ocean and stars at the top to mimic the night sky. The card will be just as awesome if you don’t emboss. I’m just a bit extra.

ASSEMBLING THE CARD
If you decide to use the optional inside message I have provided, your Cricut will “Pen” the message then cut the 4 x 6” rectangle piece to be adhered inside the card.
Once all of your cuts are made, you adhere the pieces into place on the front of your folded card base. Align and adhere the moon onto the edge of the card base. Align the silhouette sailboat and adhere to the edge. You’ll be able to see exactly where it goes. Adhere the “wavy” designs to the bottom of the card.
Lastly, adhere the “Livin’ on the edge” sentiment onto the front of the card. I used foam dots to lift the sentiment up a bit. If you choose to use this inside message, adhere it to the inside of the card.
I hope you have enjoyed today’s project as much as I have. This uniquely fantastic edge card comes together quickly and easily so why not give it go? I believe I am obsessed with “edgy” card designs lately. There are so many possibilities! I will be sharing a HOW TO create your own edge card design in my next blog post, so FOLLOW me on Pinterest and visit my blog @ www.kelliskraftstudio.com to see more. Just take this idea and make it your own and always remember to keep it krafty! Until next time, bye bye!
REMEMBER
WANT TO SEE MORE?