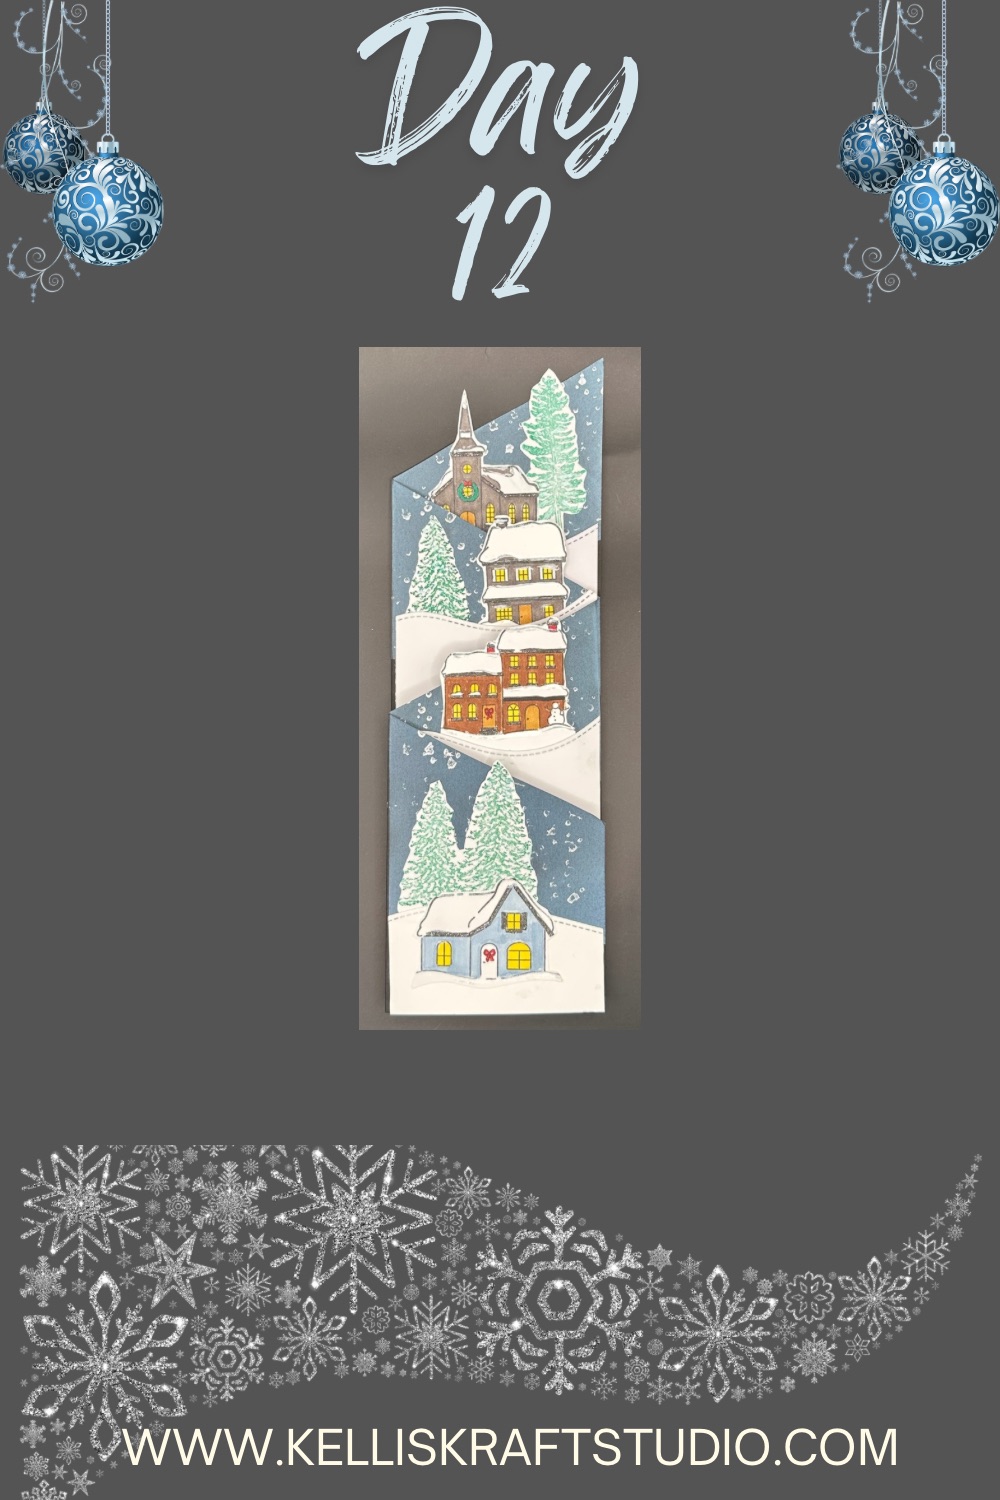

Hello and welcome to my studio! Today marks Day 12 of my “12 Days of Christmas Cards You Can Make this Year!” Series! Though I have already used the new “Yuletide Village” stamp set from Stampin’Up!, it occurred to me that the village would be cute displayed on a zigzag fun fold card, so that the houses and church seem as if they are on a mountain side. And, of course, we all love to play with our new stamps and craft supplies. I mean, why should kids have all the fun? Some people love to get out in their garden and get their hands dirty. Me? I love getting my hands inky and my fingers stuck together with glue. How about you?
The finished card measures 3 x 9”, similar to a slimline card, and fits a standard business envelope. As of this post, Stampin’Up has the “Yuletide Village” stamp set on their (Last Chance) list so if you don’t already have it and you want it, you should act quickly as this was offered in their Sept-Dec 2024 Mini Catalog.
Now, let’s grab our supplies and make this fun fold card!
Supplies I Used For This Card
- 12 x 12” Black or Gray Card Stock
- 8.5 x 11” White Card Stock
- Distress Oxide Ink: “Tumbled glass” and “Broken China”: Tim Holtz
- Foam Blending Tool
- ”Yuletide Village” Stamp Set: Stampin’Up!
- Alcohol Markers: Caliart
- Wintery Trees Stamps from “Peaceful Cabin” stamp set: Stampin’Up!
- Lunar Paste “Silver Lining”: Simon Hurley
- ”Stitched Hillside” Dies: Lawn Fawn
- Sentiment Stamps “ Holly Jolly Wishes”: Stampin’Up!
- Black ink pad
- Ink Pad “Shaded Spruce”: Stampin’Up!
- Tombow Glue
Let’s Make This ZigZag Card!
Trim the black or gray 12 x 12” card stock to 10” x 12”. So, just trim one side of the card stock to 10 inches. Score the 12” side @ 3”, 6” and 9”.
On the 10” side, measure up 2.5” from the bottom and make a tick mark. Use a paper trimmer and make a cut from that tick mark to the opposite (right) side of the card stock. This will make the diagonal shape at the top.
Trim a piece of white card stock to 2 14/16” { it’s just shy of 3” } by 7” and at the top of that 7” side, use the “stitched hillside” dies to make a snow drift shape. Next, trim a piece of white card stock to 2 14/16” x 6” and make a snow drift top. Now, trim a piece of white card stock to 2 14/16” x 4” and make a snow drift top. Set these aside.
Now stamp the houses and church you choose from the stamp set onto a piece of white card stock. Color them in with alcohol markers or colored pencils. Stamp some wintery trees onto white card stock using the shaded spruce ink pad and die cut or fussy cut the trees. Set all of these aside.
Fold and burnish the zigzag card base. Now, if you wish to do some ink blending with the Distress Oxide ink on the black card stock, place the white snowdrifts onto the coordinating panels and make a little pencil mark just above the line. Above this line is where you will blend the inks onto the black card stock. To be honest, I would leave this step out next time because we will get the same look on black or gray card stock. If doing the ink blending, do this to all of the front facing card panels.
Next, take a bit of the lunar paste and smear a thin layer onto a scrap piece of card stock and quickly use a snowfall or snowflake stamp to dip into the lunar paste and stamp your snow onto the upper part of each of the front facing card panels. Allow this to dry. It’ll only take a few minutes. During that time, Stamp your sentiments onto the white snow drift pieces. There should be 3 of them. I chose to use the “Be of Good Cheer”, “It’s the Most Wonderful Time of the Year” and “Merry Christmas to You” sentiment stamps from the “Holly Jolly Wishes” stamp set. It is best to stamp these sentiments onto the white pieces before we adhere them to the card base just in case we make a mistake, then it’s easier to remake the little piece of white snowdrift than the entire completed card. Yes, I came close to making this mistake myself. Whew!
Now, go ahead and adhere the tall white snowdrift pieces to the card base on all of the front facing panels. Leave just a little room at the top of each drift without glue so you can tuck the houses and trees just behind them. Arrange the houses and trees in a way that pleases you. Play around with the placement before you add adhesive. Once you are satisfied with the placement, go ahead and adhere them into place. Your fun and adorable zigzag fold Christmas card is complete!
Thank you so much for joining me today as it’s the last day of this series! I hope you enjoy making this fun fold card with the charming “Yuletide Village”. Please, take these ideas and make them your own. And remember, always Keep it Krafty!
Follow me on Pinterest where I’m known as kelliskraftstudio12 or visit my website and blog at https://kelliskraftstudio.com/
I’ll continue with my makes of all kinds through the year so I’ll see you again real soon!
Merry Christmas everyone and have a Happy New Year!
