
Create Ink Blended Magic
Hello and welcome to my studio! I’m so happy to have you here with me today because I love what I do and I just adore sharing my ideas with you! And the project I’m sharing this week is so much fun! Yes, I know I always say that 🙂
I always say crafting any project is so much fun because it always is, to me. If you follow my blog, you may already know that I love beautiful designer papers. I use them a lot in my various projects. However, there are times when we don’t have exactly the paper we want for a project, whether it’s a box, a tag or a greeting card. But we can take a plain piece of white cardstock and ink it up to create an ink blended background that’s magical.
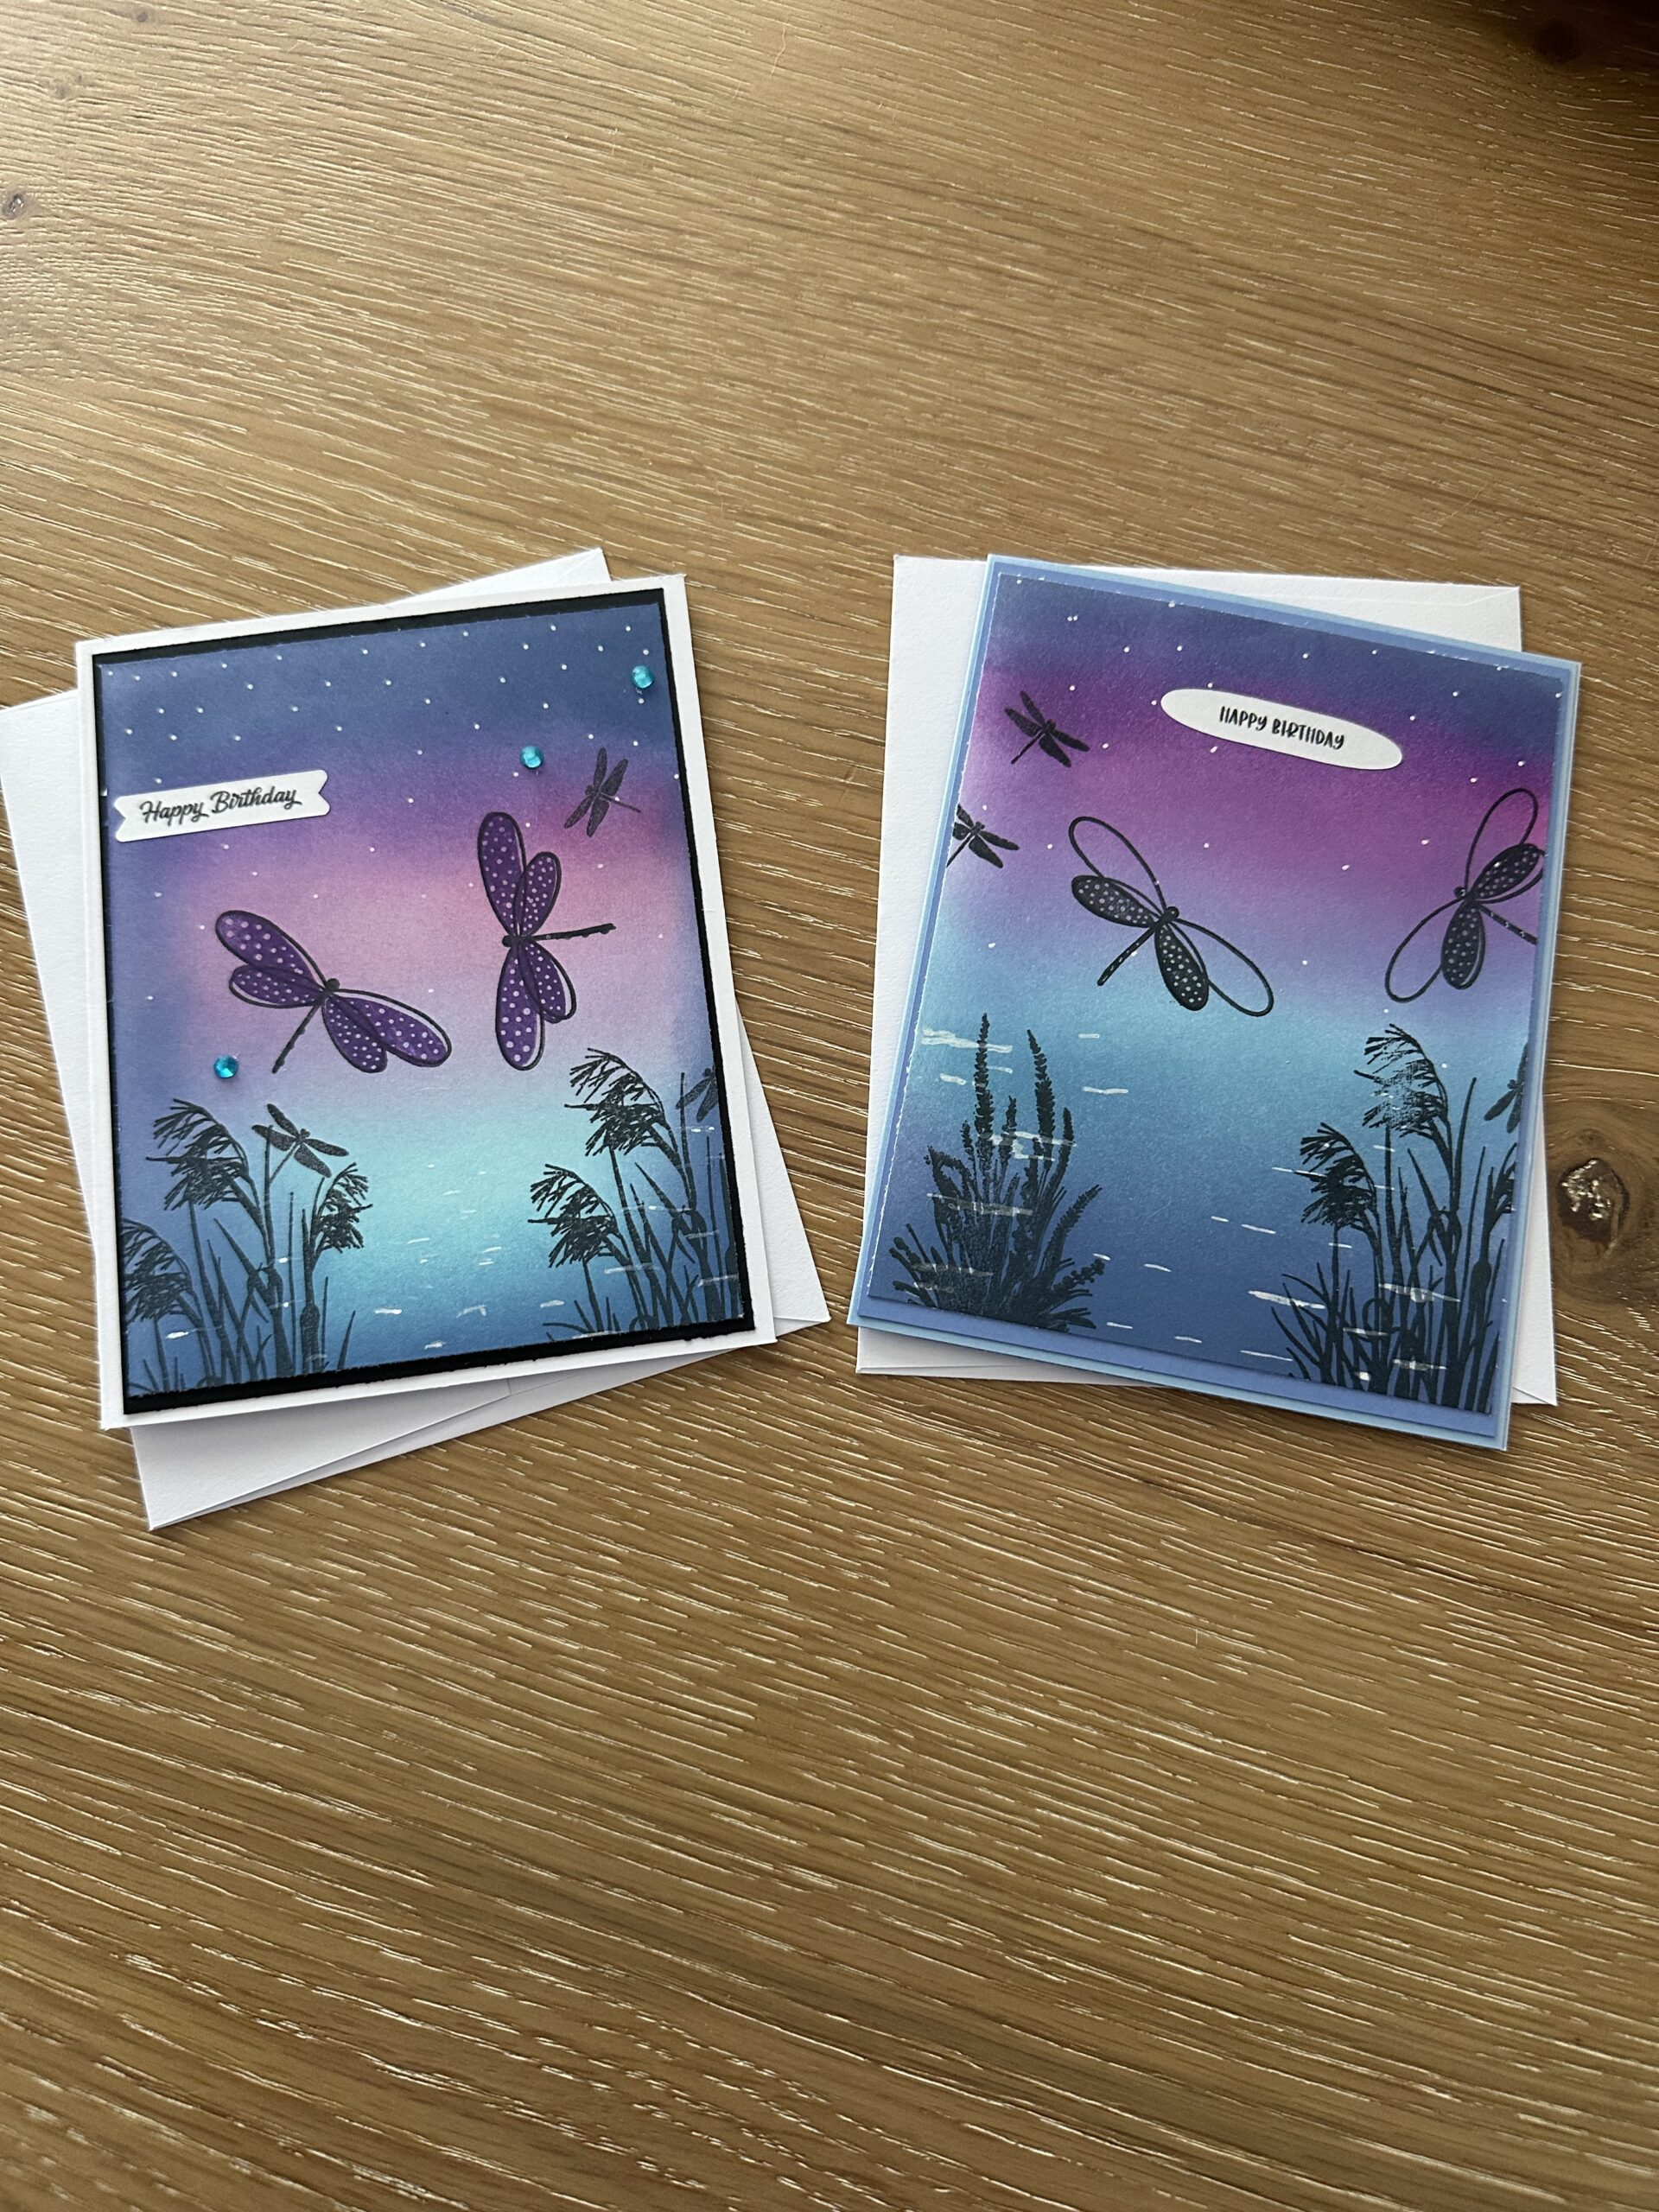
So for these cards that’s exactly what we are doing. We will transform a plain piece of white cardstock by using inks, and that will create the enchanting background. Then we simply use black ink to stamp the images we choose and that creates the silhouette effect on these ink blended greeting cards. I chose dragonflies because I just love them! They are so playful. Below, I’ve added a list of the supplies I used to make these cards. And that’s followed by some photos and very simple “How-To”. So, without further ado, let’s get Krafty!

List of Supplies
- Card Stock: White, Black, Shades of Blue.
- Ink Pads: I used These: Ranger/Tim Holtz Distress Oxide ( tumbled glass ), ( broken china ), ( faded jeans ) AND These : Ranger Ink/ Simon Hurley Dye Ink Pads ( prom queen ), ( triple berry ) AND Stampin’Up! ( gorgeous grape ) + a black ink pad.
- Ink Blending Tools ( your favorites )
- Paper Trimmer
- Glue
- Acrylic Water Based Paint Pens ( White )
- Silhouette Florals Stamp Set: this is the waterside flora and the smaller dragonflies
- “Happiest Day” Stamp Set by Stampin’Up : This is where the large dragonfly is from
Want more card making & crafting inspiration?
Follow me on social media
Let’s Get Krafty
The Krafty Slideshow


The Krafty How-To
So now we are going to make this enchanting ink blended background. As you can see, I mix and match my craft supplies. I don’t feel as if I have to use inks from just one source, nor do I use any craft supplies from just one source. Since I’m not selling supplies or representing any particular company, I have loads of options. And I’m fairly certain most of us crafters are the same because there are just too many wonderful options out there to choose just one. Am I right?
To begin this ink blending journey, first trim a piece of white cardstock to about 4 x 5.5”. Line up your ink pads in the order you think you’ll be using them so you can just grab and go. I began with the darkest blue ( faded jeans ). Then I used the medium blue ( broken china ). And then the lightest blue ( tumbled glass ). After that I blended in the ( prom queen ), then the (triple berry). Blend each of these colors from left to right and upwards. Last, I used the ( faded jeans ) again across the top and blended downwards a bit. This is so much fun!
Also, I want to add that I use the large sticky mat by Altenew. I love it! It’s absolutely perfect for ink blending and stamping. This mat holds your cardstock in place while you work. But you can always use some low-tack tape to hold your panel as well.
Honestly, I’m still kinda new to ink blending. I enjoy it and I have made some amazing makes using this technique. However, if you are unsure of the process, I suggest you take a look at Simon Hurley on YouTube. He’s my GOTO expert when it comes to inks, pastes and backgrounds. Check him out HERE.
Stamping Your Silhouette
Once you have completed ink blending your background, it’s time to add the water ripples and the stars. For this, I used a white acrylic pen. This works like a charm. Just place little ripples wherever you think they should go. And just make small dots with the pen up at the top for “stars”, again, just place them where you want. I feel I’m channeling Bob Ross here. 🙂 All of the inks dry quickly and as your panel dries, you see that the colors seem to settle and bloom. Seriously, it’s like magic!
Now is the time to stamp your waterside florals using a black ink pad. Next, stamp your dragonflies wherever you think they should go. I mean there are no rules here. You’re the artist and you can do exactly what you want to do, right?
Building Your Greeting Card
Finally, trim your ink-blended panel to 3.75 x 5”. And trim a piece of black cardstock to 4 x 5.25”. If you don’t already have an A2 card base, you can make one. Trim a piece of white cardstock to 5.5 x 8.5” and Score the long side at 4.25”. Fold and burnish your score line. Then use glue to adhere the black panel onto the white card base and then adhere your ink-blended panel onto the black panel. Remember to add a sentiment to the front of your card, and a message inside. That’s it! You have now made your own enchanted ink-blended greeting card. That was pretty easy right?
Now, I bet you want to make more 🙂 As you can see in the photos above, I made 2 cards that are very similar. On one of the cards, I used the “faded jeans” ink all around the edges to bring the focus into the center. On the other card, I kept all the ink blending to a landscape direction. I don’t know which is my favorite. In one of my cards, I used a dark purple to stamp the inside of the dragonfly wings, and on the other, I used black on just the bottom wings. I prefer the one with the black only.
WANT TO SEE MORE?
VISIT MY BLOG ARCHIVES
Keeping It Krafty
In closing, I’d like to thank you again for joining me here today. This has been a fun and rewarding project. In just a few minutes you will have made an enchanting ink blended greeting card! Ink blending takes a bit of practice but I’m certain you can make cards like these in just one afternoon. And let me warn you, it becomes an addiction quickly! And that’s okay too. Because I believe there’s a doer, a maker- a crafter, in all of us. My goal here is to inspire you to tap into your creativity. And in the process you’ll see how crafting is an amazing way to relax, reset and recharge. It’s therapy in the form of papers, inks and imagination. So no matter what it is that you decide to make just make it your own. And always remember to keep it Krafty!
Until next time,
