
Beautiful Fun-Fold Birthday Card
Hello and welcome to my studio. I’m so happy to have you join me here today. Because today I’m sharing this lovely fun- fold birthday card. This card features designer series paper from Stampin’Up! And it’s aptly called, “Lovely & Beautiful”. If you already have this paper in your stash, this card is a good reason to use it. If you’re anything like me, you tend to hoard your favorite designer papers. Also, if you don’t already have this paper and you want to buy it, you better hurry. Because you only have till the end of April, 2026 to buy it from the company, Stampin’Up!
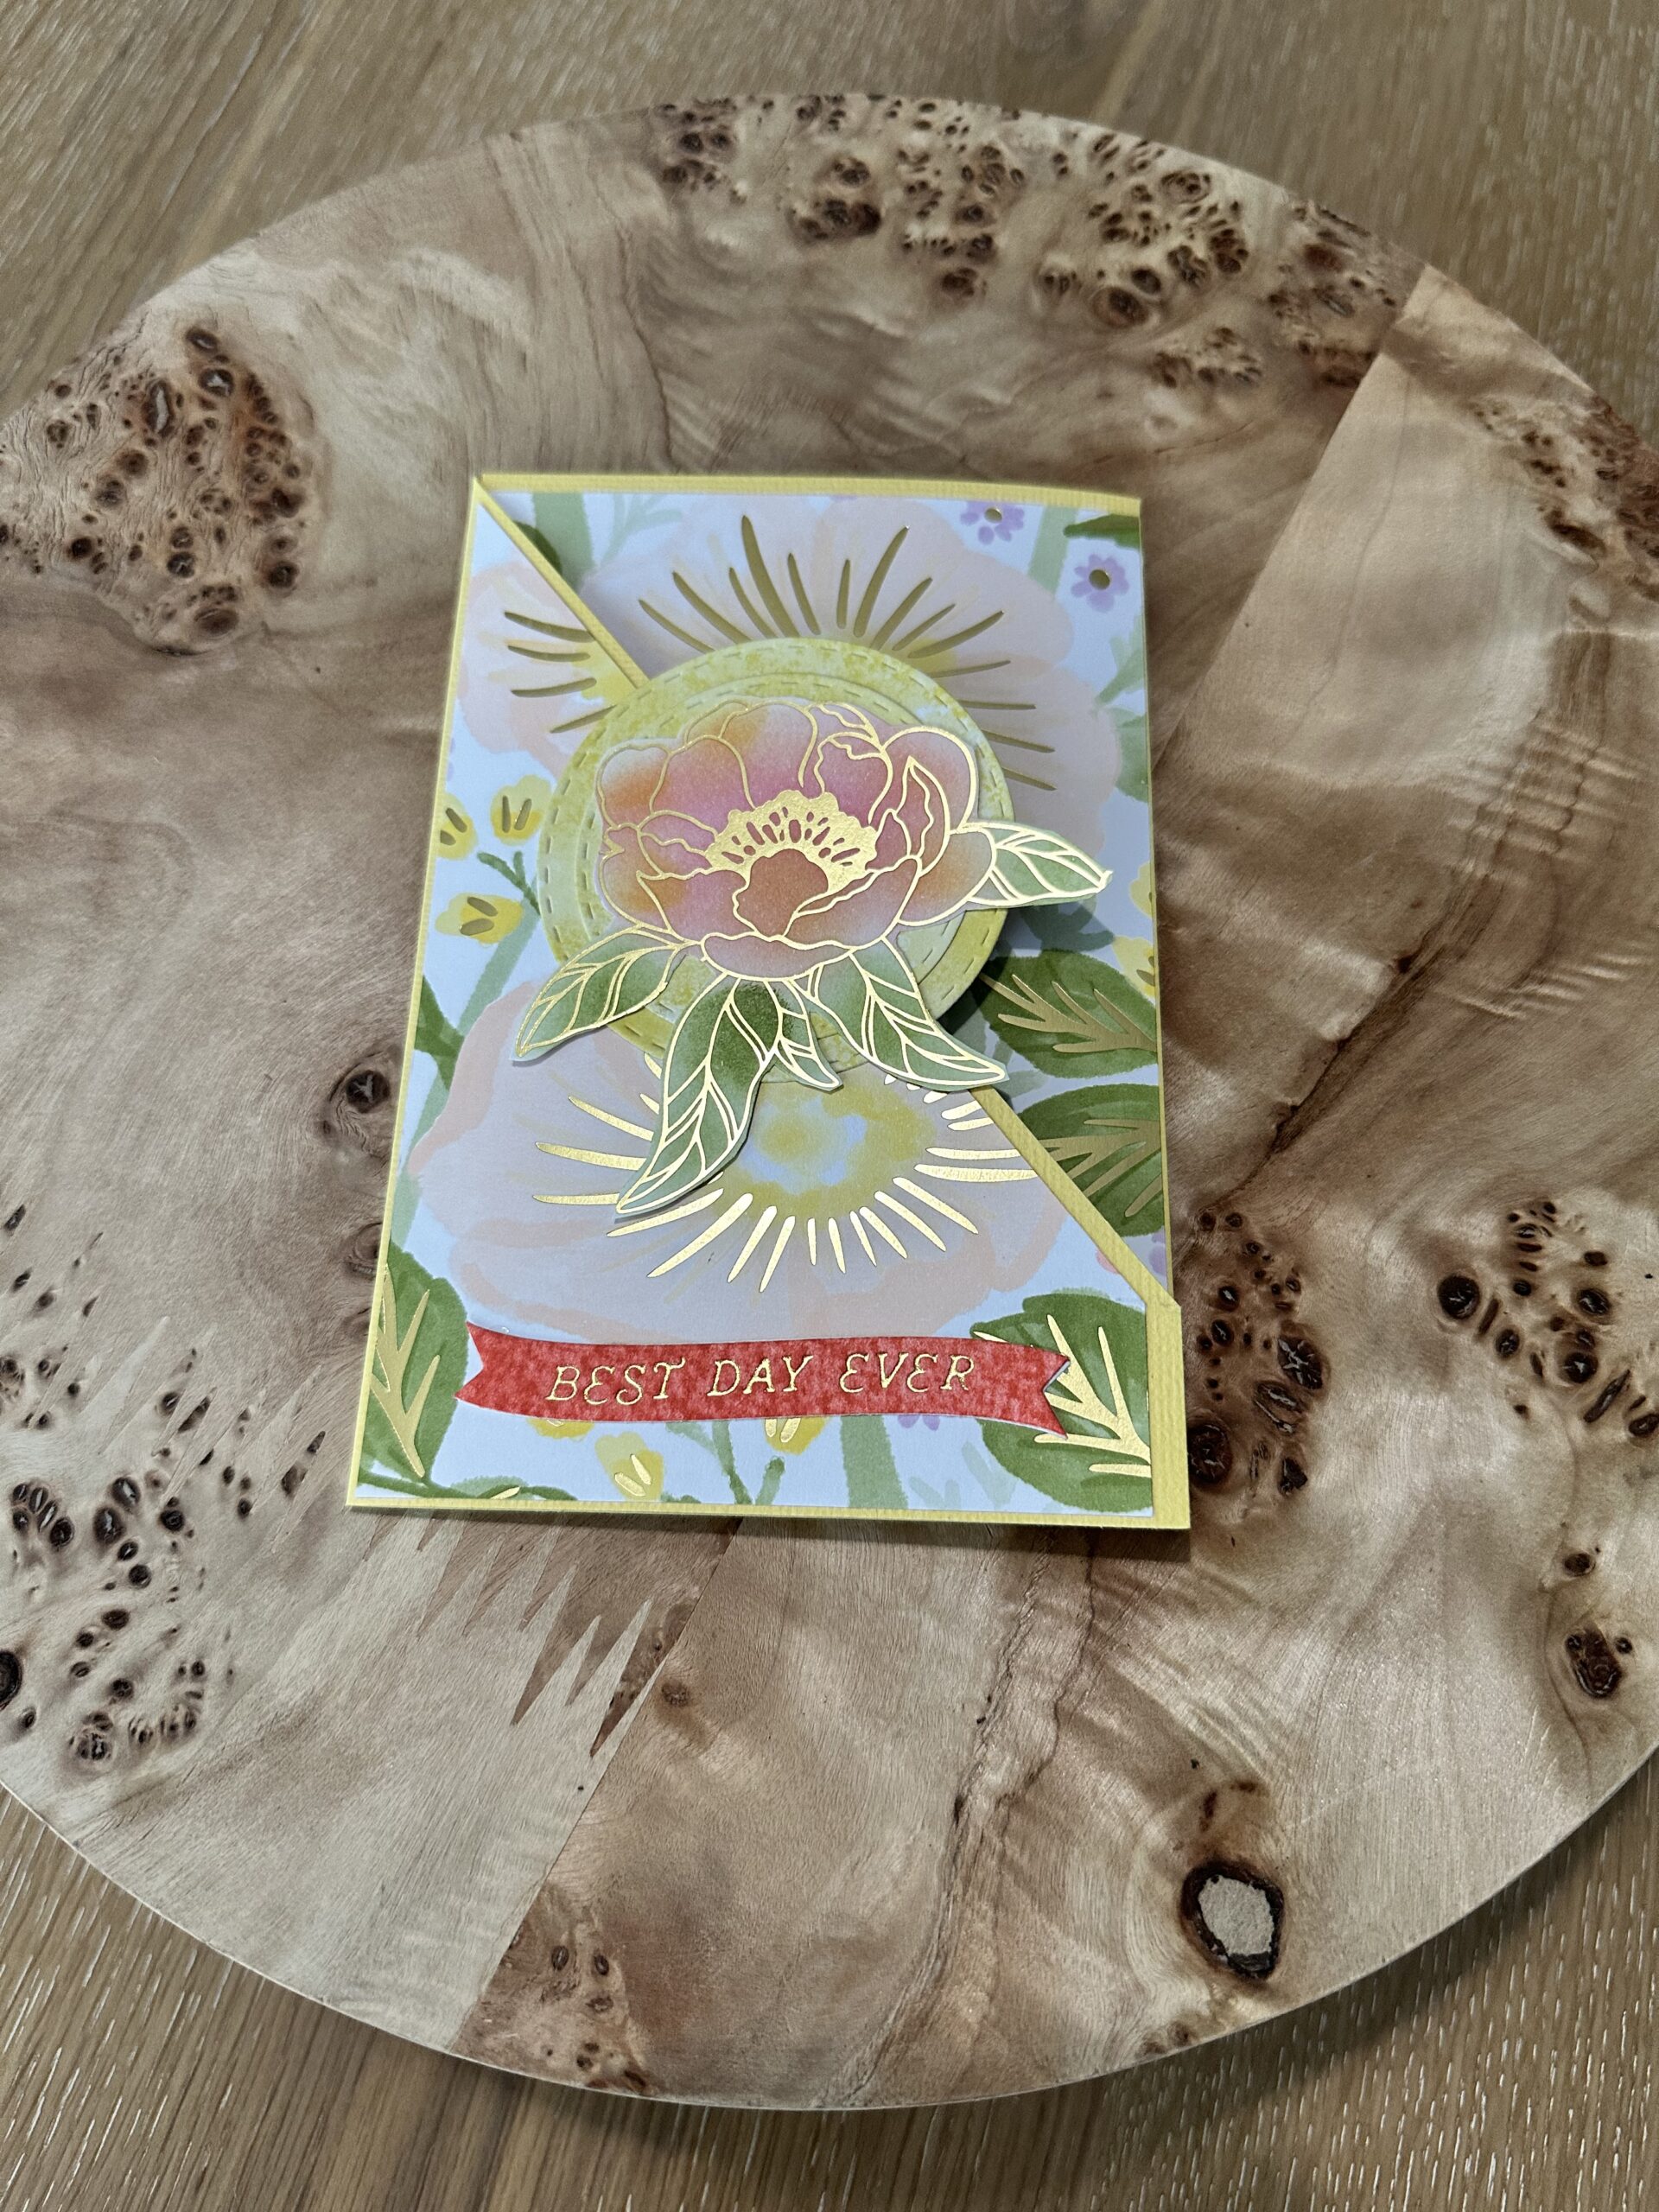
However, the good news is that you don’t have to use any particular paper to make a lovely fun-fold birthday card. This fun-fold technique will work with any designer paper and even regular card stock. This finished card, when folded, measures 4 x 6”. Below, I’ve shared a list of the supplies I used to make this card. And below that, I’ve shared a bit of how-to along with a few photos. So, keep reading to see how you can create a beautiful fun-fold birthday card.

List of Supplies
- 12 x 12” Card Stock: Yellow
- 12 x 12” Designer Series Paper: “Lovely & Beautiful” HERE
- 6 X 6” Designer Series Paper: “2025-2027 IN COLOR” HERE
- 8.5 x 11” Card Stock: White
- OPTIONAL: Hot Foil Machine, Gold Hot Foil, “Happy Birthday” Hot Foil Plate, “Best Day Ever” Hot Foil Plate, banner dies: Spellbinders- find it HERE
- Nesting Circle Dies-find it HERE
- Ink Pads: Pink, Yellow, olive green
- Paper Trimmer with Scoring Tool
- Your Favorite Glue
- Small Craft Scissors
Want more card making & crafting inspiration?
Follow me on social media
Let’s Get Krafty
- Trim a piece of yellow 12 x 12” solid card stock to 6 x 12”. Just cut it in half-then you can use the other half to make a second card!
- Score the long side @ [ 4 and 8” ]
Creating The Card Base


- Once you have scored your paper, measure up about 1 inch from the bottom and make a little mark with a pencil.
- Next, place the top right corner of the front panel of your paper at an angle on your paper trimmer. As in the photos below-then cut that angle! Remove the small triangle and save for another project. OR toss it in the bin because if you’re anything like me, you’ll never find that triangle again anyway 😉
Creating The Diagonal Card Front


- Trim 2 pieces of your designer paper: I used the “Lovely & Beautiful” to [ 3.75 x 5.75” ].
- Trim 1 of those pieces at a diagonal to match the front panel of your card.
- Use 2 pieces of the yellow designer paper from “2025-2027 In Color” and trim it the same way as those first 2. This is for the inside panels #1 and #3.
- Use another piece of the yellow, in color paper and die cut 2 circles for your focal point on the front of the card.
Creating The Focal Point of Your Card


- 2 sheets of the “Lovely & Beautiful” DSP are gold outlined flowers. Use ink pads and ink blending tools to color in a flower. Then use your scissors to cut out the flower image. This is for the focal point on the front of your beautiful fun-fold birthday card.
Finishing Your Beautiful Fun-Fold Birthday Card
- Use glue to adhere your designer papers to your card base as in the photos.
- Trim a piece of white card stock to 3.75 x 5.75” for the center panel inside your card. This is for your message.
- Adhere your layered, die cut circles along with your cut flower.
- Adhere the designed circle element- your focal point- to the front panel of your card, making certain to add glue to the angle edge only. Otherwise, you’ll glue your card closed!
- optional: use the Glimmer Hot Foil machine and create a sentiment for the front of your card. Like “Best Day Ever” and it’s matching banner die to cut it out and adhere to the front of your card. Also, use the hot foil machine to create the “Happy Birthday” message for the inside center panel of your card.
- NOTE: I already had what I needed to make the gold hot foil elements for this card. It goes so perfectly with the gorgeous gold details of this designer series paper. If you don’t have these items, no worries. Just use ink pads and stamps for the same purpose.
WANT TO SEE MORE?
VISIT MY BLOG ARCHIVES
Keeping It Krafty
In closing, I’d love to thank you again for joining me here today at Kelli’s Kraft Studio! I really love what I do and I so enjoy sharing my ideas with you! This beautiful fun-fold birthday card comes together quickly thanks to the lovely papers. Also, I want to mention that if you ever want a certain designer paper by Stampin’Up and it’s no longer available through their website, you can often find it through sellers on Etsy. I’ve found what I wanted several times that way. And keep in mind, you can create this fun-fold for any occasion by simply choosing different papers and sentiments and focal points! Of course, you don’t have to make the hot foil sentiment and message. But if you don’t already have a hot foil machine, you should check it out. It is a lot of fun and extremely useful. So, no matter what it is that you decide to make just make it your own. And always remember to keep it Krafty!
Until next time , bye-bye!
