
It’s a Sweet & Simple Easter Card
Hello and welcome to my studio! I am so happy to have you here with me today. Because, today, I’m sharing this sweet and simple Easter Card with you. Easter is just around the corner. So try not to let it sneak up on you like it does me almost every year. If you’re thinking of making some easy Easter cards this year then this card-or style of card-is going to be perfect for you!
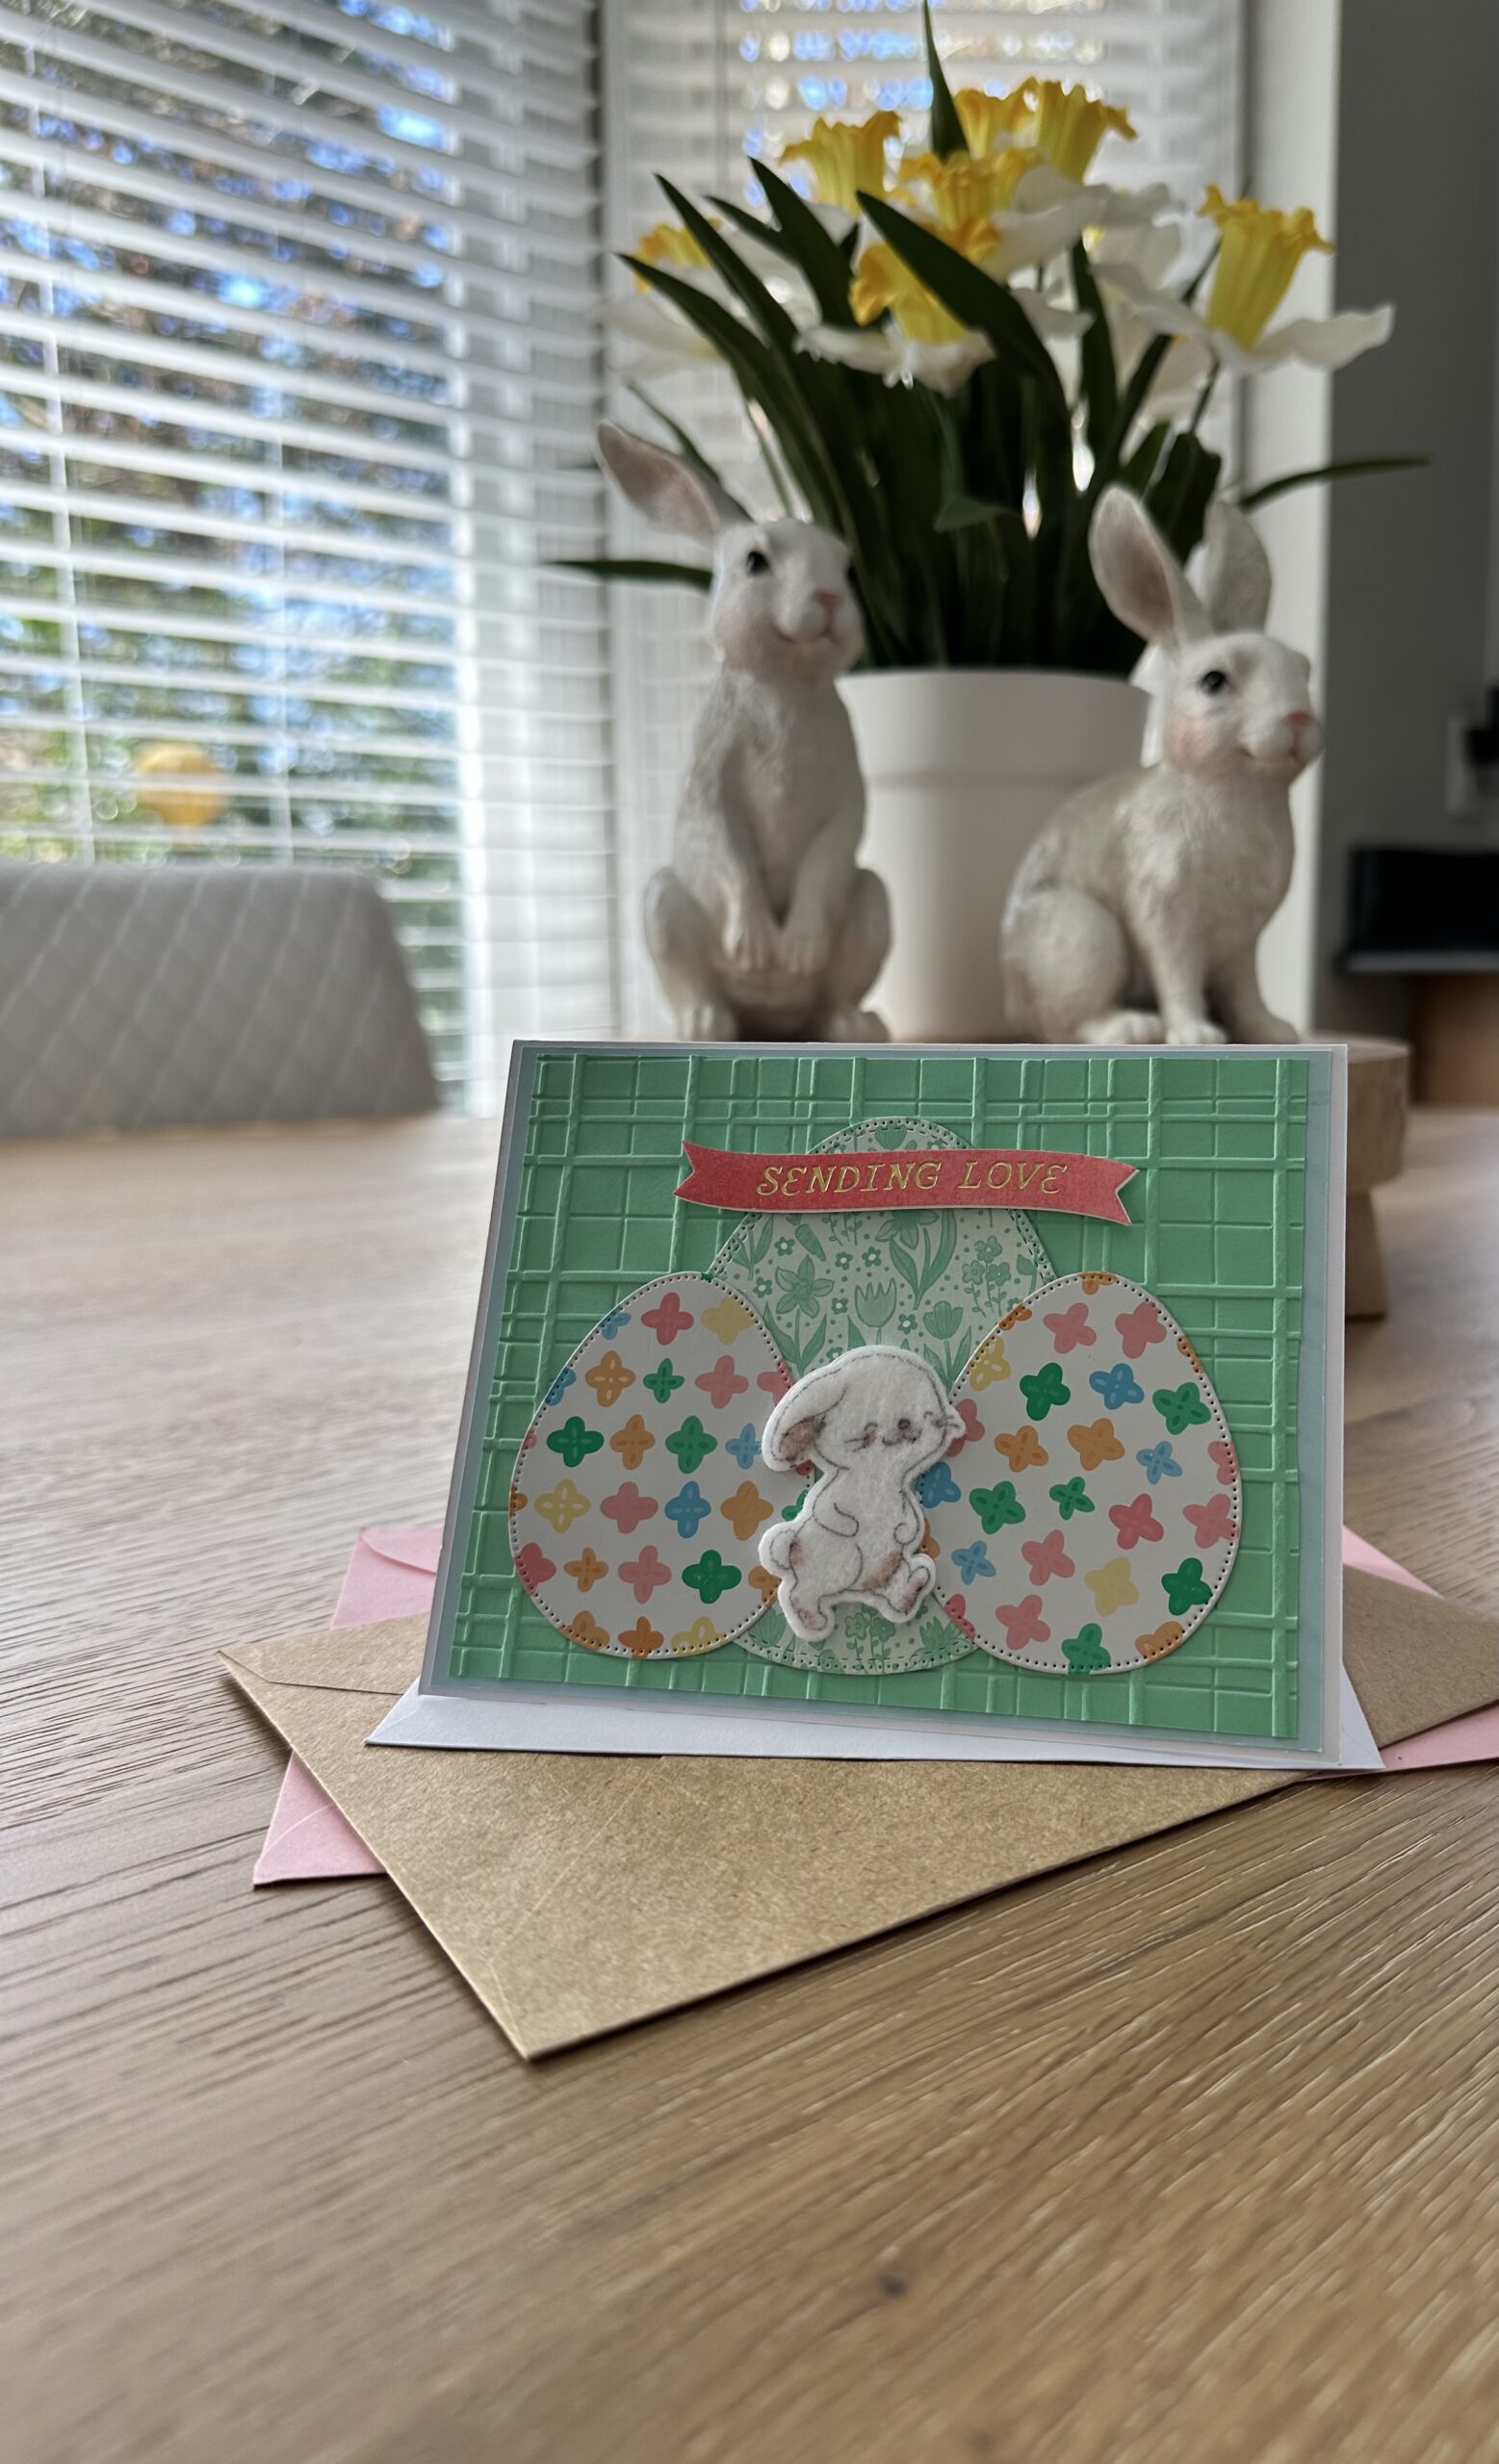
This sweet Easter card is truly simple to make. Coordinating colors and designs make this card aesthetically pleasing while the soft texture of the bunny and the embossed 3D background lend a lovely tactile element to this sweet and simple card. Also, kids and adults alike will love it! Below, I’ve shared a list of the supplies that I used to make this card followed by a very simple tutorial. Keep in mind- you do not have to use the same designer paper and card stock that I did. But use solid card stock that coordinates with your chosen designer paper. So…without further ado, let’s get krafty!

List of Supplies
- Neenah White A2 Card Base
- Card Stock: Balmy Blue, Shy Shamrock: by Stampin’Up!
- Designer Series Paper: “Easter Joy”: by Stampin’Up!
- Plaid 3D Embossing Folder
- White Felt
- Black Ink Pad
- ”Flirty Flamingo” Ink Pad
- “Pretty in Pink” Stampin’Blends alcohol marker
- Sentiments Hot Foil Plates and Dies: “Sending Love”
- Glimmer Hot Foil Machine
- Glimmer Hot Foil: Gold
- Blending Tool
- Paper Trimmer
- Glue
- Egg Dies : These are from the stamp and die set “Excellent Eggs” by Stampin’Up however: there are plenty to choose from at Scrapbook.com
- Bunny Dies: I used one I found on Amazon.
Want more card making & crafting inspiration?
Follow me on social media
Let’s Get Krafty


- Trim Balmy Blue CS to 4 x 5.25”
- Trim Shy Shamrock to 3.75 x 5”
- Use the Plaid 3D Embossing Folder to emboss the shy shamrock CS panel
- Use egg shaped dies to die cut 3 eggs from the “Easter Joy” designer paper
- Stamp a cute little bunny rabbit straight onto a piece of white felt, use the “Pretty in Pink” marker to add a bit of color to the bunny. Then Die Cut the bunny. If you don’t have a matching die for your stamp, just use scissors to “fussy cut”.
- Use the “ Flirty Flamingo” ink and a blending tool to add the color onto a piece of white card stock. Then use sentiment hot foil plates along with gold hot foil to create gold foiled sentiments. Then use the matching labels dies to die cut the sentiments and choose whatever sentiment you want for your cards.
- Use glue to adhere the blue layer onto the card base. Then adhere the embossed layer onto the blue. Add your decorative egg shapes onto the card front.
- I chose to die cut another bunny and sentiment banner from a piece of white CS to lend stability.
- Use glue to adhere your cute felt bunny, bunnies, chicks… to the front of your card. Adhere the sentiment at the top! Remember to add your message to the inside. That’s it! Your sweet and simple Fuzzy Bunny Easter card is complete!
Keeping it Krafty
In closing, I’d like to thank you again for visiting my website aka “My Studio”. I just love what I do and I really enjoy sharing my ideas with you! As for the steps above, those are for creating this exact card. Keep in mind, you can use this idea and create your own design. Some companies, like Stampin’Up, Altenew etc. have coordinating and matching papers and inks.
The “Easter Joy” designer paper from Stampin’Up has the color names on the back. And that makes it easier to find the matching card stock and inks. This designer paper has gold and green foil accents! It’s really cute! I am not affiliated with any of the companies I mention, but I do enjoy using their products. Also, to create the sentiment, I used a Glimmer Hot Foil machine along with the hot foil plates and the gold hot foil by Spellbinders. If you’d like to check out these products, go to their websites, to see all they have to offer. And WOW! There’s a lot to choose from. I love it and I never tire from having so many choices.
No matter what it is that you decide to make, just make it your own! And always remember to keep it Krafty!
HAPPY EASTER!!
WANT TO SEE MORE?
VISIT MY BLOG ARCHIVES
