
Utilizing Stencils, Stamps, Dies & More
Hello and welcome to my studio! I’m so happy to have you here with me today because I love what I do and I really love sharing my ideas with you!
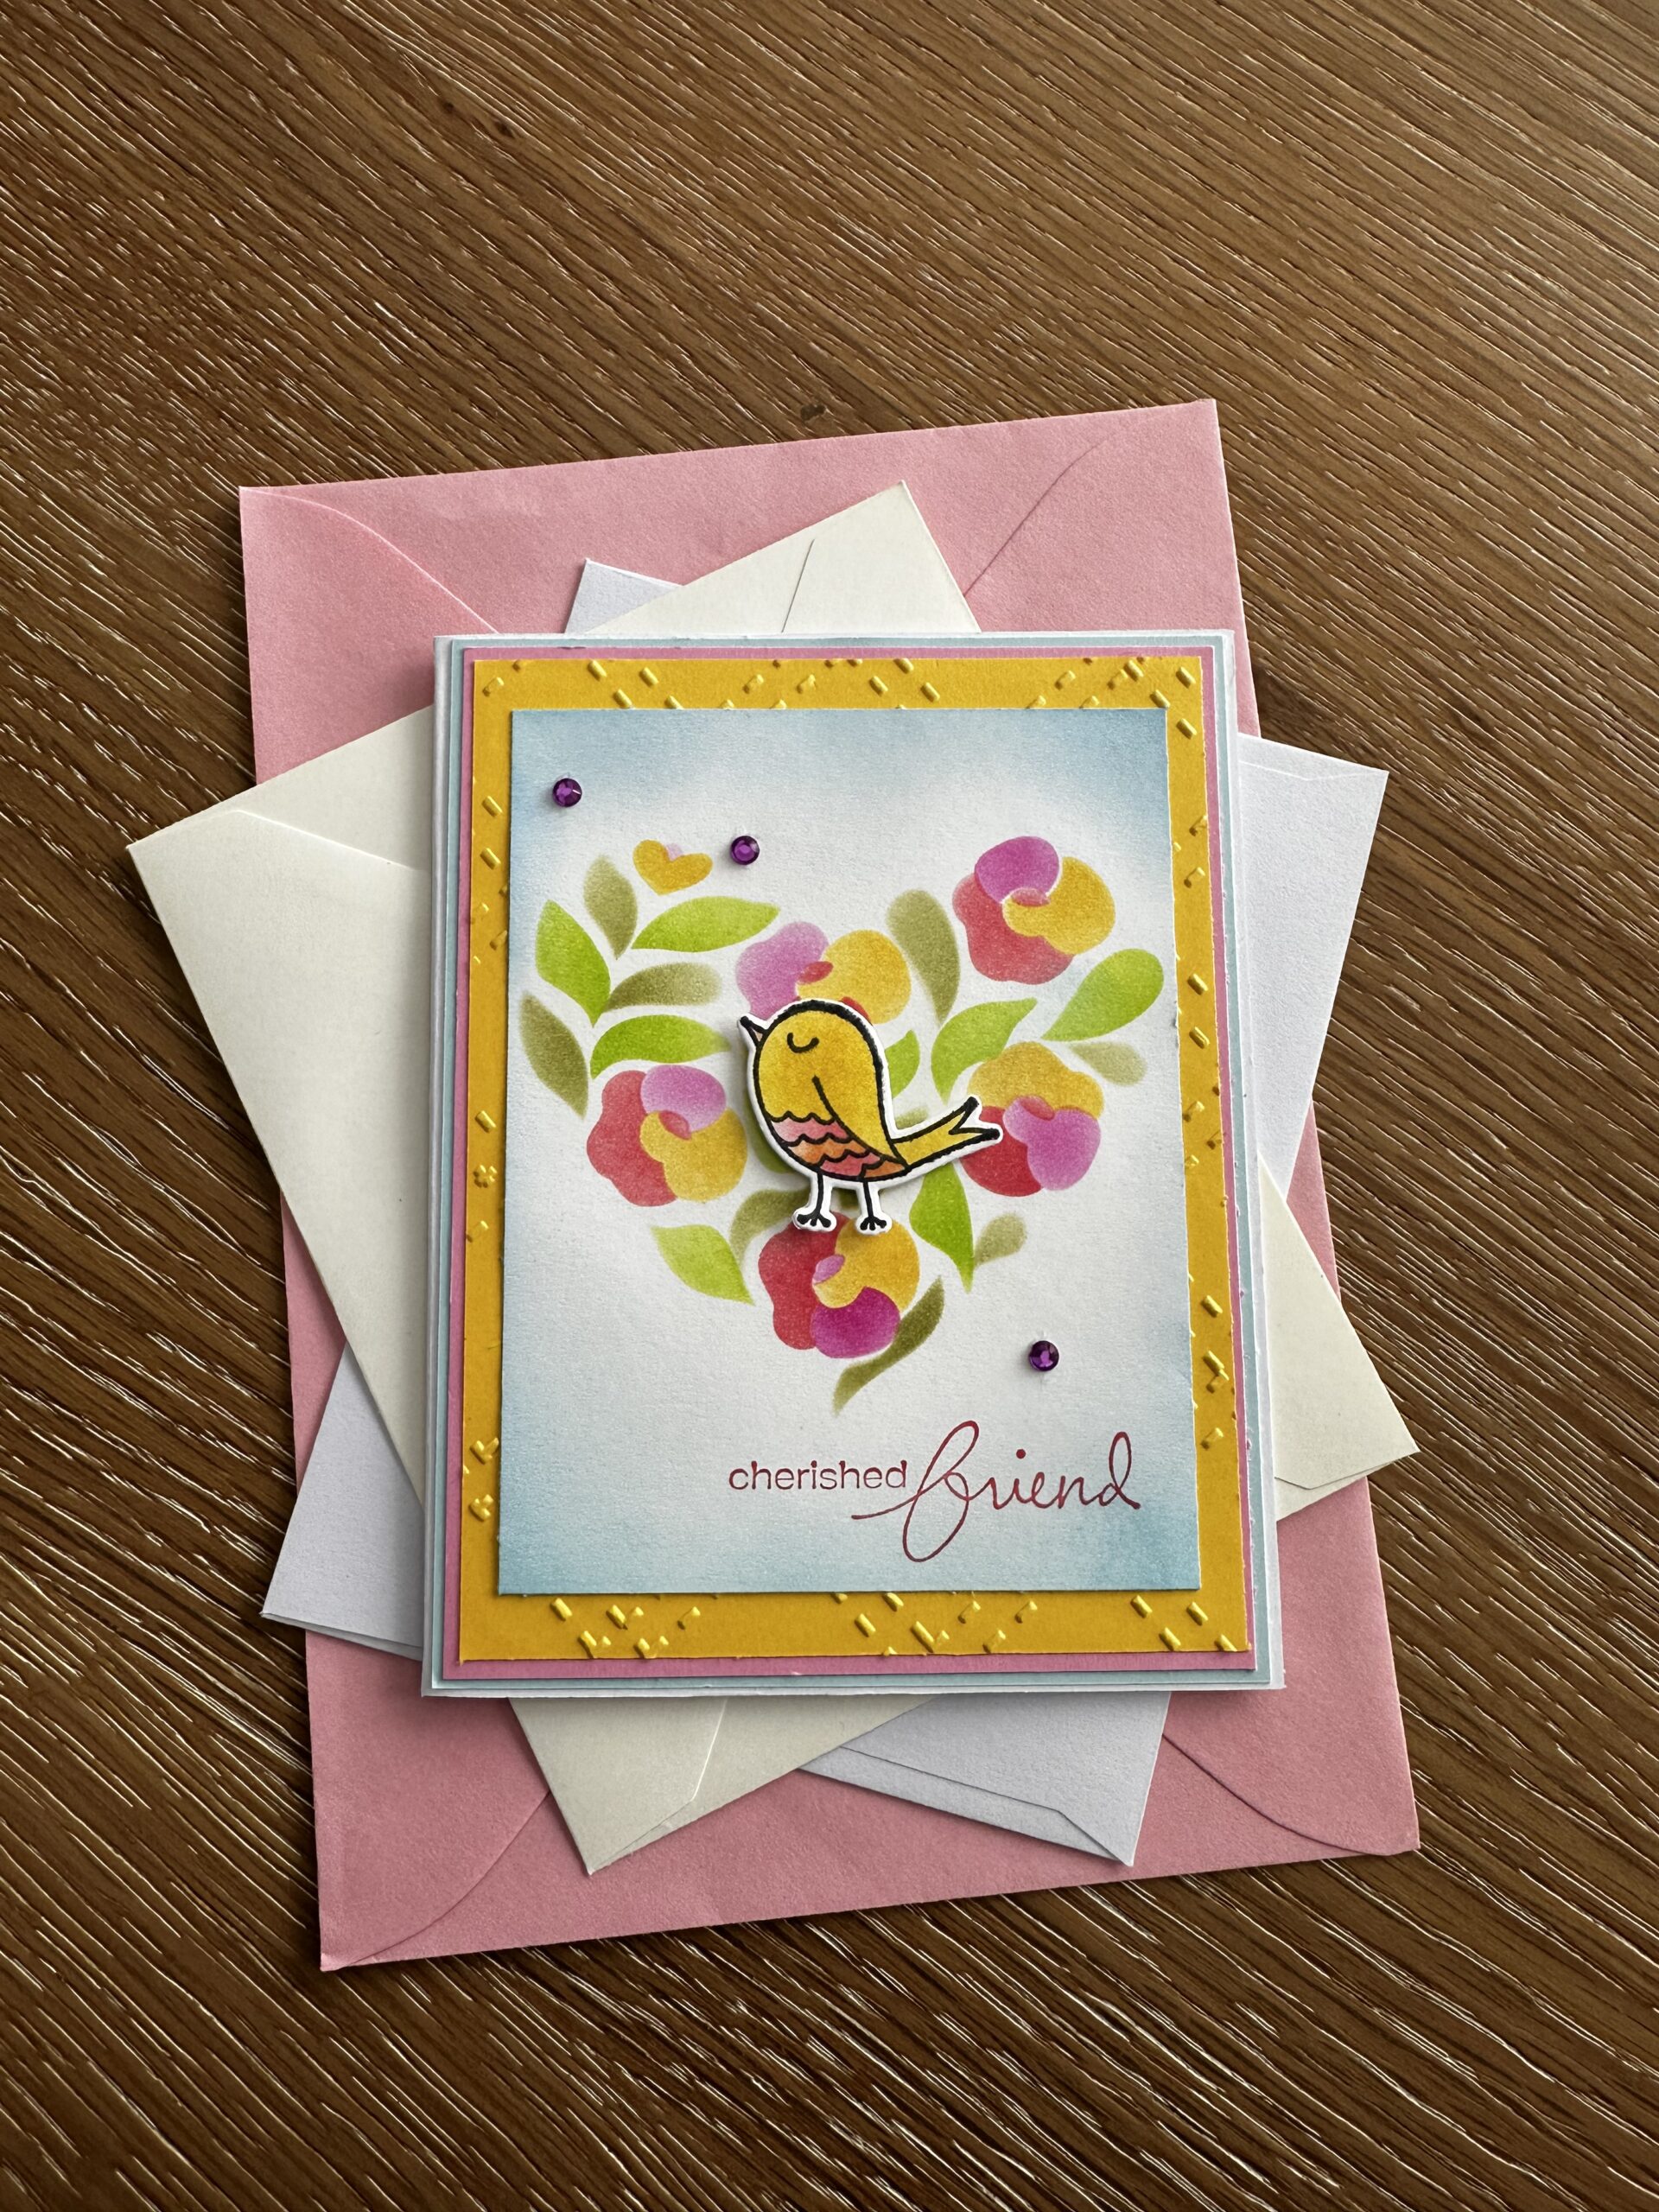
That being said, today’s project is so sweet and it’s a quick and easy All Occasion card. Cards like this can easily be made in multiples that you can keep on hand for those moments in life that just spring up on us. Simply stamp various sentiments at the bottom like, “Happy Birthday”, “Thinking of You”, “Hello”, “Get Well”… Or you can leave the space blank on each card and when you need a card for someone, just grab it and stamp the appropriate sentiment on the front. Keep reading below where I’ve shared my list of supplies followed by my beginner friendly tutorial. So, without further ado – let’s get Krafty!

List of Supplies
- White A2 Card Base.
- Pastel Card Stock- I used these:
- BLUE trimmed to 4 1/8 by 5 3/8”.
- PINK trimmed to 4 x 5 1/4”.
- YELLOW trimmed to 3 7/8 x 5 1/8”.
- WHITE trimmed to approximately 3 3/4 x 4 1/2”.
- A2 Designer Layering Stencil by Taylored Expressions
- ”Doodle Birds” Stamp and Die sets And Coloring Stencil by TE: Here
- Ink Pads in your chosen colors. I used light and dark greens, pink, red, yellow and blue.
- Ink Blending Tools- I used small brushes and larger foam blending tools.
- Embossing Folder: “Natures Garden” by Crafters Companion
- Embossing and Die cutting machine
- Sentiment stamp of your choice. I used one from the “Lovely You” stamp set by Stampin’Up
- Paper Trimmer
- colorful gems
- Glue
- Scissors
Want more card making & crafting inspiration?
Follow me on social media
Let’s Get Krafty
CREATING LAYERS
Firstly, choose your color theme along with your stamps, dies, stencils and inks. And trim your CS as in the list above. Each layer is roughly 1/8” smaller than the one beneath it. The top white CS layer just needs to be wide enough to fit your stenciled image and long enough to fit a stamped sentiment.
STENCILING
So, for your background image, take each of your layering stencils and secure them on top of your white CS panel and use blending tools to add all the colors you choose to create the design. You can use a baby wipe to clean off each of the stencils and they’ll be ready to use the next time.
STAMPING AND DIE CUTTING
Next, stamp the little doodle bird and place the coloring stencil over it to color it in. OR just use markers or colored pencils. Then use the matching die to die cut the image. If you don’t have the matching dies, just use small scissors to fussy cut your image.
EMBOSSING, INK BLENDING AND BUILDING YOUR CARD
Now take your yellow CS and place in an embossing folder and run it through your die cutting/embossing machine. I used the one listed in my Supplies List. Finally, use glue to adhere all of your CS layers onto your card base. Trim the White CS with the stenciled design and use a light blue ink to blend around the edges and lightly across the top of the stenciled design. This just ties it all together. I used a foam dot to raise the little bird that is placed in the center of the heart. Then I finished the panel off with stamping the “Cherished Friend” sentiment at the bottom and adding some colorful gems. Lastly, I centered the top panel onto my card and that’s it!
Keeping It Krafty
In closing, this card actually came about as a happy little accident. Don’t you just love those? I had placed an order with an online store called Taylored Expressions. They often send a free gift inside of the order and this heart shaped, floral stencil was in that package. I couldn’t wait to try out the stencil and was pleasantly surprised with the result. Also, they have many beautiful stencils to choose from. Stenciled designs make great backgrounds and they are easy to “mass produce” in our own craft rooms.
And as it so happened, I had the little bird from Taylored Expressions’ “Doodle Birds” collection sitting on my desk. The bird was already stamped, colored in and die cut-just waiting for its forever home. And it amazed me that the colors I chose to use matched the little bird. It was meant to be! The end result is this card for a “cherished friend”. Keep in mind, we can mix and match all of our stamps, dies, stencils…to make completely new designs. And that expands our crafting supplies exponentially! YAY!
Also, it’s a really good idea to make a few cards in advance so they’ll be available if we need one quickly. OR as it often happens with me, a family member for friend needs one of mine to give someone else. But no matter what it is that you decide to make, just make it your own. And always remember to keep it Krafty! Until next time , bye-bye!
FUN FACT! I used a free gift I received for placing an order with TE in one of my recent posts. It’s the cutest little turtle I used to decorate the sweet Valentine’s Day Treat Box. You can see that post HERE!
WANT TO SEE MORE?
VISIT MY BLOG ARCHIVES
