
Featuring “Doodle Birds” by Taylored Expressions
Hello and welcome to my studio! I am so happy to have you here with me today. Because, today, I’d like to share with you this ever-so-TWEET Valentine’s Day card I made using the “Doodle Birds” stamp and die sets from Taylored Expressions! I also used the “Doodle Bird Digs” stamp and die sets to make this card! These are simply the sweetest sets and I’m sure to get a lot of use from them.
However, keep in mind that I am not affiliated with Taylored Expressions in any way. I do not earn commissions from the sale of their products. But I do love their products because what’s not to love? I knew I just had to have these cute sets! This is a very simple card to make and below I’ve shared a list of the supplies I used along with any helpful links. Following the list of supplies is a very simple step by step tutorial for making this card. So let’s get Krafty!

List of Supplies
- Card Stock: White and Red
- ”Doodle Birds” “Doodle Bird Digs” stamp and die sets by Taylored Expressions: find it HERE
- ”HEARTS” background rubber stamp: optional ( designer paper would work well )
- Alcohol Markers
- ”Happy Valentine’s Day” stamp
- Glue
- Scissors
Want more card making & crafting inspiration?
Follow me on social media
Let’s Get Krafty

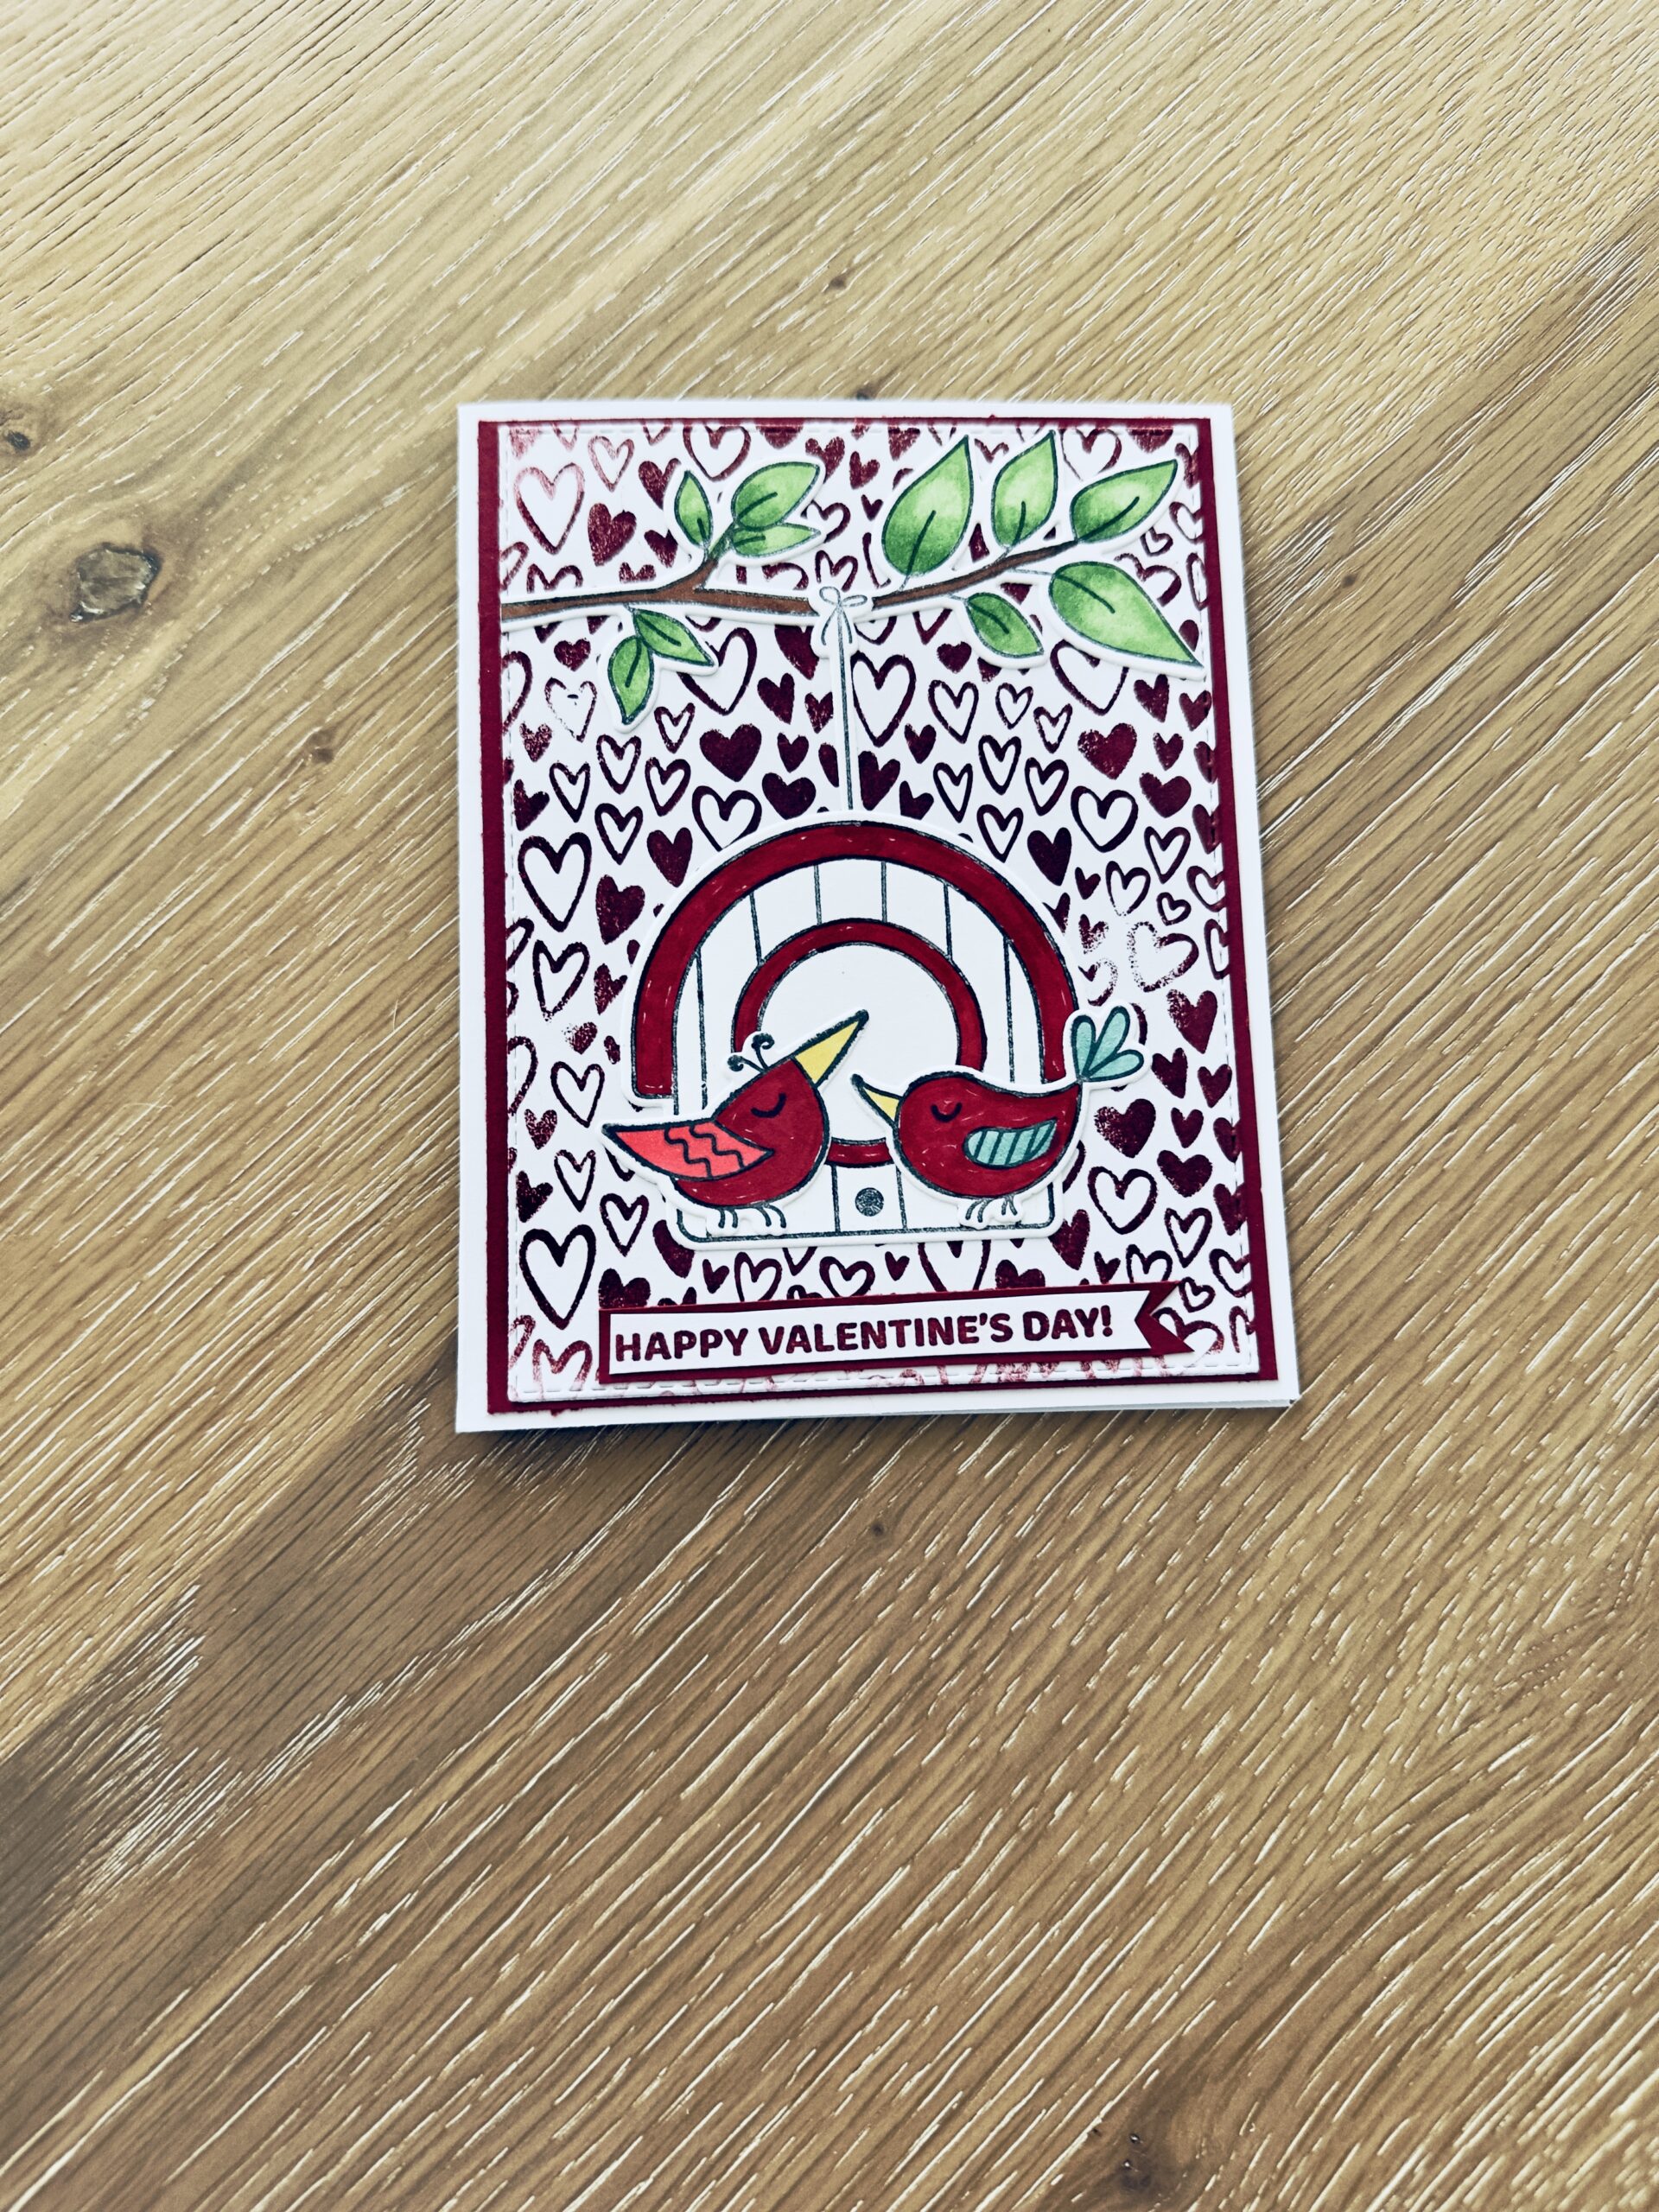
- First, choose your papers. I used a white A2 Card Base. Then a layer of red that measures 4 x 5.25”.
- Next, trim a piece of designer paper to 3.75 x 5”. I didn’t have any designer paper for this project so that’s where large background stamps or stencils come in handy. I used a large, A2 rubber stamp with hearts all over it for this. I received the stamp from a friend and I don’t know where she bought it. But you can find plenty of stamps and stencils from places like Scrapbook.com, Taylored Expressions…
- Now, stamp one of the bird houses and 2 of the doodle birds you choose onto white CS. Also, stamp the branch and the string onto the same sheet of white CS.
- Color in the house, the birds and the tree branch using alcohol markers.
- Now, just use the matching dies to die cut your birds, the house, tree branch and string.
- Next, use a red ink pad to stamp your sentiment. I used a “Happy Valentine’s Day” sentiment from another set and fussy cut it into the little banner shape. Just use whatever you have on hand.
- Then we simply use glue to adhere the birds onto the house, the tree branch onto the designer paper, the string that hangs down from the branch. Now, adhere the house meeting up with the bottom of the string.
- Finish off this simple but sweet Valentine’s Day card by attaching a sentiment to the bottom of the front panel and a sweet and loving message inside and that’s it!


WANT TO SEE MORE?
VISIT MY BLOG ARCHIVES
Keeping It Krafty
In closing, I’d like to thank you again for visiting me here at Kelli’s Kraft Studio! I really enjoy what I do and I absolutely love sharing my ideas with you! This Tweet Valentine’s Day Card is quite simple and really fun to make. The cute stamp and die sets are the star of the show and can be used for just about any occasion. I love craft supplies that are versatile like these. Also, for the background for this card, there are many options. Like background stamps, designer papers, “Foil It” sheets from TE, stencils…So no matter what it is that you decide to make just make it your own. And always remember to keep it krafty! Until next time , bye- bye!!
