
Let Your Designer Papers Do the Work For You
Hello and welcome to my studio! First, let me just say how happy I am that you’re here today. Because it really means a lot to me to be able to share my love for crafting and especially paper crafting with you. And Christmas is just around the corner, I know right? So it’s time to start planning and making those Christmas cards!
I have been crafting with paper in the form of scrapbooking, greeting cards, boxes, bags and tags for about 20 years now. Even though I think most of the craft projects I share in my blog are quick and simple I realize that may not be true for all people. If you have been crafting for enough time to accumulate various equipment, tools and supplies, then you’re likely all set to make whatever you like.
However, IF you are quite new to paper crafting and haven’t bought supplies, tools or equipment, then this blog post is just for you! AND if you are a seasoned crafter but are short on time this year, then this blog post is just for you! If you want to spend less money but make amazing Christmas cards to send your family and friends this year, then this blog post is just for you! Keep reading below as I’ve shared my very short list of supplies as well as helpful links-for information purposes only-to where to find them. Further down, I’ve shared the simple “how-to’s” for these adorable Christmas cards.

List of Supplies
- DESIGNER PAPER: “The Owl’s House” Collection: Stamperia- find it HERE
- DESIGNER PAPER: “Candy Christmas” Collection: Stamperia- find it HERE
- DESIGNER PAPER: “Fairytale Christmas” Collection: Paper Rose Studios-find it HERE
- CARD BASES: 5 X 7” find sets of cards and envelopes at Amazon or Craft Stores
- CARD BASES: 4.25 X 5.5” find sets of cards and envelopes at Amazon or Craft stores
- ADHESIVE: glue or adhesive tape runner
- OPTIONAL: Christmas-themed sentiment stamp sets like THESE or THESE
- OPTIONAL: Black ink pad: find it HERE
Want more card making & crafting inspiration?
Follow me on social media
LET’S GET KRAFTY!
CHRISTMAS CARDS 1 & 2 PLUS A GIFT TAG!

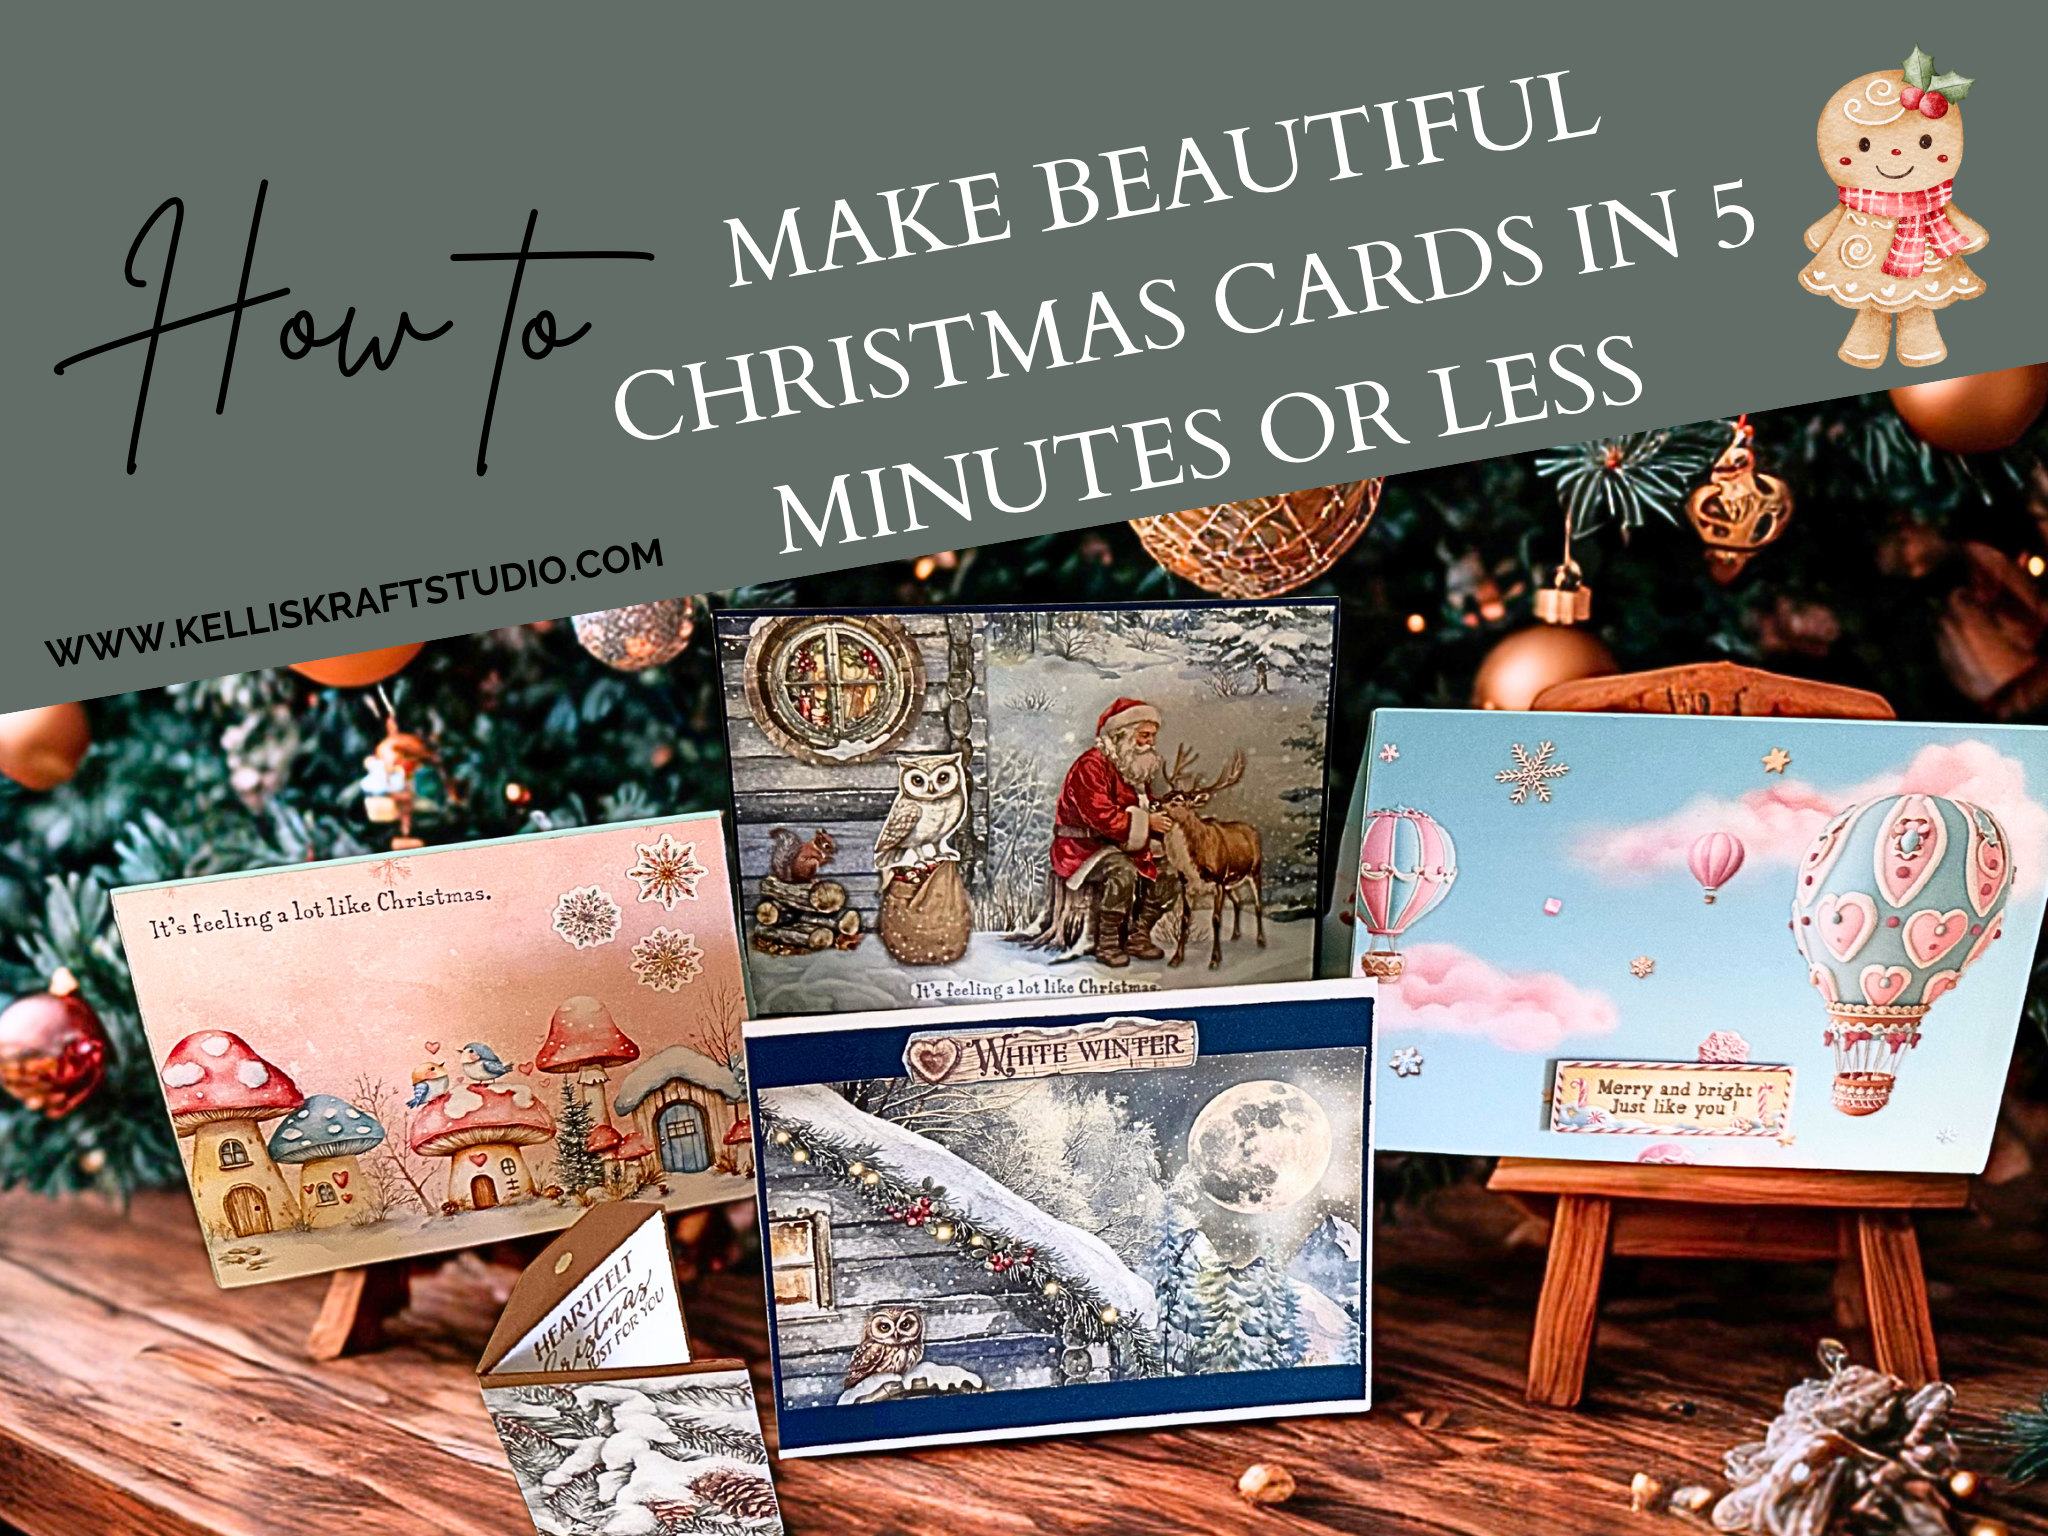
Firstly, these basic instructions work for all of the cards I’m sharing here today. So grab your supplies and place them on your work surface. Choose which paper you are going to use. By the way, you don’t have to use the same paper I did. You could choose any of the papers that are on offer this year, and there’s loads of them. This blog post is simply to help you see that you can make your own Christmas cards this year with just a few supplies and a few minutes. These cards were created from just one sheet of 8 x 8” paper from the “The Owl’s House” paper pad. Also, choosing which paper you are going to use may the most time consuming part of your project. Just saying.
For the cards above, I chose a 5 x 7” card base because I wanted to show as much of that beautiful paper as possible. Trim the designer panel to just about an 1/8” of an inch smaller than your base. Now, adhere the designer panel to the front of your card base with some glue or a tape runner. Attach a card stock sentiment ephemera( found in the paper pad )wherever it feels right.
For The Inside of the Cards
Now, for the inside of the card, take a piece of white printer paper and trim it to about an 1/4” smaller in length and width than the card base. Attach an Inside Card Message Sticker like THESE to the inside panel of your card base OR stamp an inside message OR you can write your own message using Google Docs and change your font, size and color as you wish. Then print it, and trim it to fit your card. There’s lots of options.
In addition to that 5 x 7” card, I was able to make another A2 (4.25 x 5.5”) card using the rest of that same sheet of designer paper! And I also used a bit of the trimmed paper to create a gift tag. I had very little wasted paper here.


Keeping It Krafty
I hope you have been inspired to make your own Christmas cards this year. I know you want to. These paper packs, kits and collections make it so easy for us to create beautiful Christmas cards in minutes. Honestly, you can make all of the cards I shared in this post in less than 5 minutes. I do want to add that there are many more Christmas themed designer papers to choose from at online stores like Scrapbook.com, Simon Says Stamp, Whimsy Stamps, Stampin’Up and more. I saw that several companies offer complete card kits which include the paper, additional elements, sentiments, card bases and envelopes! That would make it even easier. So you should check those out.
Also, I suggest you choose at least a couple of stamp sets for Christmas phrases and inside messages. Don’t forget to get a black ink pad. In addition to that, I believe permanent tape runners are the way to go at first. They just help keep everything running along quickly with no mess. Whatever it is that you decide to make just make it your own. And always remember to keep it krafty! Bye-Bye!
